the Renaissance Housewife
  • Home
  • Topics
    • Saving >
      • Kitchen >
        • Food >
          • Recipes
      • Bath & Laundry
      • Medicine Cabinet
      • Office
      • Electricity
      • Gardening
      • Foraging
      • Animals
      • Weekly F. A.'s
      • Printables & Downloads
    • Earning
    • Investing
  • Books
  • About
    • RH Recommends
    • Newsletter & Updates
    • Travel
    • Beta Readers
    • Legal Stuff

ROI of Growing Garlic

5/6/2016

0 Comments

 
Picture
Welcome to the Friday ROI! If you click on the "Finance" tab in the top left hand corner, you'll see that I've added a page called "Investing". No, I'm giving advice on the stock market! What I will be talking about is different ways that we can invest small amounts of time and money, and the size of return on those small investments.

Last summer at the farmers market, I set up every week next to a vegetable gardener I called "Rhubarb Man". He was full of stories from the good old days, garden shenanigans and tips. During the fall he sold a lot of garlic, and happened to be giving out free tips on how to grow your own. Of course he gave this information to every customer that bought garlic, so the idea of growing some started to grow on ME!
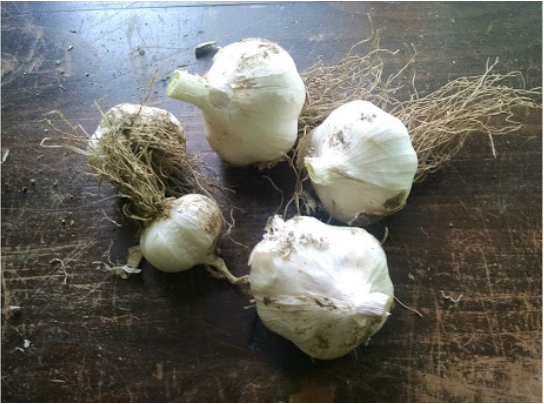
Growing Some Garlic
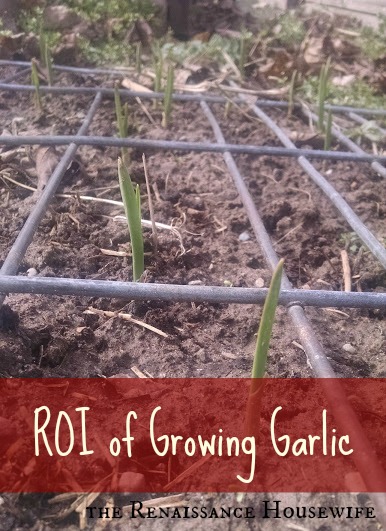
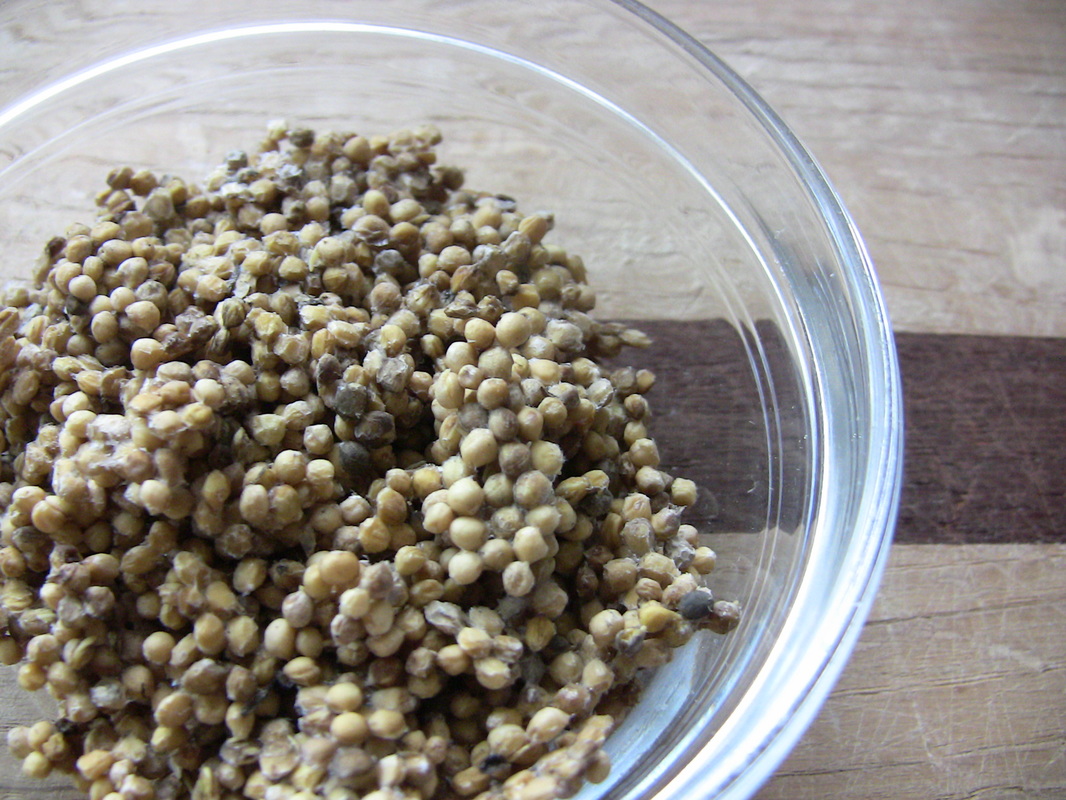
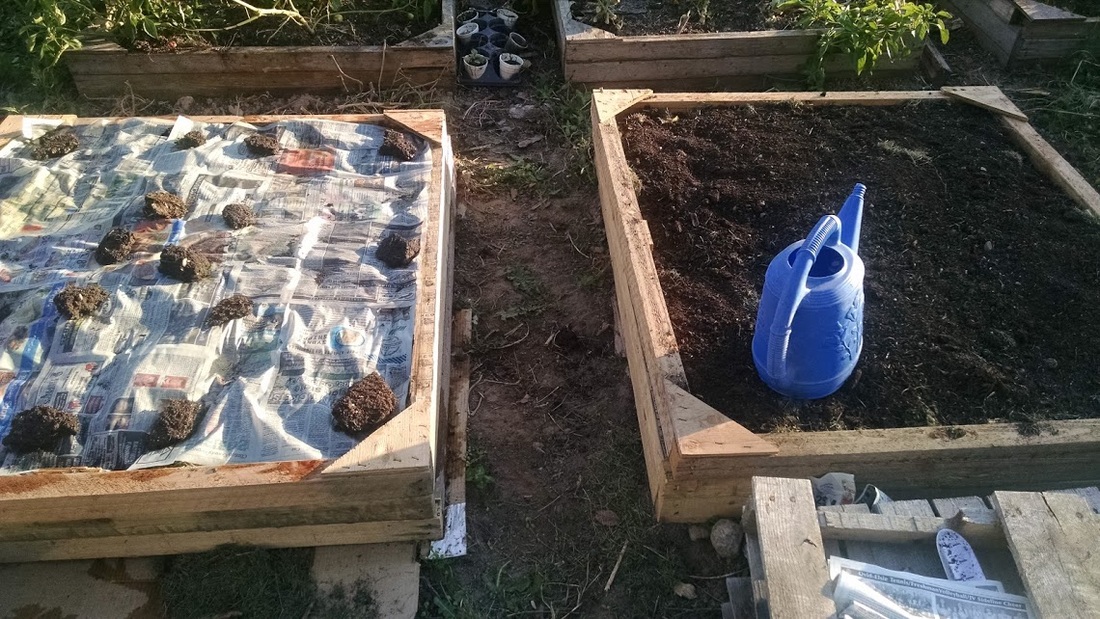
I ended up buying four bulbs from him to plant in my own garden. There were still a few 4x4' spots that did not have raised lasagna beds yet, so I decided that I would put my garlic there over the winter. It took about 10 minutes to work the soil a little bit, and 20 minutes to plant all four bulbs (about 30-40 cloves). I put a small cattle panel over the spot so that I'd remember where my garlic patch was.

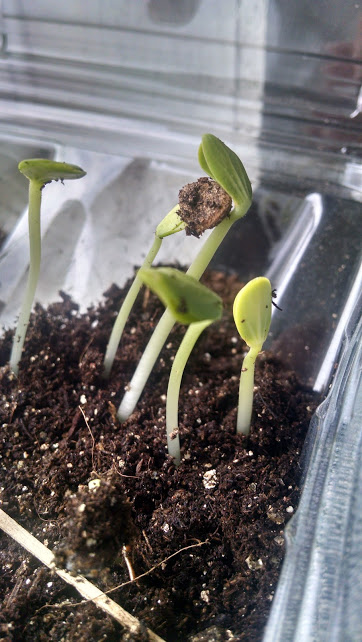
This March, the weather finally warmed up and my little garlic cloves began to sprout. I counted 35 sprouts. If each of these sprouts grow into a bulb of garlic, what will be the return on my $2.00 investment?

Calculating the Return on Investment
4 bulbs @ $0.50 per bulb = $2.00, + 0.5 hrs of my time @ $4.00/hr. = $2.00
Total investment = $4.00

35 bulbs @ $0.50 per bulb = $17.50 - $4.00 investment = $13.50

Therefore the return on my $4.00 was almost 338%.

Hourly Wage
You can also look at growing garlic from the standpoint of an hourly wage. 

35 bulbs @ $0.50 per bulb = $17.50
$17.50 - monetary investment of $2.00 = $15.50
$15.50 x 2 (30 minute sessions) = $31.00 per hour

Conclusion
I've come to the conclusion that growing garlic is well worth the time and money involved. Either way you look at it- $31.00 per hour or a 338% return- there's no denying that this is something many more housewives should be doing.

In addition to being incredibly easy and a small time commitment, garlic is super healthy for you. Use it to flavor food OR in herbal concoctions to help fight infection. One of the reasons I planted so much is that I'll be using it for my animals as well as for Hubs and I.

Here's to growing great garlic!
​-Bethany
0 Comments

Frugal Accomplishments This Week

4/25/2016

0 Comments

 
Picture
Again, I had a crazy busy week!  We had a new baby goat born this week, did quite a bit of gardening and during the rainy days, a lot of reading. Here are my frugal accomplishments for this week:

1. Sold seven dozen eggs this week.

2. Got one pound of pasta for $0.53 using an Ibotta rebate.

3. Found a boxed dinner on clearance at Kroger. I don't usually buy these things, but it was on sale and box dinners are an easy way to try something new.
Picture
The boxed dinner was $1.89, and included tortillas, seasoning and about 1/4 cup of chipotle sauce. I figured that the tortillas alone were worth $1.10, so I ended up paying about $0.80 for a packet of seasoning and some chipotle sauce. I used some free canned chicken for the meat, and served the tacos shredded cheese, sour cream, cold frame lettuce and cilantro. It ended up being a very good meal. I think I will keep making this at home, but with homemade chipotle seasoning mix (and some liquid smoke in with the meat... that's what made it really good). We didn't end up using much of the sauce.

There was some leftover chipotle chicken meat, sauce, and tortillas after we had the boxed meal for lunch. I used the taco shells for dinner, and used the sauce and leftover meat to make pizza the next day. Which was pretty tasty, I might add!

​4. Much of our fruit is starting to blossom this week! So far I've seen pear, cherry, peach and even a few strawberry blossoms.

​My experimental free fruit trees are doing well. Out of seven cuttings, at least four are starting to revive and grow new shoots. This is good news.
Picture
Pear blossoms.
Picture
Pear tree cutting.
5. I started some watermelon and muskmelon seeds indoors this year. Last year my watermelon got crowded out by weeds and other plants, because it took so long to grow big. I'm hoping that giving the melon seeds a head start will help them thrive and actually produce fruit this year.
Picture
6. I also potted up the curly willow branches that originally started as a table centerpiece. Using, of course, free pots that I found beside the road.
Picture
7. Lastly, I started experimenting with some of my new pygora wool. I tried felting soap with both the 1) waste wool and 2) good dehaired wool, but neither of the soaps felted like I wanted them to. Then I finished spinning what was left of the romney sheep wool I had for practice on my drop spindle. After spinning two of the smaller threads together (to make a 2-ply yarn), I knitted it. I was actually impressed at how well my crude homespun yarn looked in a finished project.

When I finished with the sheep wool, I started on some of the pygora. It was SO easy to spin! I was super happy with how it turned out. The only problem I had with spinning the pygora is that sometimes the thread would get so thin that it would break off as I was spinning. However, that was due to user error and not the fiber itself.
Picture
I will not have time to spin yarn to sell, but I do hope to use some as a display at my farmers market booth.

Goals for Next Week
1. Transplant broccoli starts into garden bed.
2. Plant green beans in garden bed.
3. Plant peas in market garden.
4. Plant kale in market garden.

Til next time,
-Bethany
0 Comments

Growing & Using Chili Peppers

2/24/2016

0 Comments

 
Picture
One of my experiments last year was growing chili peppers. I found that it was relatively easy. I started some old pepper seeds (probably 5+ years old) using this method, and then planted the starts in my garden. The seeds took a while to germinate and a while to grow, so this year I'm starting them a little early, in February.

After putting them in the ground, the pepper plants needed little else besides the occasional weeding and watering. After the peppers turned red, I picked them and strung them on a piece of thread to dry. Make sure your drying area is well-ventilated and warm. 

Preserving & Processing
After the peppers are dry, you can pulverize them in a food processer. This year I will be using my Vitamix Dry container to make the chili powder.
PictureReady to be ground up.

To process, I crack off the top of each pepper and pulverize it. Below is what a food-processer ground chili powder looks like. Nowadays I process dried herbs with a Vitamix blender dry container. You could probably use a mortar and pestle as well.
Picture
Don't forget to save some of those seeds to start indoors! I'll be starting mine in the next week or so, toward the end of February.

Happy chili-growing!
​-Bethany
0 Comments

Garden Schedule for 2016

2/4/2016

0 Comments

 
Picture
Seeds from Ebay- complete with a personal note from the seller!
It's that time of year again, when seed catalogs start flooding the mailbox, cabin fever starts setting in and we order way too many plants and seeds. This is will be my third year of having a functional vegetable garden, and boy have I learned a lot. Last year I tried my hand at starting seeds, which was much easier than I thought. In addition to starting seeds, I've been learning what does and doesn't work with saving seeds, as well. Using seeds instead of buying plants is what makes a garden so economical.

Winter Gardening

What I'm learning more and more about gardening is that it's almost a year-round activity in order to get the best results. I've begun to start seeds now, and it's only February. The trick is to have a plan and start early. Many seeds take two or three weeks just to germinate! The Passiflora (passionflower) seeds I bought last year take a full 30 days to germinate. For those of you who are gardeners, I thought I'd share my gardening schedule for this Spring. Some of you might read my list and say, "Wow, that is a lot of stuff to do." However, most of the work will be mixing seed starter with water, poking in some seeds and covering with glass or plastic. I might do this for an hour each week from February- mid April. In April and May when I start to plant, a majority of the soil will be already prepared in lasagna raised beds. I will just have to poke a few more seeds in the soil, and in May I will transplant things I've started indoors. After that I'll mulch all of the raised beds and from there most of the work will be done. At least that's the plan! :)
February:
1. Force tulip bulbs
2. Start chili pepper seeds
3. Start basil seeds
4. Start echinacea seeds
5. Start rosemary seeds
6. Start lavender seeds
​7. Start passionflower seeds
April:
1. Plant radishes in garden
2. Plant new garlic in garden
3. Plant snap peas in garden
4. Plant onions in garden
5. Plant lettuce in garden
6. Plant fennel, dill, cilantro and chamomile in garden
(these things might self-seed)
7. Plant carrots in garden
***********
​8. Plant broccoli starts in garden
9. Start watermelon seeds indoors
10. Start cantelope seeds indoors
11. Start cabbage seeds

March:
1. Start bell pepper seeds
2. Start pumpkin-on-a-stick seeds
3. Start tomato seeds
​4. Start broccoli seeds
May:
1. Plant butternut squash in garden
2. Plant pumpkin in garden
3. Plant spaghetti squash in garden
4. Plant acorn squash in garden
5. Plant green beans in garden
6. Plant cucumbers in garden
7. Plant straightneck squash in garden
8. Plant potatoes in garden
9. Plant amaranth in garden
10. Plant sweet corn in garden
************
11. Set potted plants outside
12. Pot passionflower and set outside
************
13. Transplant pumpkin-on-a-stick starts
14. Transplant herb starts
15. Transplant tomato starts
16. Transplant pepper starts
17. Transplant cabbage starts
18. Transplant cantelope starts
19. Transplant watermelon starts

Buying New Seeds
I learned a lot last year with my garden. My non-hybrid sweet corn did not turn out well, and I discovered that saving carrot seed is almost impossible because of cross-pollination with Queen Anne's Lace (wild carrot). I learned that Roma tomatoes are prone to blossom-end rot. Because of all this, I will be buying new tomato, carrot and sweet corn seeds this year. However, all of the other seeds are ones that I saved from the garden or kept from last year's seed packets.

Instead of buying carrot, tomato and sweet corn seeds from a seed catalog (Gurneys wanted $5 for a pack of seeds!!), I just bought them on Ebay from private sellers. Honestly, I've had wonderful results buying seeds directly from other gardeners. In addition to getting perfectly good seeds for less money, I feel a type of camaraderie with other seed-saving gardeners. It makes me feel good to support another individual.

If I like how the tomatoes turn out, I'll save those seeds next fall and not have to purchase tomato seeds again. Unfortunately it looks like carrots and sweet corn will be an annual purchase, but I don't mind. You still save a ton of money growing sweet corn and carrots.
Picture
Dwarf Lime Tree
My one big purchase this year was a dwarf lime tree that I bought for $21.00 on Ebay. I read a lot of good reviews of this certain variety, even from people in colder climates that bring the plant inside during the winter. It may or may not produce fruit, but I did read so many good reviews and it would be nice to grow some of my own citrus. I was a little uncertain about buying such an expensive plant on Ebay. It was shipped out right away (usually seed catalogs wait until the "proper planting time") and sat out in the cold mailbox for half a day. However, the plant was carefully wrapped (in cardboard and paper towels...) and three days later it hasn't lost its leaves yet. To my delight, the plant came with detailed instructions, both on the Dwarf Lime tree in particular, and another sheet for citrus trees in general. In addition to the planting instructions, the seller said to message him on Ebay if I ran into any problems. 

Later I was looking on Gurneys' website, and if you really want a bargain you can spend $50 on exotic plants, use their $25 gift certificate (for purchases over $50), and with shipping, be able to spend less than $15 on each plant. However, this year I only wanted to buy one exotic plant.

Less Work Than it Seems
One more thing I might add; it LOOKS like I am planting a ton of things in my garden, but I am not going to do "a row of each" like most gardeners would. I've discovered that we really only need one or two plants (about 3-5 seeds) each of things like squash, cucumber, and melons every year to produce enough for the two of us, plus some. My three hills of squash last year, for example, have provided enough for us to eat one squash per week through the month of March. Planting only a few seeds per year is how I can get away with 1) growing a lot of different plants, and 2) rarely buying seeds.

Anyone who has done a garden before knows that it is so easy to plant way more than you're capable of taking care of. In fact, most people plant a huge garden in the spring, and by the time August rolls around they have nothing but weeds to show for it. It's not because people are lazy- it's because doing a garden like that is simply unsustainable!!! I've found that using the square-foot gardening method, in conjunction with lasagna composting in raised beds, cuts down on SO MUCH work. You can read about how I did this in some of my previous garden updates. Growing all of my own plants (as opposed to buying them at a garden center or nursery) makes gardening almost free, and that small cost for a couple packets of seeds and seed starter can be easily offset by selling a few plants or some extra garden produce.

Wishing you all the best in your gardening efforts this year!
-Bethany 

P.S. I highly, highly recommend the book Square Foot Gardening by Mel Bartholemew. It covers a lot of different aspects of gardening and how to make gardening fun, easy, and NOT overwhelming.
0 Comments

Growing & Using Mustard Seeds

10/23/2015

0 Comments

 
Picture
One of my garden experiments this year was growing mustard seeds. In March, a fried mentioned that she had never made mustard. I remembered making some mustard in high school as a 4-H project. It was 1) stinky, and 2) expensive. I bought about $8 worth of ingredients to make a pint of mustard. I'll never do this again! I thought. Especially when you can buy mustard for $0.88 per bottle.

As I remembered that experience, a thought came to my mind. What if you could grow the seeds yourself? The most expensive part of making mustard is the seeds and mustard powder (which is just ground mustard seeds). The cost would come down to almost nothing if you had free seeds.

Growing
So, pulled out my tin of mustard seeds that I'd bought in 2014 for making relish, and I planted a few in some seed starter. In a few days (to my surprise), they sprouted! I tried transplanting the seeds, but the seedlings died outside in the colder weather. Then I tried sowing some directly in the garden, which was more successful.

My mustard plants grew to be 3-4' tall and fell over from their own weight. Because they were covering some of my other plants, I tied them all to a stake. This seemed to work well.

Harvesting
After the seed pods were done growing, they turned a tan-gray color and dried out. I cut off branches full of pods and put them in a paper grocery bag. After folding up the bag, I took it inside and shook it as hard as I could. The shaking was enough to open a lot of the pods and release the seeds to the bottom of the bag. Then I put on some rubber-coated gloves and crushed the remaining pods with my hands.
Picture
After crushing and shaking, crushing and shaking, I had released as many seeds as possible. After removing the pods and branches, I poured the seeds from the bottom of the bag into a bowl.

There were still a lot of stray pods in with the seeds, so I put it all into a colander, again moving the pods around with my hands. The seeds fell through the colander, while the pods and larger pieces of debris stayed on top. There was a bowl underneath to catch the seeds.
Picture
Picture
To remove the small debris, I poured the seeds into a smaller bowl and added water. After stirring, the good seeds sank to the bottom, while the bad seeds and debris floated to the top. I scooped out the debris.
Picture
After that, I poured the water off the top and poured the seeds onto a washcloth to remove the rest of the water. To my surprise, the seeds were kind of slimy.
Picture
After that, I dumped/scraped the slimy seeds on to a cookie sheet and put them in the oven to dry like I would any other herb. The pilot light in our gas oven is enough to dry most herbs in a few days. After the seeds were dry, I picked them off the cookie sheet. The slime made some of them stick together.
Picture
And now, the fun part! I poured all of the seeds into my Vitamix Dry container and pulverized them to pieces. This made some wonderful mustard powder. Altogether, I got 1/3 - 1/2 cup of powder.
Picture
Bought from Kroger, this amount of spice costs about $4.00. When I made my own mustard, I spent $4 on mustard powder and a little less on mustard seeds. Thus, if I went out and harvested the rest of my mustard seeds, I will have collected $8.00 worth of product from my mustard plant.

Is It Worth It?
I'll admit- harvesting mustard seeds is a little time-consuming. It's not like other herbs where you just cut them, pop them in the oven to dry and pulverize them. Because of this, and because of the fact that Hubs and I don't use very much mustard, I'll probably just buy mustard in the future. A bottle of $0.88 mustard will last us an entire year.

However, I do think it is worth it to grow your own seeds to use as a spice. I'll probably continue to grow mustard every few years, but not every year. My current supply of homemade mustard powder will last at least two years if I use it as a seasoning and not to make mustard. 

If someone is dead set on making their own mustard or buying gourmet mustard (at $8 or more per bottle), than it might be worth it to grow their own seeds to make condiments with. Otherwise, they would be better off just spending $1 every year on mustard. If I use my precious homegrown seeds to make mustard, they are worth less than a dollar. If I use them to make mustard powder and mustard seeds, they are worth $8. I probably have 3-4 hours into planting, weeding, staking, picking, sorting, washing, drying, and powdering the seeds. This brings my hourly wage to about $2 if I make spices, and $0.25 per hour if I make condiments with those spices. It seems wrong, but that's just how everything works out. 

The other thing about mustard seeds is that they take up a lot of garden space. In my opinion, this space (that you are going to have to weed and mulch and water anyway) is better used to grow something like tomatoes, which can also be used to make condiments but yield a whole lot more condiment per square foot.

Do you like mustard? Have you ever made your own?
0 Comments

Fall 2015 Garden Update

10/21/2015

0 Comments

 
It's time for my fall update! The first frost has hit, all of my vegetables have been harvested and now we're preparing for next year's garden. For the months of July, August and September I only picked vegetables. No weeding, watering, mulching or other maintenence. I picked a ton of beans and tomatoes. My cucumber plant did not do well at all; I think I picked three cucumbers, and then the plant shriveled up and died. Likewise my corn didn't do very well either. I used non-hybrid seeds this year, and also planted a bit late. The kernels on many cobs were scarce and crooked. 

It may seem strange, but I do as much garden work in the fall as I do in the Spring. In early October I decided to start cleaning up the garden and picking the last of the produce. This is what I found:
Picture
Neglected garden.
Of course, that had to be dealt with. I completely weeded the places where things were done growing (and that included pulling out the spent vegetable plants) to make spaces for new raised beds. I also picked every single tomato (including the green ones!) and pulled out those sprawling tomato plants.

After the clean-out, I swept the goat barn and brought the "brown gold" up to the garden. I dumped it in a pile beside last year's compost and the grass clippings that I've been collecting throughout the summer. I was using the clippings as mulch, but in the fall I use them in my raised beds, as I will the manure.
Picture
Clockwise from left: grass clippings, 2014 compost, and 2015 barn litter/manure.
After collecting materials, Hubs helped me build some new raised beds. Before putting them in place, we set down a big piece of cardboard to prevent weeds from popping up. Then in the bottom, I put a thick layer of "new" manure.
Picture
Slowly, I've been working to fill up these new beds. I put in one layer of green (grass), one layer of brown. For the brown I used 2014 compost, but recently our leaves have been falling, and I will use that "brown" for the last three raised beds in addition to the old compost.

After filling them up, I put a layer of newspaper on top, weighted by chunks of manure, and then soak it all with water. This will help the layers break down into beautiful compost for next season. After the last layer, I put a pallet on top to prevent the newspaper from blowing off. It gets crazy windy in the fall!
Picture
Overall, I would have to call this year's garden a success. I grew strawberries, tomatoes, green beans, butternut and acorn squash, poblano and bell peppers, peas, cucumbers, sweet corn, cabbage, basil, sage, cilantro, fennel, dill, chili peppers, and mustard seeds. On average from May-September, I probably spent three hours per week in the garden weeding, mulching and picking produce. There were a lot of tomatoes, so I was able to make salsa, marinara sauce, enchilada sauce, simmer sauce, ketchup and tomato juice. I was also able to make pesto with my fresh, free basil and dry a lot of herbs to use as spices this winter. Below are my estimated savings, as compared to non-organic* frozen/dried produce from the grocery store. 

$145 strawberries
$12 green beans
$25 squash 
$80 tomato products
$12 bell peppers
$20 herbs & spices
$5 corn
$5 peas
Total savings: $304

The Payoff
My hourly wage for this project is just over $5 an hour. This is not bad compared to a part time job. Next year I will be doing mostly raised beds, which will cut my gardening time at least in half (no mulching or weeding), thus doubling my hourly wage. Because we are installing the beds this year, next fall I will only have a fraction of the work to do. No building boxes or filling- just topping off. It took me a half hour to top off three beds this year, so it should only take a couple hours to do them all next October.

If you would like to start a garden primarily to save money, I would grow strawberries, tomatoes, peppers and winter squash (if you eat those, of course!). These are fairly easy to grow, easy to freeze/can, and provide the most savings. The reason I only saved $12 by growing peppers is that most of my peppers got killed out by the tomatoes. :(

Mistakes & Lessons Learned
Next year I will NOT be inter-planting tomatoes and peppers! The tomatoes almost completely obliterated my pepper plants. After the tomato vines died, some of the peppers were able to grow. However, there wasn't enough time for them to mature before our first frost. This was sad, and I won't plant that way again.

I was disappointed in my acorn squash and sweet corn varieties, so I will be buying new seeds for those. I'll also be purchasing a different variety of tomato seed- a bigger tomato, in order to cut down on processing time. Romas just weren't big enough, and they suffered from blossom end rot.

Lastly, I'll be starting my herb seeds much earlier (Feb.) and also starting my melon and squash seeds indoors. This is only because Michigan weather is so crazy that it isn't "safe" to plant until the middle or end of May if you want to avoid frost. I'll give my plants more growing time if I start them indoors. 

Happy garden planning!
-Bethany

*My garden produce qualifies as organic, but I would not buy organic produce from the store. This is why I use non-organic prices to calculate savings. If I used organic prices, the savings would be much, much higher. Anyone who is buying organic produce should grow their own, period.
0 Comments

Canning: Frugal or Not?

9/4/2015

0 Comments

 
Picture
I love canning! It allows you to stretch out the natural season of (free!) fruits and vegetables. But in the hustle and bustle of harvest season, it is easy to just keep buying jars and lids and keep canning everything in sight. Today I thought I'd do a cost analysis on different canning methods and a few tips and tricks to keep canning truly frugal.

Is it a Good Deal to Can Food?
Before canning anything, one must ask several questions. Why do I want to keep this food for an extended period of time? Does it lose nutritional value or flavor during the process? Could I get the same item, already canned, for a better price on sale at the grocery store?

The easiest thing to do when trying to answer these questions is 1) first decided what is good and what is not good to can, and then 2) make a price list with each food or food category. When the price of tomatoes or meat or fruit drops below X dollars per pound, THEN you stock up and freeze/can/dry it. Here is my personal price list.

Highest price I will pay for most foods:
Produce: Free
Beans/Grains: $0.70/lb.
Meat: $1.00/lb.

I'm not locked in to such a price list, but it helps me determine whether I should stock up or not. The other day we found chicken thighs for $0.39 per pound. We didn't have a lot of freezer room left, but I bought two 10 lb. bags anyway. It took about an hour to skin the legs and divide the drumsticks and thighs, then I was able to can 10-15 lbs and freeze the rest in reusable plastic freezer boxes. As for produce, I have a garden and orchard on the property, so there is no reason for me to buy fruits and vegetables to put up for the winter.

Freezing vs. Canning
Frozen food deteriorates faster and costs more money the longer you keep it in the freezer. Having a freezer is like having a storage unit for food; the rent you pay ends up in your electric bill. Canned food can be stored almost anywhere, no electricity needed. 

However, freezing does preserve more of the nutritional value of fruits and vegetables. Water bath canning destroys some vitamins, and pressure canning destroys a lot more vitamins. Because of this, I choose to freeze vitamin-rich, low-acidity foods (that would require pressure canning): peppers, green beans, peas, herbs, sweet corn and some fruits. 

Neither type of canning destroys minerals, however, so I don't have an issue with canning meats. In fact, pressure canning draws minerals out of bones that are canned, so it is my favorite way to make gelatinous broth. While the texture and flavor comes out a bit different, canned meat is tender and wonderful for casseroles, tacos, soups and other one-pot meals. Things I like pressure canning: meat, beans, grains (like hominy).

Cost of Jars
So now you've got a garden full of nearly-free produce. Still, consider the cost of each jar:
Brand New Jar (with ring and lid): $0.71 - $0.11 lid = $0.60 per glass jar

It is entirely possible to get jars for free or cheaper than $0.60, but I frequently see people trying to sell used jars at garage sales for $1.00 each. In addition to being more expensive, sometimes used jars have chips or cracks that can prevent a good seal. Because of this, it is prudent to watch the price closely if you plan on paying for used jars.

Wide Mouth vs. Small Mouth
Honestly I prefer canning with wide mouth jars- they're easier to clean and easier to get the food in and out of. But both wide mouth jars and wide mouth lids are more expensive. Wide mouth jars cost $0.91 each as opposed to $0.71 per small mouth jar. Wide mouth lids cost twice as much as small mouth lids- something you should keep in mind when thinking long-term. Lids can only be used once, so you will have to buy new ones every year. Small mouth lids cost $0.11 each; wide mouth lids are $0.21 each. If you end up canning 100 jars of food every season, you could save $10 per year by simply using small mouth jars instead of wide mouth. They are more difficult to clean, but a jar brush will help a lot with that. I only use wide mouth jars for meat, which can be hard to get in and out of a small mouth jar.

Quarts, Pints, or Half-Pints?
Even though there are only two of us, I still prefer to use quart jars to do some of my canning, even with things like salsa. If I'm canning a gallon of applesauce, I can use 4 quarts, 8 pints, or 16 half-pints. The cost of lids would then be $0.44, $0.88, or $1.76 respectively. If I use 16 jars instead of four, not only am I buying more lids but also washing twice as many jars. To me it makes more sense to open a quart jar and then plan several meals with that ingredient, as opposed to using two jars for two meals.

However, if I don't follow my well-planned menu, I could end up with a bunch of half-jars of food rotting in the refrigerator. For this reason, I still can with pints even though it technically costs a little more.

Water Bath or Pressure Canner?
Water bath canning is definitely easier for beginners. It also processes the food at a lower temperature, thus preserving more vitamins. Unfortunately with water bath canning, you can only preserve acidic fruits/vegetables like strawberries, pineapple, peaches, pears and tomatoes. You cannot can most vegetables, meat, beans or starches with a water bath canner.

Pressure canning opens up a whole new world of food preservation for the homemaker. After I got married I bought a big scary pressure canner. My first few attempts were less than successful, but after a while I got the hang of it. I use my pressure canner mostly for beans, grains (like hominy) and meat. Pressure canning cooks the meat and draws out the gelatin. All of the fat rises to the top of the jar, so I don't have to pick it off the meat. The meat and broth are all ready to go if I want to make soup. 

Gas or Electric?
I won't go into specifics about gas vs. electric (because it's not like we're going to switch out stovetops for canning season). But it's important to remember energy costs when canning.

Is the Food Even Worth Canning??
Last year I canned probably seven quarts of summer squash. I also froze several gallon bags of summer squash, and put summer squash in most of my frozen stir fry mixes. Needless to say, I never actually used the canned summer squash. In addition to cooking out the vitamins, pressure canning had cooked the squash (overripe by the time I picked it) to an icky, limp texture. It didn't even make good squash soup. Instead of spending $2.00 on lids and several hours preserving the squash, I should have just thrown it away.

Likewise, I don't spend any time or money canning jam. Apart from the tooth-rotting factor, it simply doesn't ever get used at our house. I have several jars of jams and jellies from when and before we got married that sit unused in the pantry, because we rarely have toast in our meal plan and that is the only thing you use jam for. I also made six or seven pints of relish last year; none of which have been opened. We are still working on a gifted jar of relish from one of Hubs' customers. Guess what you use relish for? Hamburgers and hot dogs, which we hardly ever eat. And tartar sauce, but we never have fish. So make sure you will actually USE and enjoy what you are going to can.

The Bottom Line
If you figure in the cost of a lid ($0.11) and the cost of a new jar and ring divided by ten years of use ($0.06) plus a few cents thrown in for electricity or propane, each jar of canned food costs $0.20. Hubs and I go through 3-5 jars of canned food per week, which averages out to $41.60 in yearly canning costs ($62.40 if using wide mouth jars). And that's just meat, beans and salsa for two people. Hard-core canners and those with larger families would probably spend at least $100-$200. So as you can see, "free" garden produce isn't really free after canning, and if you are buying something on sale, you need to factor in the cost of preservation for what you can't eat right away. If you are able to buy a can of beans for $0.10, you are probably better off buying it than trying to buy dried beans and can them at home. 

Happy frugal canning!
-Bethany
0 Comments

Growing & Preserving Basil

8/6/2015

0 Comments

 
Picture
Basil is one of my favorite herbs to grow. I use mine for pesto and also for flavoring Italian dishes.

Growing Basil
The most cost-effective way to grow basil is to start it from seed in the Spring. This is easy enough, but the seeds do take a little longer to germinate, so start early in February or March at the latest. After they sprout, the seedlings are fragile and will need to be watched carefully. Make sure they are not under- or over-watered.

Seedlings can be transplanted into the garden after all danger of frost is over, or planted in a pot on the windowsill. From here on out, basil is a pretty easy keeper. It will take a few months to get a good-sized plant growing. In the garden, watch the basil for bugs, and also pinch out the top flower buds. This will allow your plant to bush out more, instead of growing tall and leggy and going to seed.

Full-grown plants can also be cloned, or propagated with cuttings. Simply cut a 3-4" piece of stem above a pair of leaf nodes. Set the cutting in a jar of water and wait. After a couple weeks, you will see little roots growing out of the stem. These cuttings can also be replanted in the garden or a windowsill pot after they have grown a decent root system.

Preservation
I preserve my basil in two ways. You can either make pesto and freeze it in ice cube trays, them transfer the cubes into a plastic baggie (hint- you don't want the pesto exposed to air). This is the same process I use for freezing cilantro, which loses its flavor when dried. 

Basil, however, is an herb that CAN be dried as well. I usually thin out and pinch out the tops of my basil plants, then save the tops and thinned parts to dry. These parts are just set on a cookie sheet and put in my gas oven to dry for a day or so. You don't need to turn on a gas oven- the pilot light keeps it warm and dry enough to easily dry most herbs. After the basil is dry enough to crunch, I put it in my Vitamix Dry container to grind/powder it. 
Picture
I usually store my dried herbs in empty spice containers from Walmart.

Do you grow basil? What is your favorite way to use it?
0 Comments

Saving Seeds

7/31/2015

1 Comment

 
Picture
Saving your own seeds means that you skip buying seeds every winter/spring. This means that, depending how many seeds you are used to buying, that you can save $10-$50 per year in gardening costs! This makes gardening an even better deal than it already is.

Heirlooms, Hybrids & GMOs
Before I talk about methods, I'd like to clear up some confusion about  organic, heirloom, non-GMO and hybrid seeds. This is something I've only begun to learn about, but knowing the difference between the four can save you some $$.

So in the last few years, people have made a big deal about GMO seeds and struck fear into the hearts of many. At the same time, there has been a lot of talk about "heirloom" seeds. My understanding used to be that all non-heirloom seeds were GMOs and that you couldn't save them to use again. This belief is a product of marketing genius on the part of heirloom seed peddlers and promoters.

There is no "heirloom certification", which means that the term 'heirloom' is up to interpretation. Mostly it just means that the seed is an old variety. GMOs were only invented recently, which means that a 100-year-old plant variety is obviously not a GMO. This is why heirloom seeds are promoted as "non-GMO".

The truth is that most garden seeds are not GMOs. GMO seeds are created for big-scale corn, wheat, and soybean farmers. Some of these seeds are called "Round-up Ready", which means you can spray weedkiller all over the entire field and it will not kill the corn, only everything else. Obviously most small-time home gardeners are not going to spray their entire garden with Round-up (we're not THAT lazy!), so there is no market for GMO seeds among home gardeners. Most mail-order seed catalogs will not have GMO seeds. They may state this somewhere in the catalog, but if not, you can call to make sure before buying.

HYBRID seeds are what you want to avoid when planting a garden to save seeds. Hybrid seeds are NOT GMOs. A hybrid seed is like a mule. Mules are the offspring of a female horse and a male donkey. A mule is a naturally occurring animal, but it can't reproduce. Hybrid seeds are the same way. It's not like eating a hybrid will kill you; it just can't reproduce well. Usually the seed packet will say "hybrid" on the front, so you can tell savable seeds from non-savable. 
Picture
Non-hybrid and hybrid cucumber seeds.
It is not necessary to buy organic seeds or plants in order to save the seeds. I have successfully saved seeds from the Dollar General. All you need is a non-GMO (most garden seeds), non-hybrid plant. However, all organic seeds are required to be non-GMO, so if you are paranoid about GMO seeds, buying organic will squelch your fear.

How To Save Seeds
Now for the actual seed saving! The easiest seeds to save are beans. All you have to do is set aside one bean plant (I picked one at the end of the row) and wait until the pods mature, get brown and shrivel up. Then, simply shell the beans. I stored my been seeds in a baby food jar at room temperature over winter, and they sprouted just fine. This year my crop of beans was entirely free. I actually MADE money on my beans from selling them at the farmers market.

Broccoli, radishes, mustard and other members of the Brassica family send out tall shoots that grow little pods, similar to a bean. These are harder to shell than a bean, but still simple to find.
Picture
Radish (and chamomile!) seeds.
Lettuce seeds are very easy to save. They will "bolt" (grow really tall) and then grow tiny flowers on top that turn into seeds. These seeds are easy to recognize because they have fur on one side, similar to a dandelion but more compact.

Herbs like dill, fennel, and cilantro grow rather large seeds. These are fantastic seeds to save because not only can you grow plants with the seeds, but you can also cook with them. Cilantro seeds are actually sold as a completely different spice: coriander.
Picture
Dill seed.
Like I mentioned before, I save my seeds in baby food jars. Any container that is airtight will work. Don't store the seeds primarily in paper envelopes, or the mice will eat the paper. Try to keep them cool. Some people keep seeds in their refrigerator, but I keep my seeds in a drawer in our mudroom. It stays very cool there during the winter. It is crazy how many seed varieties accumulate once you start collecting!

Note: I am not a seed-saving expert. It is probably best to look up seed-saving methods for each different plant that you want to keep seeds from. Some plants have seeds that are small and hard to find. Carrots, I recently found out, cross pollinate with wild varieties unless you put a cage over them and add pollinating insects to the cage. Which is a bummer for me, because I waited two years for my carrots to go to seed. Live and learn.

Do you save seeds? What are your tips and tricks?
1 Comment

Summer 2015 Garden Update

7/29/2015

0 Comments

 
Picture
Well, I guess we are almost through July so I should post another garden update! I am super, super happy with the way my garden has worked out. Most of it was mulched in June, so I've done precious little weeding since then. We put up some cattle panels to keep my vining vegetables under control, and I also cut down my seeding carrots after finding out that they cross-pollinate with wild carrots (Queen Anne's Lace). Whoops.

I told Hubs the other day that it feels like I'm neglecting my garden because I don't go work in it every day. I venture out a couple times a week to pick produce and check up on everything. Once or twice a week I try to do some cosmetic weeding, but the garden is fully functional without babying from me.

I did a much better job this year of keeping things manageable. I planted LESS of what I couldn't freeze or can (cucumbers, lettuce, yellow squash) and MORE of things like peppers, tomatoes, beans and peas. I did make a few mistakes with the garden layout. For example, I planted 15 large sprawling pea vines in the middle of everything. They covered my corn, they covered my basil, they covered the green beans. Also, I underestimated the "sprawl effect" of tomatoes as well, and these have overpowered the pepper plants that were planted with them. Now I know that any companion plants of tomatoes should be tall and fast-growing.

Financially, gardening is a great deal. I'm amazed at everything I have grown for about $20 ($10 seed starter and $10 seeds). My pride and joy is my basil. Last year in desperation I bought a basil plant for $4 late in the season. Fresh basil at the store is something like $4 per handful, so the plant was still a good deal. This year I started seeds. Most of the sprouts died, unfortunately, but eight survived to maturity. These seedlings have grown larger than the plant I purchased last year. I got eight times the value for half the price! Crazy.
Picture
Seeds are such a fantastic deal. Not only do they cost pennies at the store, but if you learn to save them, you can have FREE seeds! But even if you stick to buying seeds, they can be stored for years. This year I bought a $0.20 packet of cucumbers and planted only three seeds. That 20 cents will pay for my cucumbers for the next two years. Same thing with squash, lettuce, herbs and other plants.

In addition to basil, I also planted hot peppers and mustard from seed. The mustard has seed pods, and the hot peppers have small green peppers on them.

My tomatoes are sprawling all over the place and growing little green tomatoes. This year I grew Romas and Beefsteaks, with a few volunteer plants of unknown origin. I've noticed that many of the Roma tomatoes are suffering from Blossom End Rot, which is apparently common for that variety. BER is caused by a calcium deficiency. I did put some eggshell powder under each plant in the Spring, but with Romas I guess it has more to do with the shape of the fruit. Luckily you can just cut off the rotted end, but I will probably only grow a few Roma plants next year.

Picture
The tomato forest!
Picture
Blossom End Rot
Raspberries- Like my cabbage, these have taken the back burner. I should have pruned and thinned the row, but just never got around to it. Plus the rose beetles got to them. I'm picking off the beetles, but I should have started way earlier. Maybe next year.

Most of the vine plants are growing on cattle panels, as I mentioned before. This year we have one watermelon plant, a couple different varieties of squash, one cucumber plant and also some peas. The peas are done and I have pulled them out to make room for other things. I left one sugar snap pea wrapped around a stake, so it can go to seed.
Picture
Picture
Cucumber plant.
In the Spring, I bought one head of garlic and planted the cloves, mostly for an experiment. As it turns out, garlic is really easy to grow! I got seven full heads (two not shown) out of the one bulb that I planted. I plan on replanting several of these heads this fall, to have some garlic next Spring. 
Picture
Lettuce, dill, fennel and cilantro have gone to seed. My strawberries were done a long time ago, so they are just sitting dormant now. I plan on gradually filling up three raised beds with new strawberry runners. This will allow me to have free strawberries, and the raised beds will make it easier to weed and pick. Guess who is making me some more raised beds!!
Picture
That's it for now!

How does your garden grow?
0 Comments
<<Previous
Forward>>
    Picture

    Bethany

    Housewife, happy wife, and mama to one. :)

    Picture

    Picture
    The Housewife's Guide to Frugal Food
    How to Eat for $10.00
    ​per Week

    Picture
    The Housewife's Guide to Menu Planning
    A Weekly Menu to Save
    Time & Money
    Picture
    The Housewife's Guide to
    Frugal Fruits and Vegetables

    No Garden? No Problem!

    Watch Meals From the Bunker:

    Picture

    Check out my Youtube Channel!

    RSS Feed


    Picture
    Baby Girl's Birth Story
    Picture
    8 Cheap Ways to Eat Healthy
    Picture

    Categories

    All
    Animals
    Book Reviews
    Books
    Christmas
    Cleaning
    Clothing
    Cooking
    Couponing
    Education
    Ego
    Electricity
    Farmers Market
    Finance
    Foraging
    Frugal
    Frugal Accomplishments
    Frugality
    Garage Sales
    Gardening
    Gifts
    Grocery Budget
    Grocery Shopping
    Herbs
    History
    Hobby Farm
    Home Based Business
    Home-based Business
    Home Decorating
    Housekeeping
    Industry
    Languages
    Laundry
    Marriage
    Meal Planning
    Medicine
    Minimalist
    Network Marketing
    Organization
    Plants
    Product Reviews
    Quotes
    Recipes
    ROI
    Rv
    Sewing
    Simplicity
    Spanish
    Spending Report
    Travel

    Archives

    May 2021
    April 2021
    March 2021
    February 2021
    January 2021
    August 2020
    May 2020
    April 2020
    March 2020
    February 2020
    January 2020
    December 2019
    November 2019
    October 2019
    September 2019
    August 2019
    July 2019
    June 2019
    May 2019
    April 2019
    March 2019
    February 2019
    January 2019
    December 2018
    November 2018
    October 2018
    September 2018
    August 2018
    July 2018
    June 2018
    May 2018
    April 2018
    March 2018
    February 2018
    January 2018
    December 2017
    November 2017
    October 2017
    September 2017
    August 2017
    July 2017
    June 2017
    May 2017
    April 2017
    March 2017
    February 2017
    January 2017
    December 2016
    November 2016
    October 2016
    September 2016
    August 2016
    July 2016
    June 2016
    May 2016
    April 2016
    March 2016
    February 2016
    January 2016
    December 2015
    November 2015
    October 2015
    September 2015
    August 2015
    July 2015
    June 2015
    May 2015
    April 2015
    March 2015
    February 2015
    January 2015
    December 2014
    November 2014
    October 2014
    September 2014

    Full Disclosure & Disclaimer

    Picture
    Picture
    I get cash back for many online purchases including wedding gifts and Ebay stuff!

Powered by Create your own unique website with customizable templates.
Photos used under Creative Commons from dasWebweib, amanessinger, thewritingreader, diakosmein