Hey everyone! Unfortunately this is not a cheese-making blog, but if it were, I would methodically make tutorials cheese-by-cheese, starting with soft cheese (cream cheese, cottage cheese, queso blanco, etc.), then doing all the hard cheeses (cheddar, mozzarella, Parmesan) and lastly the mold-ripened cheeses (brie, blue cheese, etc.). As it is, my time is limited so I'm just going to do a one-size-fits-all hard cheese post so you get the idea.
A Word About Homemade Cheese
The thing you must understand about homemade cheese is that it's inconsistent. A slight change in the temperature, cooking time, what kind of milk you use or even right down to what the cow ate, can all effect the flavor of your finished cheese. This being said, YOUR cheddar or havarti might have similar characteristics but will definitely not be exactly like the store-bought variety. By the time you're done, it may taste like a different kind of cheese. In which case you can call tell everyone that it is your new "house specialty".
The inconsistency of homemade cheese is why I prefer to use an "eyeball-it" approach rather than a methodical, scientific perfectionist approach. Cheese is cheese, and for my purposes, "messing up" a recipe or altering a recipe for convenience's sake won't hurt. If I were to sell or market the cheese that would be a different story, but neither Hubs or I care what kind of cheese we eat on a day-to-day basis.
Where To Start
Below are some basic steps involved in making hard cheese, as well as ingredients and tools required. I think you will be surprised at how easy it is. I believe the cheese I made in the pictures was Colby.
Ingredients
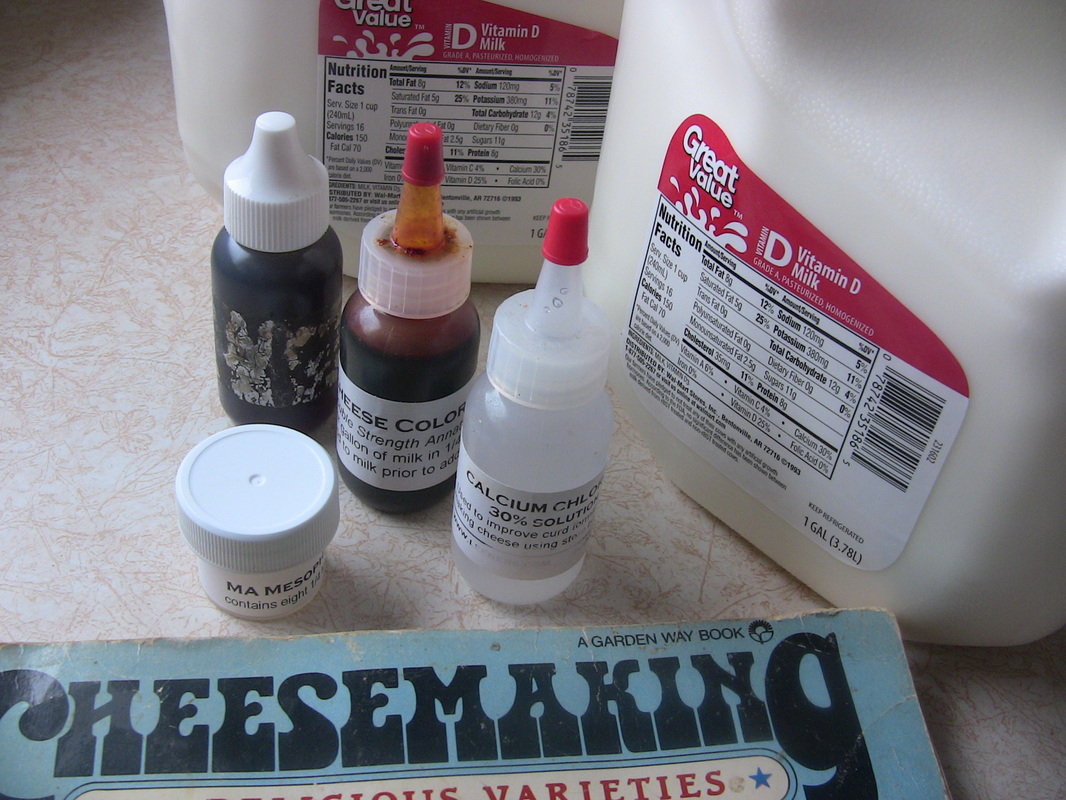
This is what I have in my cheesemaking toolbox:
Stored in the freezer:
-Thermophilic, Mesophilic, and Italian starter cultures
-Proprionic shermanii (swiss cheese) bacteria [optional]
-Bacteria linens (red mold starter for Muenster, etc.) [optional]
While the last two cultures aren't must-haves, at least get yourself a good thermophilic and mesophilic starter. Your starter will come in flakes or powder form.
Stored in the fridge:
-Milk
-Vegetable rennet
-Cheese color (optional)
-Calcium chloride (optional)
Supposedly the calcium chloride helps store-bought milk to coagulate into curds, but if you are using raw milk it's not necessary. The cheese color is also optional, but do make sure to have vegetable rennet and milk on hand.
So there you have it; vegetable rennet, starter culture and milk will get your foot in the door when it comes to cheesemaking. There are plenty of recipes available on the internet, but a reference book can be helpful as well. I have both the old and new cheesemaking books from Rikki Carrol.
Tools:
The main tool you'll need for hard cheese is a cheese press. You can buy a cheese press from a retailer or manufacturer, or you can make your own. I have two cheese presses: one is a simple heavy-duty plastic with holes throughout, and a lid/follower. To use, you put X amount of weight (like a gallon of water) on top of the lid. This pushes down the lid and squeezes whey out of the little holes. My other press was more expensive and doesn't use weights, but instead uses a screw-style mechanism where X amount of weight = X amount of rotations on the knob. You'll see this press in my photographs. Unfortunately it was bought from a private manufacturer (actually made with PVC pipes!) so I can't give a link here.
You can also make your own press from various plans on the internet. One small cheese company here in Michigan uses modified 5 gallon buckets for presses. They simply poke holes all around the bottom part, and another 5 gallon bucket easily slides down inside the first bucket to apply pressure. Of course this company is cranking out a LOT of cheese, but you could use smaller buckets and get the same effect.
Other tools you'll need are:
-Thermometer (candy thermometer works)
-Pot large enough to hold milk
-Long-bladed knife for cutting curds
-Colander and/or cheesecloth for draining curds
-A kitchen sink large enough for your pot (to water-bath warm the curds or keep them at a stable temp, if necessary).
The Process
Step 1: Read through the recipe and pre-measure ingredients. Many times the recipe will tell you to dilute the rennet and/or coloring in 1/4 cup of water before adding it to the milk. I do this diluting right at the beginning to get it out of the way.
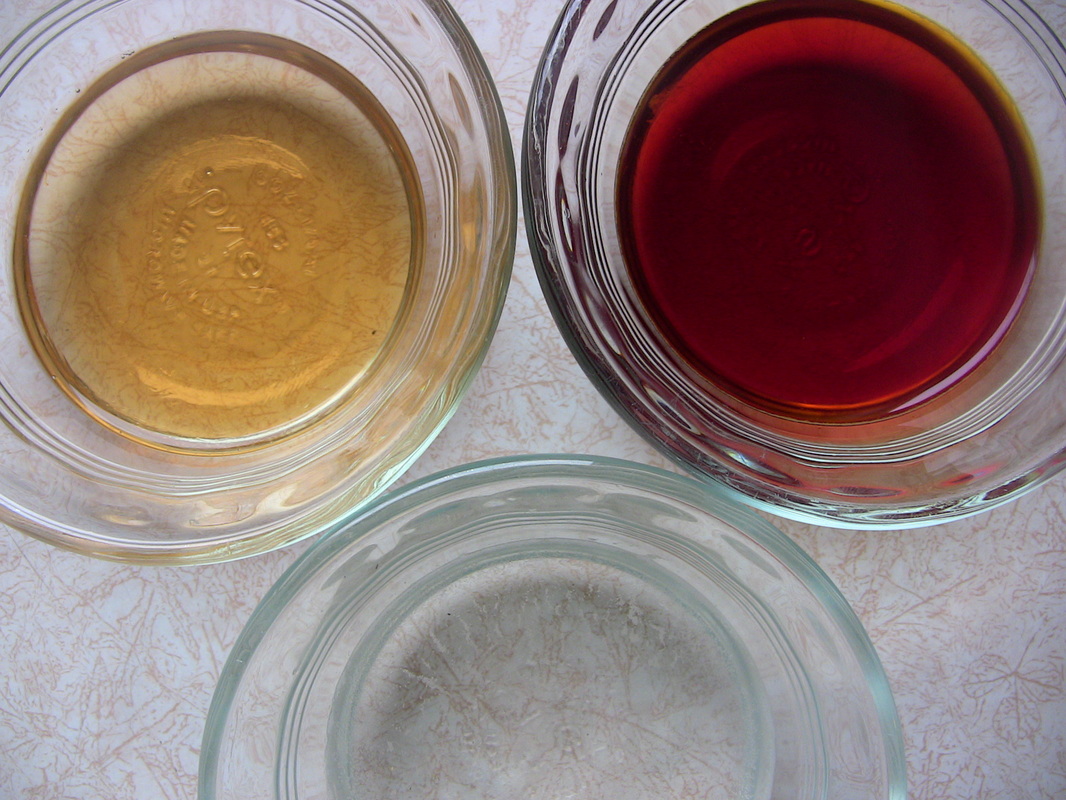
Clockwise from top left: rennet, coloring, calcium chloride (I think...)
Step 2: Ripening
Heat the milk to a certain temperature, then add starter culture. I usually sprinkle the flakes of starter on the surface of the milk and stir, rather than dumping it straight in and then having to de-clump it. After the specified ripening time, add coloring if desired.
Step 3: Renneting
Add the rennet by pouring it through a slotted spoon (again, we don't want "clumps"). Stir in an up-and-down motion to distribute the rennet evenly. Wait the specified time until a big, wet curd has formed!
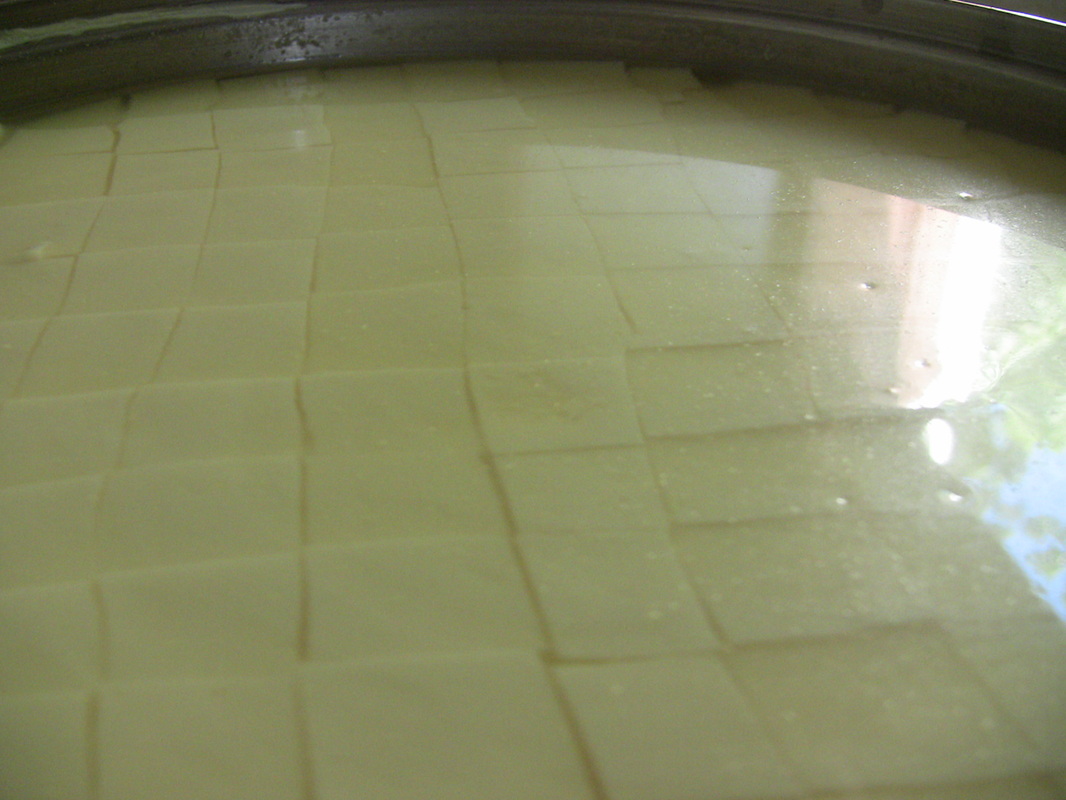
Cut curd.
Use your long-bladed knife to cut the curd into specified sizes. A common size is 1/2" or 1/4" cubes.
Step 4: Cooking the Curds
After the curds are cut, you will have to heat them to a certain temperature while gently stirring. Generally the instructions say to heat slowly; no more than 2 degrees per minute.
Step 5: Draining the Curds
Use a cheesecloth-lined colander (or just a colander) to drain the whey off of your curds.
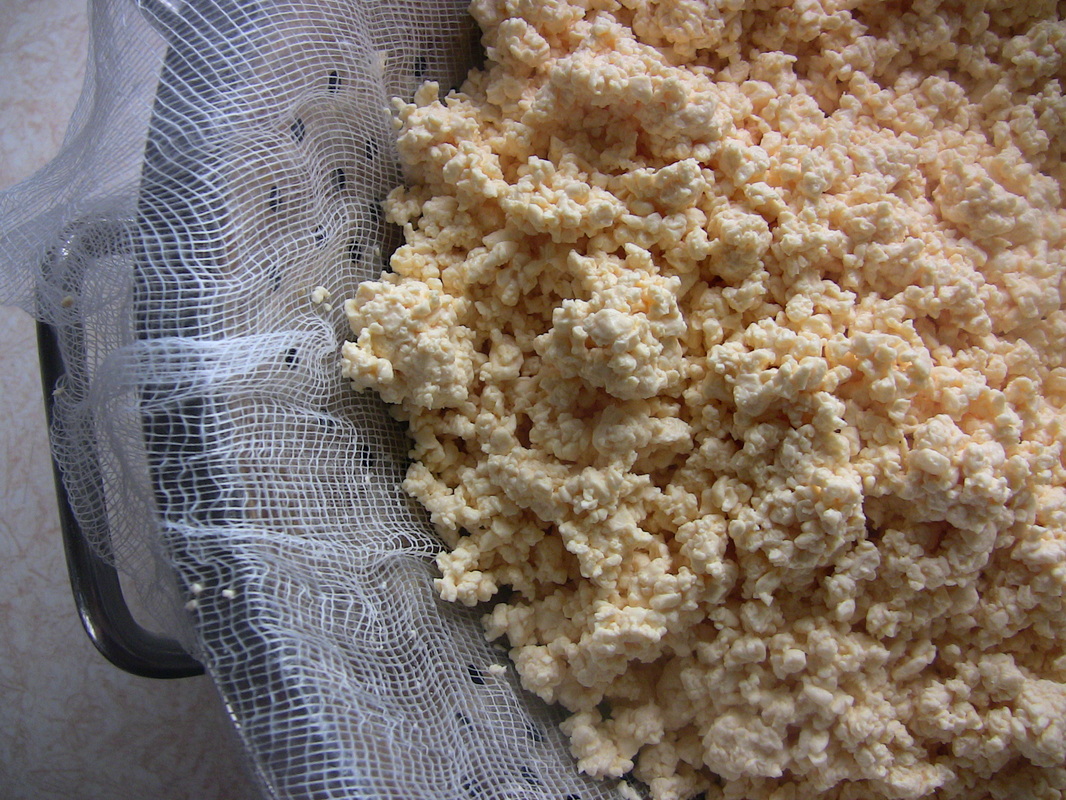
Draining and salting curds.
Step 6: Milling and Salting
Some recipes will ask you to break the curd into small pieces; some will tell you to cut it in strips first. This is called milling. After the milling is done, sprinkle the specified amount of salt over the curds and mix it in well. There is a 'cheese salt' that you can buy, but I just use regular table salt. It works.
Some recipes will ask you to break the curd into small pieces; some will tell you to cut it in strips first. This is called milling. After the milling is done, sprinkle the specified amount of salt over the curds and mix it in well. There is a 'cheese salt' that you can buy, but I just use regular table salt. It works.
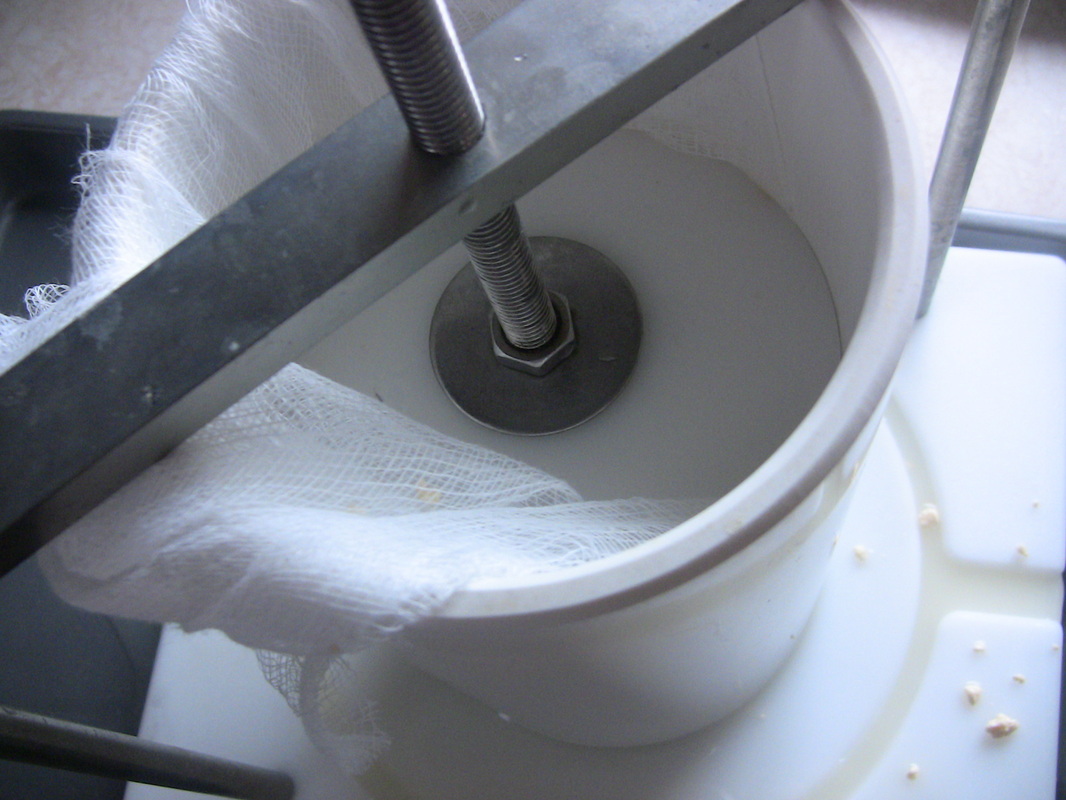
The cheese press at work.
Step 7: Pressing
Now you get to use the cheese press! Dump your curds into the press (some recipes line the press with cheesecloth) and apply the proper amount of pressure.
Step 8: Drying
Before storage, you'll want to dry the cheese for a couple days. This can be tricky. In my early cheese-making days I used a real cheese drying mat, but the darn thing molded. Now I dry my cheese in the oven (turned off!) where there is little humidity. The gas pilot light keeps it warm enough in there. Putting the cheese on a bread cooling rack allows air to circulate, though turning the cheese once a day or so is still recommended.
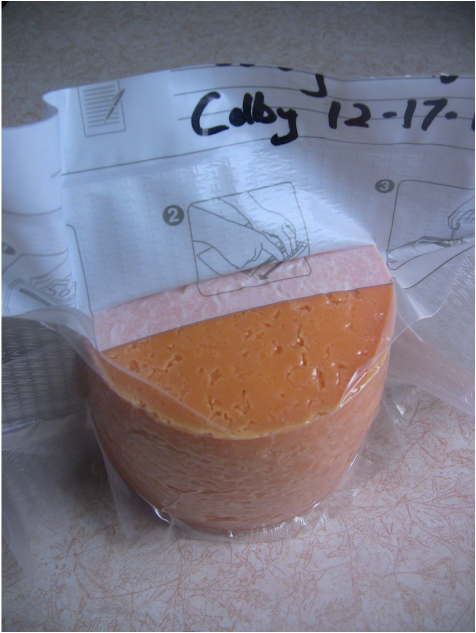
Step 9: Storage
The best way to store my cheese, I've figured out, is to vacuum seal it. As with many other fermented products, AIR IS THE ENEMY!!! It causes mold. I've tried waxing, oiling, spraying with vinegar, ziplock bags, salt, you name it, but vacuum sealing keeps the mold away best, by far. I'd highly recommend investing in a vacuum sealer. It is heartbreaking to spend hours on a cheese, then bring it out to enjoy 2 -3 months later and find it totally infested with mold and/or bugs.
After sealing, label the cheese with the name and date. Even though it is sealed, the cheese is still susceptible to mice and other pests, so I store mine in a plastic box with a lid- a.k.a. The Cheese Box. Supposedly raw milk cheese should be aged at least 6 months for safety reasons, but the longer you store, the stronger the cheese gets. I think the best flavor comes from a 1-3 month aging time (regardless of safety... do this at your own risk!). With the vacuum seal there is still a tiny bit of mold, but it is easily wiped and/or cut off.
Is cheesemaking a frugal skill?
The answer is: it depends. If you are buying extra milk from the store to make cheese, the answer is usually no. It costs $3-4 to make a pound of cheese, but you can buy it for $2-3 a pound in many cases. If you insist on eating an expensive variety like Gruyere, though, it's definitely a bargain to make it yourself.
Many families I know make cheese when, for some reason, they have a large amount of extra milk that must be used before it goes bad. If you own a milking goat or cow, you may also have a lot of extra cheap or free milk that can be used. In this case, cheesemaking IS frugal.
Happy Cheesemaking!
-Bethany


 RSS Feed