Ducks
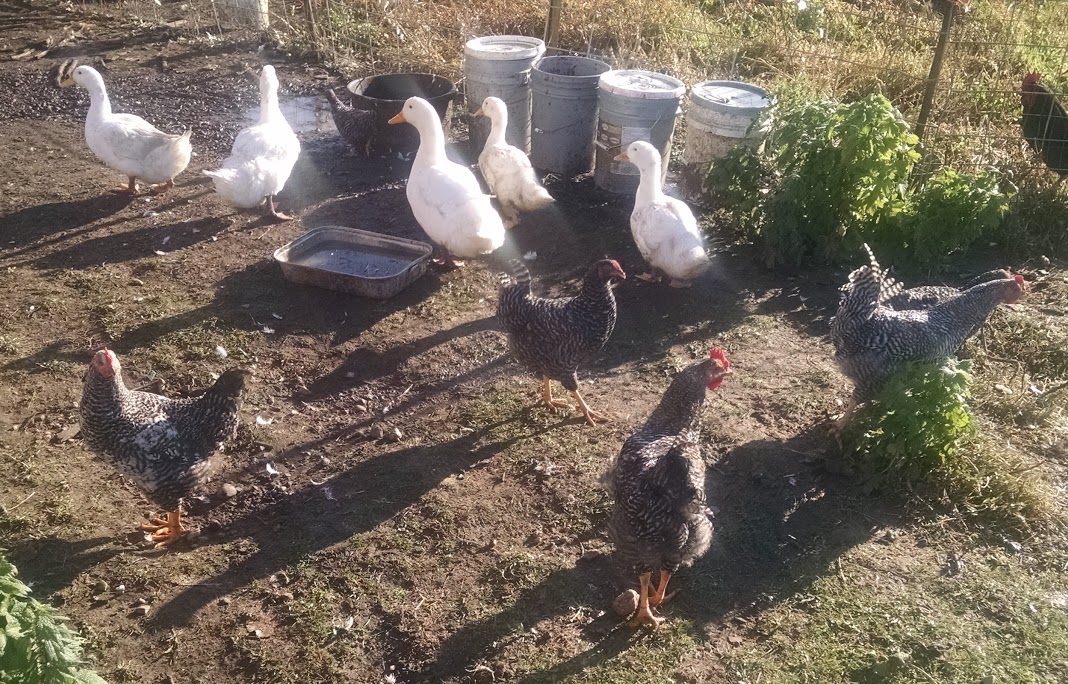
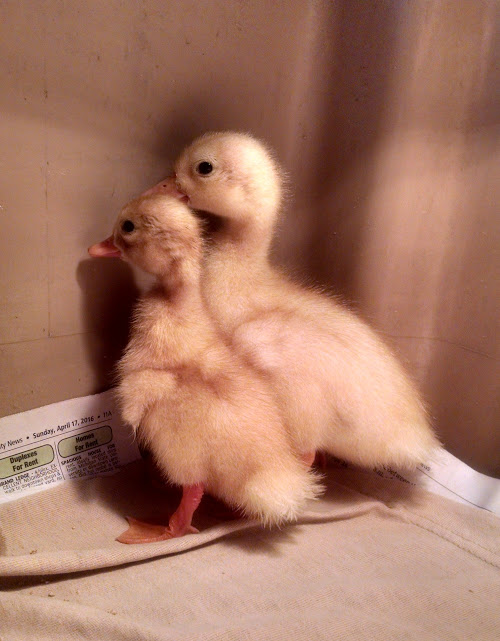
At the end of September, my little brother helped me hatch two baby ducks (there were a lot more eggs, but only two hatched). I kept them inside until they got SO messy that I was changing the bedding every single day. What it was, is that ducks fling water all over the place to clean themselves. At that time, I decided to move the ducks outside. They have started life with the "big ducks" and transitioned pretty well at this point.
What's true with little ducks is also true with big ducks. They make a huge mess! Because the ducks dirty up my poultry water every day, I have to change it every day. One of the challenges of having ducks was coming up with a watering system that didn't involve a lot of water-dumping, mud creating, hose-dragging and time spent every day trying to get them some clean water.
What I came up with is a bucket system. I have four five-gallon buckets (with lids) lined up beside the black water tub. Once every five days I fill up all of the buckets AND the black tub. Then for the next four days I dump the dirty water out of the black tub and replace it with clean water from one of the buckets. This saves me at least 15 minutes every day.
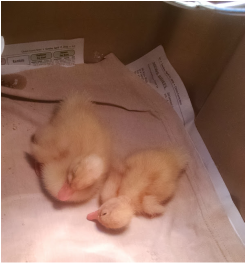
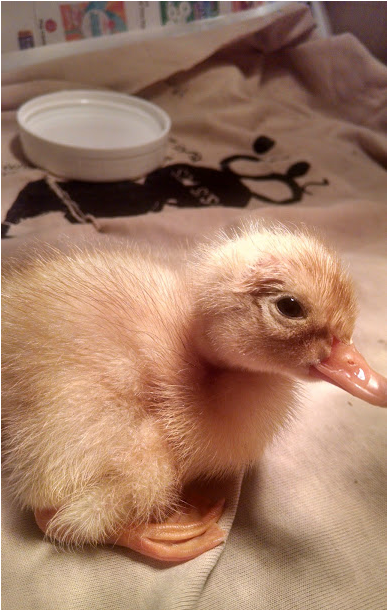
My "baby" ducks also have a little chick friend! One of our chickens hatched out a little chick, and was taking care of it very well until we found the chick by itself several nights in a row. The first night it was riding around on the back of our goat! Then we found it in some other places, and decided it would be happier and safer with the little ducks. They've grown to be great friends. It's hard to believe that the ducks were this small:
We did finally end up butchering one of our older drakes (male ducks). There were two drakes to two females, which is not a good ratio, so it was better that the second drake go in the freezer. The processing was much easier to do than I thought. It took Hubs and I about 90 minutes to complete the duck, but we spent a lot of time trying to figure out how the insides should be removed. For plucking, we first dry-plucked the larger feathers. Then we dunked the downy duck into a pot of hot water with melted paraffin wax on top. After dunking, I dipped the duck into a bucket of very cold water in order to harden the wax. Then we peeled the layer of wax off, and out came nearly all of the downy feathers. It was a very simple but effective process. I used two blocks of Gulf canning wax for one duck. Two problems we ran into were 1) areas that didn't have enough wax, or 2) areas where we had pulled too many down feathers and the wax had nothing to grab. Next time I will try to more thoroughly dunk the duck, and leave more of the down feathers on.
Chickens
As the weather gets colder and warmer, so egg production goes up and down. In October we got anywhere from two to eight eggs per day. Right now they are giving between three and four eggs per day. One of the frugal hobby farm things I did in October was clean out the chicken coop. Litter went in the garden, and then I used free sawdust from Hubs' shop to replace the bedding.
Goats
Adi and Barry are doing well. They are working on eating down the pasture, bit by bit. I'm so happy that there are only two of them, because there will be plenty of pasture until it snows. I am watching each paddock to see when I should start feeding hay.
Another thing I am doing is making tree hay. This year I hung a clothesline out in the barn, complete with clothespins, and I use this to dry different weeds and plants. Some things I have dried to feed the goats this winter are sumac, curly dock, willow branches and raspberry canes/leaves.
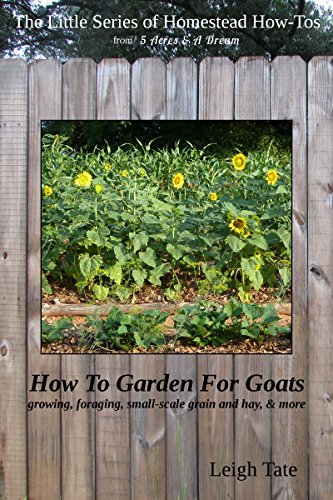
This month I bought an ebook that I thought might help me lower my winter goat feed bill.
What I am looking for are ways to feed my goats during the winter. The lists in this book were nice, but I have seen many of them on other websites, and there are Youtube channels that can show you how to make sprouting or fodder systems. About one third of the book was glossary and back matter, which was kind of a bummer. However, if you are interested in any of these topics, $1.99 isn't to bad of a price to have it in an ebook.
Profit & Loss
Expenses:
100 lbs. layer mash- $22.00
200 lbs. shelled corn- $22.00
Gardening for Goats ebook- $1.99
Total expenses: $45.99
Income:
Eggs- $10.00
Total net profit: -$35.99
Year-To-Date net profit: $425.26
Now it's time to see if my $425.00 can last until April!!
After stocking up last month, I'm pretty sure the corn and layer mash I have now will last through the end of the year. I certainly have enough goat feed to get through December as well.
More Ways I Plan on Saving:
1. Feeding my goats the tree hay I've collected and dried for them.
2. Processing most of the roosters and some non-laying birds.
3. Building a fodder system for the chickens. It's the chickens- not the goats- that will probably eat a lot of my profits over the winter.
I've decided to pause my Etsy store for now, because I didn't get any sales this year from it. I've never been able to sell handmade items on Etsy, although I have sold a few antiques and/or vintage items. In addition to that, the listing process takes a very long time, and I end up paying a fee even if the item doesn't sell. Ebay is much better for me because it is free to list, easier to list (it's like having a garage sale vs. a retail store) and I can actually sell stuff on that platform.
Should the Hobby Farm Earn an Income?
Based on past experiments, it is easier and faster for me to make money selling garage sale items on Ebay than it is to sell handmade items at farmers markets. 1) I don't have to make the items. 2) I don't have to pay to sell the items. I love having a hobby farm and I love making things, but the money-making part is just not efficient.
I like the farmers market model because I can sell excess "stuff" from the homestead (whether that be produce, soap, baked goods or books) and it's an easy way to make $50.00 per week while cutting down on household waste. However, it's not worth my time to be making things especially for the farmers market. I figured that out last year. Between 30% and 40% of my market profits are automatically subtracted for things like gas, booth fee, and costs of goods sold.
Example: Selling vs. Saving with Apple Pie
I can make an apple pie at home in a glass reusable pie pan for $1.47. Let's say that a decent bakery pie costs $10.00. If it takes an hour for me to make the pie, that means I can save $8.53 per hour making apple pie.
Hey! If I can save that much money making pie, I should try selling some, right? So I take the same pie to a farmers market. Instead of costing $1.47, the ingredients cost $2.39 because I have to use a disposable pie pan and pie box. In addition to those costs, I also have the booth fee ($20.00 divided by 20 items = $1.00). If it takes me an hour to bake the pie and 20 minutes to sell the pie (6+ hours divided by 20 items = 20 minutes), that means I'm earning $4.97 per hour selling pie.
As you can see, I'm losing $3.56 per hour by selling the pie instead of just serving it for Thanksgiving dinner.
Faster, Easier Earning with Garage Sales
The internet model, however, is much more efficient. Even if I sell something small, like a used book, the workload is much less. There is no waste. First, I list the book on Amazon. It can stay there for a week or six months, and I don't have to pay to keep it up. When the item sells, I get an email, print out the postage, wrap it up in some recycled packing material, and pop it in the mail box. Sometimes I have to mail the item from the post office, but that can be done while we are already going to town for something else. With this model, I spend about 15 minutes total, and earn anywhere from $2.00 to $8.00. That's between $8.00 and $32.00 per hour. At the farmers market I have never made more than $5.00 per hour.
Though it has been fun trying to earn some money with my hobby farm, and I know from experience that it can support itself, I can make easier money (and more of it!) by selling non-farm products. I could sell just a couple of things on Ebay or Craigslist every month, and support my hobby farm that way. Or, I could give one 30 minute piano lesson per week.
Hobby Farming to Save, Not Earn
Let's think about that apple pie. If I keep my pie-making at home, I "earn" $8.53 per hour instead of $4.97. That's a 43% increase. And technically I should be paying taxes for everything I sell, but that is not required for items produced and used for your own consumption.
Take what we learned with the apple pie and apply that to bread, granola, soap, cheese, butter, milk, chicken meat, goat meat, eggs, and anything else I can produce here on the hobby farm.
Selling price - $1.00 (booth fee) - selling cost (varies per item) = earnings.
Earnings divided by hours required to make (+ 20 minutes to sell) = hourly wage.
I could do an entire blog post on this, going through item by item of each thing I sell to figure out if it is really worth selling. You could go through the same calculations for ANYTHING you are interested in selling- crafts, services, used items.
Hourly wage for items produced and consumed inside the home is much simpler. It looks like this:
Cost to buy - cost to make = savings. Savings divided by hours required to make = hourly wage.
I believe that running all DIY projects through this calculator (and comparing it to your hourly wage at work, perhaps) could be the key to determining what is worth your time to do.
But that's kind of getting to another post.
I want some pie!!!
Til next time,
-Bethany










 RSS Feed

