the Renaissance Housewife
  • Home
  • Topics
    • Saving >
      • Kitchen >
        • Food >
          • Recipes
      • Bath & Laundry
      • Medicine Cabinet
      • Office
      • Electricity
      • Gardening
      • Foraging
      • Animals
      • Weekly F. A.'s
      • Printables & Downloads
    • Earning
    • Investing
  • Books
  • About
    • RH Recommends
    • Newsletter & Updates
    • Travel
    • Beta Readers
    • Legal Stuff

Italian Salad Cheese

2/25/2015

0 Comments

 
Picture
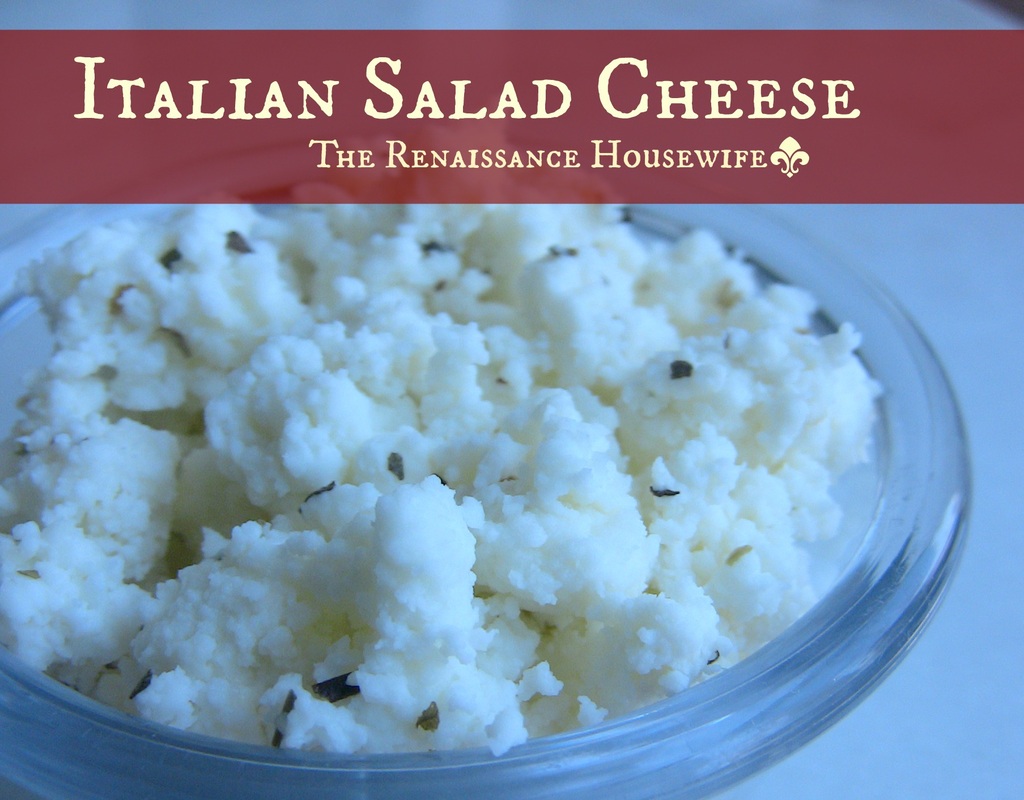
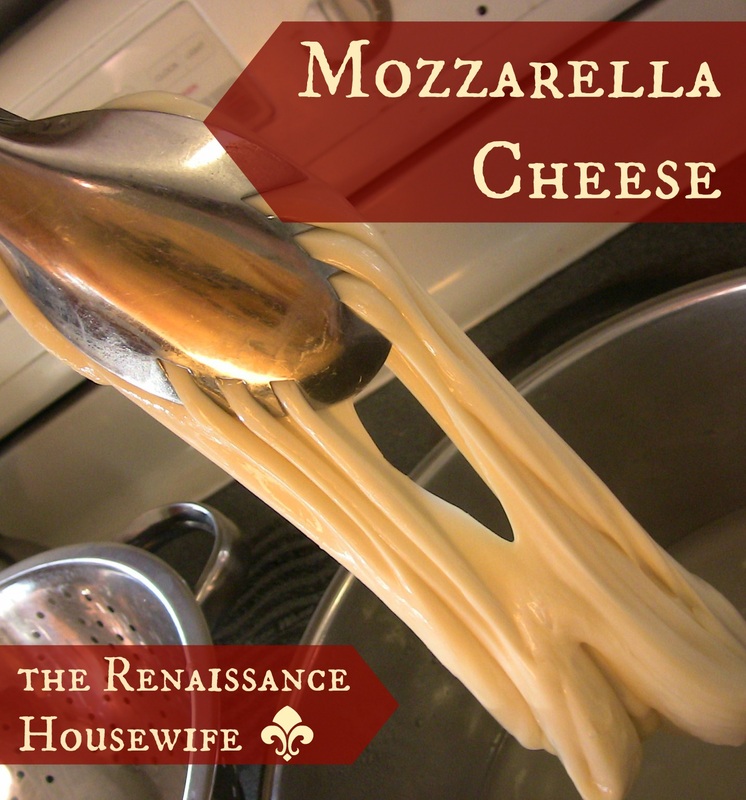
Disclaimer: The original recipe for this cheese was called "queso blanco". However, I've tried real queso blanco from Central America and it tastes nothing like my revised version of the recipe. Therefore I opted to use a different name for this tutorial. You could also call it "Italian crumble cheese" or "soft cheese" or "goat cheese". It's basically just a really good, easy-to-make cheese. Yum.

Ingredients:
1/2 gallon milk
1/4 cup white vinegar
2 tsp.  salt (more if needed)
2 tsp. Italian seasoning 

Instructions:
1. Heat the milk to 180 degrees F. 
2. Add vinegar and stir. Let curds form for 10 minutes. 
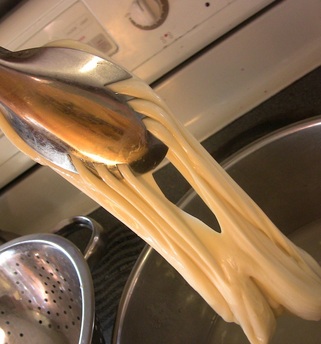
3. Drain out the whey using a cheesecloth or clean muslin. I let it hang for a couple of hours, suspended over basket with a bowl inside,   

Picture
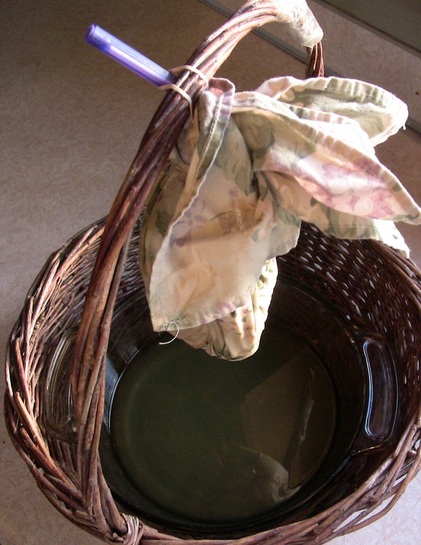
4. When you are satisfied with the amount of whey drained, mix in some salt to taste and Italian herbs. 

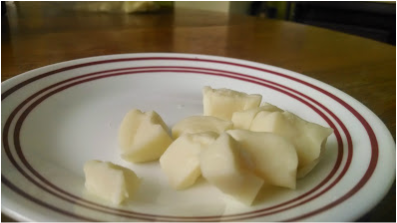
Keeps refrigerated for one week or more. If it lasts that long.

Use this cheese like ricotta, cottage cheese, or any other soft-spread cheese. It works great in lasagna, on spaghetti, salad and other dishes. 

Normally in cheesemaking, one gallon of milk produces one pound of cheese. I use this recipe for whatever "leftover" milk I have -milk that is about to go bad- and adjust the amount of vinegar accordingly. Hubs likes to put it on everything.

Happy cheesemaking!
-Bethany
0 Comments

Economics of Raising Dairy Goats

2/21/2015

0 Comments

 
Picture
Today we're going to sit down and figure out if having your own dairy goat is really economical or not. Some people think that doing-it-yourself is always economical. However, as we've seen from raising meat chickens, this isn't always the case.

To make a long story short, raising dairy goats is extremely economical... for me. The following figures are based on my own costs. Obviously these may vary and if you are thinking about getting goats, be sure to research your local prices. If you want to know the bottom line without reading this long article, skip to the end and read the "Bottom Line" paragraph.
 
Expenses 
We'll start with expenses. My actual expenses are in parenthesis.

Animals: varies widely depending on breed, registration status, sex & age, and seller (a homesteading neighbor will probably sell for less than a dairy goat farm). You will need two goats unless you have sheep or other animals for companionship.

Doe/nanny: ($0) - $400
Wether [for companionship... registration not needed]: ($0) - $50

Feed: If you live in a warm climate, feed costs will be a lot lower. Hay is necessary for doe and wether, grain is more necessary for does, especially pregnant or milking does. Right now I'm giving a tiny amount of grain with corn to the wether. Too much grain for male goats can cause urinary problems.

Goat Feed: $17 per bag x 1 bag per quarter = ($68)
Hay: $5 per bale x 2 bales per month x 5 months = ($50)

Breeding the doe: Like the cost of an animal, this can vary widely. If you breed with a registered buck, it will cost more. If you breed with the neighbor's buck, it will cost less. 

Breeding: $0-$100 ($50)

Other costs: There aren't many other costs associated with raising goats. Wormer and/or shots will cost some. We bought a reusable coffee filter for filtering the milk. Pruning shears can be used for hoof trimming. Hubs built our goats' pen and Adi's milking stand out of scrap lumber. Fencing was already in place. Obviously there are a lot of things you can buy that you don't need to raise goats. These are listed in the bottom group.

Coffee filter: ($5) ___
Pruning shears: (already have)___
Wormer/shots/medication: (not needed yet)___
Milking stand: (Hubs made from scrap lumber)___
Fencing: (pre-existing hog panels)___

Vet visits:
Heated water bucket:
Goat treats:
Kidding supplies:
Automatic milking system:
Stainless steel milking bucket:
Kid sweaters:
Automatic feeder:

Include the cost of labor if you wish. I think the benefits of the labor (see below) outweigh the costs. If you are not milking, expect to spend 10 minutes per day feeding and watering. Now that I'm milking, it takes 1 - 1.5 hours per day; 30 minutes at night and 30 minutes in the morning. This is quite a commitment because you won't be able to go anywhere before your morning milking and you will have to be home before night milking unless you make arrangements for someone else to milk the goats.

My total costs: $173

Benefits
Now we'll talk about benefits.

The main benefit you'll get from having dairy goats is obviously "free" milk. There are several ways to calculate the value of this. The amount of milk you get depends on the breed of goat and how much you are feeding her.

Milk: 1 quart per day x 10 months = 75 gallons milk= $225 (price of cow's milk at Kroger)

*Side note: At Kroger, real goat's milk cost $4 per quart, bringing the value of 75 gallons to $1200.  

This year I will save $225 by not buying milk at the grocery store. However, I will save even more by making my own cheese and yogurt. Hubs and I don't typically drink milk as a beverage.

Cheese: 35 lbs x $3/lb. = $105
Yogurt: 140 qts x $4/qt. = $560
Drinking Milk: 5 gal. x $3/gal = $15
Total value of 75 gallons = $740

Kidding: Aside from milk, you should also get 1-4 kids from your doe. If the kids are registered, they can fetch a nice price. If not, you can keep the males for meat or keep the does to add to your milking herd. Unfortunately our kids died this year.

Kids: ($0) - $400
  
Other benefits: Without my goats, nothing could have dragged me outside for fresh air this winter. I. Hate. Being. Cold. Milking morning and night forces me to get fresh air and exercise every day. "Having to milk" is a good excuse/reason to leave a party or not go to church too early. I've also learned about milking goats. This knowledge and experience could give me the credibility to write a book or teach a class someday if I wanted to. OR with this knowledge I could grow my heard and start a dairy business.

Bottom Line
Is it economical?

In my case, yes.

Costs of raising goats: $173/yr + work
Benefits of raising goats: $740/yr + fresh air and exercise
Total savings: $567/yr + better health

As with any other hobby/project, the key to keeping it economical is NOT BUYING MORE STUFF. I don't know how many times this winter I was tempted to buy a heated water bucket so I wouldn't have to carry water every day. But I resisted and saved $40+, and got more exercise because of it.

Is it economical for you? That depends. You probably won't have a pair of goats fall into your lap like I did, so consider that initial investment. However, if you are going to buy a big expensive farm-animal pet anyway (llama, horse, goat, dog) I would seriously consider buying a dairy goat. My Nigerian Dwarves are friendly and small enough for me to handle on my own. We haven't noticed the dreaded "goaty" taste in any of our milk products. They can also be shown at county fairs and the like if you have children in 4-H.

It's a much better (and economical!) idea than getting a dog, anyway. :)
0 Comments

The Wonderful World of Scavenging

2/18/2015

1 Comment

 
Picture
These days, I never go for a walk without a plastic grocery bag. Why? Because of all the wonderful things you can find in the ditch! Besides aluminum and glass recyclables (worth 10 cents each), I've found unopened hand warmers, music CDs, nutcrackers (??), morel mushrooms, and yes... even a full can of beer. All this is just from going on my normal walks, runs, and bike rides around the neighborhood (i.e. my free gym membership). 

Unfortunately scavenging has gotten a bad rap due to it being associated with rats and homeless people. However, this phobia has come to the point where people are afraid to look into a garage sale free box because of what "icky" things might be in there. This is a little crazy.

I'd like to introduce you to the wonderful world of scavenging that only a minority of people take advantage of. Are you afraid of what your friends would think if you dug through a dumpster? That's exactly what keeps scavenging so profitable. Because nobody wants stuff that someone else didn't want.

How to Get Started

There are several ways to get started scavenging. The best way to start is just to carry around a plastic bag and pick up cans (if you live in a place of 5 or 10-cent deposits). This is generally socially acceptable as there is nothing inherently wrong with going for a walk. In 2014 I probably returned $30-40 worth of recyclable cans and bottles. If you think returning cans is for homeless people, think again. Even rich old retired men pick up beer cans. Who couldn't use some free money?

If you enjoy shopping at garage sales and yard sales, you are probably a bit of a scavenger yourself. But do you ever take advantage of the FREE boxes? Before a few years ago, I never even looked into a free box because I thought they were full of old cottage cheese containers and holey nasty mis-matching tennis shoes. Boy was I wrong! Sometimes the free stuff is worthless junk or even trash. But other times a free box exists because the home owner was too lazy to price the last of his items. As I write this, I am wearing name-brand jeans, a belt and a pair of like-new socks picked out of a free box.

The town we live near has something called "Junk Days", where everyone piles old furniture and other unwanted household items on the curve. The junk is out for one week, during which time middle-aged guys with pickup trucks (or in my case, teenage sisters with a pickup truck) drive around looking for items to sell or scrap. I've found perfectly usable household items, office supplies, a North Face backpack, hair extensions, books, brand new mens' jeans (sold for a profit on Ebay), and other miscellaneous items on the side of the road. Several pieces of furniture in our home were lovingly picked off someone's lawn during Junk Days.

A Few Cautions:

1. Always wash whatever you find before you use it.
2. Don't take something that isn't clearly free or unwanted.
3. Don't trespass on private property; be courteous and safe while scavenging.

Another hazard that you might run into: hoarding. The temptation to hoard can be very strong when you have been introduced to so many free things available. I've picked up loads of stuff that sat unused until I finally threw it away. It's okay to pass up the fifth garden rake or fifteenth tennis ball that you have seen. If you don't need it, leave it.

Those cautions aside, scavenging roadsides and free boxes is a fun, even profitable pastime.

Happy Scavenging!
-Bethany

* Scavenging is not for everyone, though. If you can't leave your ego at home... if you can't deal with the "embarrasment" of taking and using someone else's junk, you won't have fun scavenging. You can still be a part of it, though. Just leave your junk out by the road in a FREE box. Get a pair of binoculars, seat yourself by a window, and have a good laugh as we pick through your "worthless" old junk.

1 Comment

Residential Geneology: a Free, Fun Pastime

2/18/2015

0 Comments

 
Picture
Sunday is my no-chores, excuse-to-do-non-productive-things day. Often this means watching a movie, playing board games or reading historical biographies. Maybe the John Adams book that I've been working on for 6 months will make it to Goodreads one day.

Another thing I've taken to this winter is studying local history. Who says that all history is made in cities or in the East or West? Even here in Michigan where pretty much nothing happens besides car manufacturing, cold cereal and chemicals, our very backyards are rich with history.

Here's how you can literally study the history of your backyard. This method should work for anywhere in the US.

1. Go to Zillow and type in your address. The description will tell you when your house was built, or at least give you a general idea. 

2. Go to Historicalmapworks.com. Use their search feature to pick your home state, and then your county/township/parish/other local area. When I did my search, there was several plat book years to choose from; 1896, 1915, 1930, 1940, etc. Pick the year closest to when your house was built.

3. When you've found the correct map, find your residence and see who owned the property at that time.  

4. Google search the owner's name. This may bring up birth and death dates, obituaries or any other notable information. If the search comes up dry, a good website to use is Familysearch.org. This site will bring up US Census info, birth, death and marriage records if they are available. 

Find Your Home's Story
Now that you've got the who, what, where, and when, it's time to figure out the why. This is the fun part; finding your house's personal story and reading about its former inhabitants.

5. Look up any old/free books about your county/township/parish's early history. I got lucky- Michigan has a relatively short history, with the very first settlers coming from New York in the 1830s. I found two history books online published around 1900 with many individual stories about the people who settled in my community, right down to school attendance records and how much money was in the church fund. By reading the chapter about my township thoroughly, I was able to familiarize myself with names of the most prominent citizens.

By cross-referencing the history book with the plat book, you can connect people with places. I discovered that my property owner was an widowed daughter of the farmer across the road. When she was 34, she married a 64-year-old widowed doctor/reverend (who immigrated from England as a boy) and bore him two daughters. When they were 5 and 6, the old man died and she moved back home, across the road from her parents' place, presumably to raise her daughters.

In addition to this information, I found out that the farmer across the road had bought the property from one of the original settlers and found native american burial mounds in his field. Pretty cool, I think!

Using this method, you can literally take a historical tour of your own neighborhood. Start with your own property, then look up other properties nearby that are of interest. Then go down to the local cemetery and see if you can find any notable people. It's a fun way to spend a lazy Sunday afternoon. :)

0 Comments

Bookshelf-Only Reading Challenge

2/18/2015

0 Comments

 
Picture
Hey housewives! You know I'm all about not buying stuff, but for years I've been collecting hundreds of dollars worth of books faster than I can read them. It is time that I stop buying books. 

The plan is to read one book per month, post a review and then DISPOSE of the book (unless it is a reference book) by selling or donating it. 

Instead of posting my book reviews on here, I'll be hanging out on Goodreads with a lot of other readers. Are you a reader or just a book-buyer? Let's start improving our lives by reading good non-fiction books that we already own. 

Rules:
1. No buying books on Amazon or other bookstores (high-value books found for free or very cheap at garage sales may be exceptions).
2. Try to read one book every month from your current collection.
3. Post a review on Goodreads.
4. Sell or donate the book so someone else can enjoy it.

Happy reading!
-Bethany

0 Comments

How To Make Hominy

2/18/2015

4 Comments

 
Picture
It's February. That means it's cooooold here in MI. In honor of the cold, I've taken to pressure canning beans and figuring out ways to eat for free.

"For free!?" Yes, for free. Last fall a neighbor said his corn picker had missed a lot and it was all out in the field free for the picking. Non-GMO corn, too. We threw a bunch of ears in the back of the truck and headed back home. 

Aside from free animal feed, one of my goals for the corn was to make hominy- basically field corn that has busted out of its skin and puffed up. It tastes a lot like corn mush or corn meal.

Hominy is pretty easy to make and store. I do mine in larger batches to pressure can. You can also air-dry the finished hominy and boil it before using.

Ingredients for 5-6 quarts:

2 quarts shelled field corn
2 cups sifted hardwood ashes

1. Boil the ashes and corn together for 30 minutes or until the skins start to slip off.

2. Drain excess water off of the corn. Fill the pot up with water. 

3. Using your hands, squeeze the corn kernels in between your fingers and "work it" so the skins slip off. These skins will float to the top of the water.

4. Repeat steps 2-3 until the water/corn is clean to your specifications.

5. Transfer kernels into large crock pot and fill pot all the way up with water (so corn can soak and expand). Sometimes I use a crock pot and let it cook for a few hours, especially if I won't be home.

6. Let the corn cook on High until it has doubled in size and split open.

And that's it! Basically boiling, rinsing, and boiling/cooking some more. The hominy can either be dried or pressure canned. To can, fill hot jars with hominy and cover with cooking liquid, leaving a 1/2" headspace. Process quarts at 10 lbs. pressure for 70 minutes.

Supposedly you can make cornbread, corn tortillas and cornmeal mush with hominy. My first attempts at this have failed, but I will let you know if I find a good recipe. For the time being, Hubs likes it with salt & butter, and also in his chili.

Happy hominy-making!
-Bethany
4 Comments

A President's Home: The Hermitage

2/16/2015

0 Comments

 
Picture
Unlike Rutherford B. Hayes, you may actually stand a chance at being familiar with Andrew Jackson, 7th president of the United States. Jackson was also a military hero, thus elevating his status in the history books.

The Hermitage is a rather popular tourist/road trip/field trip destination 20 minutes from downtown Nashville TN, with its own welcome center, food court and snacks, exhibits, events and tours. It's open from 9-4 in the off season. General admission for an adult is $20; kids are $10 each and a family pass is $54. Admission includes a museum exhibit pass, guided tour of the house and a self-guided audio tour of the grounds, which you can stroll through at your own leisure.

The guided house tour was very quick, in my opinion. We were given a memorized spiel about each room, asked if we had any questions, and then shooed on to another tour guide waiting in the next room. We also (understandably) weren't allowed to take pictures, but that's okay because you can find them online... I mean, in case the tour goes so fast that you forget what the house looked like.

The Hermitage was definitely built to impress, inside and out. 
Picture
Hubs hanging out on the back porch.
The self-guided tour of the grounds was much more relaxed. On one side of the house is Rachel's (the First Lady) garden and the Jackson family burial plot. Although it was cold outside, we also went out back to look through the slave cabins and got to learn about some of the plantation dynamics. One slave, "Uncle Alfred" stayed at the Hermitage his whole life, even after emancipation. He took it upon himself, after Andrew's death, to be self-appointed museum guide and curator. He even made and sold photographs of himself, and had himself buried beside the Jacksons in the family plot. Quite the guy. 
Picture
The smoking/meat house.
After strolling the grounds, Hubs let me spend some time in the rather large gift shop, which was full of cool interesting stuff. I love gift shops. :)

This is a fun stop if you're in or around Nashville TN and like history.
0 Comments

Pressure Canning Dry Beans

2/11/2015

2 Comments

 
Picture
Hey guess what everybody! I found a new way to cook and preserve dry beans all in one. Actually it's not a new idea, but it's really convenient.

1. Soak the beans overnight.

2. Bring beans to a boil (add water if necessary). The longer you boil the beans, the softer they will be. I prefer to just bring mine to a boil.

3. Ladle into clean, hot jars leaving 1" headspace. Cover with cooking liquid.

4. Process in a pressure canner at 10 lbs. pressure (adjust for your altitude); 1 hr. 15 minutes for pints, and 1 hr. 30 minutes for quarts.

Sometimes the cooking liquid leaks out and causes the rings to stick. If this happens, put the jar upside down in a bowl of water for a while. This will cause it to loosen up.

Because we're all too busy in the summertime, right now- February- is a great time to be canning beans. It's fast, easy, and oh-so-convenient when you want to whip up a batch of spicy refried beans or black bean brownies. Dump a can into some leftover rice and salsa.... yummy. Add chicken and pineapple... even yummier. So snatch up all the sale beans you can find and get to canning!
2 Comments

I'm Not Afraid of Math Anymore

2/9/2015

0 Comments

 
Picture
This past winter I conquered one of my math-related fears. Fitting sewing patterns had caused me many, many headaches in the past. It was something I thought I would never understand. But after Christmas I proved myself wrong and drafted my own pattern... entirely from measurements.

That's a lot of numbers! That's a lot of directions-following, a lot of steps and calculations and complications! That's not creative or artsy! I'm not that kind of person, and I hate math, so I shouldn't be able to do that. Or should I? 

The Old Me
One way I used to define myself was, "I'm not a math person." During my 10+ years of formal schooling, I loved the subjects of reading and writing, and despised the subject of math. It sometimes took hours for me to finish the problems correctly, though many of those hours were spent staring out the window wishing I were somewhere else. Algebra was the worst. By the time a test came along I had already forgotten the techniques I had learned in the weeks before. Math brought me no joy and no reward. It made me feel stupid. During these years I bought into the common polarizing lie that you are either an "art" person or a "math" person... and I was not a math person.

I am not the only lady out there who has told herself that. In fact, I know a girl who insisted that she had a "math disability". But I think it's a bad habit to shut ourselves off to potential skills. We should resist being boxed in by bad experiences and what society tells us. We need to tell ourselves the truth: I never had a reason to like math. I am afraid to try anything with numbers because of all the times I messed up in school.

A New Page
Now that I'm out of school, I'm learning that I really am a "numbers person". I love science and math in their practical applications. Math is not about memorizing methods and getting good test scores. Today math is about inches, ounces, kilometers, degrees ferenheit, and dollars. Math is tempering chocolate so it "snaps", planning a garden, using a chop saw or drafting a well-fit sewing pattern. My goodness, math is the difference between being rich or being broke.

What about you? Have you told yourself "I will never be able to do that; I am not that kind of person." We all have the ability to be math people or creative people, foodies or workaholics or people-persons or criminals to some degree. It's all in what we believe, largely influenced by what we hear from others and what we tell ourselves.  

So stop telling yourself you're not a math person.

Happy calculating!
-Bethany

0 Comments

How to Make Mozzarella

2/6/2015

0 Comments

 
Picture
Homemade mozzarella is a fantastic cheese for beginners. It only requires milk, salt, citric acid and rennet. No special starter cultures or bacteria or equipment required. I've been making mozzarella with my fresh, creamy goat milk and Hubs can't get enough.

Ingredients:
1 gal. milk
1 1/4 tsp. Citric Acid Powder
1/4 tsp. liquid rennet or 1/8 rennet tablet
1/2 cup cool water, divided in half

Instructions:
1. Dissolve the citric acid powder into 1/2 cup cool water.
2. Dissolve the rennet tablet/liquid in 1/4 cup cool water.
3. Pour milk into a big pot and add citric acid mixture.
4. Heat to 88 degrees F.
5. Add rennet, slowly stirring for 30 seconds. The milk will start to coagulate, or form curds.
6. Let it sit for 15 minutes to form a big massive curd. It helps to use a timer. When you dip your finger into the curds they will break cleanly over your finger. Whey will fill the depression where your finger has been.
7. Cut the curd into 1-inch cubes. This allows more whey to be released. Allow curds to rest for 10 minutes.
Picture
8. Drain off the excess whey by putting the curd in a cheesecloth-lined colander.
9. Place the post of curds into a sink of very hot tap water and slowly bring the temperature up to 108 degrees. Curds will shrink during this process. Drain curds in a colander for 15 minutes. 

The curds must now be worked and stretched in a brine solution (2-3 oz. salt + 1 quart water).

There are many methods and variations of stretching the curd. Some recipes call for using the whey (with added salt) as a brine. Some call for a water-and-salt brine, and some utilize the microwave. If you're in a time pinch, these methods will work. The basic idea is to heat the curd and stretch it until it is shiny.

10. Heat liquid to 150 degrees, more or less. Place curds into heated brine. Work quickly so the cheese doesn't melt into the brine. Using salad tongs, cooking utensils or rubber-gloved hands, bring the curds out of the brine, pulling and stretching like you would taffy until the cheese is shiny.
Picture
11. Put the stretched in a mold to harden. This can be a casserole dish, tupperware container or even a bowl, but remember the cheese will take on its shape. 

Refrigerate for up to 2 weeks. 

Happy curd-pulling!
-Bethany
Picture
Yum-ness!!!
0 Comments
<<Previous
    Picture

    Bethany

    Housewife, happy wife, and mama to one. :)

    Picture

    Picture
    The Housewife's Guide to Frugal Food
    How to Eat for $10.00
    ​per Week

    Picture
    The Housewife's Guide to Menu Planning
    A Weekly Menu to Save
    Time & Money
    Picture
    The Housewife's Guide to
    Frugal Fruits and Vegetables

    No Garden? No Problem!

    Watch Meals From the Bunker:

    Picture

    Check out my Youtube Channel!

    RSS Feed


    Picture
    Baby Girl's Birth Story
    Picture
    8 Cheap Ways to Eat Healthy
    Picture

    Categories

    All
    Animals
    Book Reviews
    Books
    Christmas
    Cleaning
    Clothing
    Cooking
    Couponing
    Education
    Ego
    Electricity
    Farmers Market
    Finance
    Foraging
    Frugal
    Frugal Accomplishments
    Frugality
    Garage Sales
    Gardening
    Gifts
    Grocery Budget
    Grocery Shopping
    Herbs
    History
    Hobby Farm
    Home Based Business
    Home-based Business
    Home Decorating
    Housekeeping
    Industry
    Languages
    Laundry
    Marriage
    Meal Planning
    Medicine
    Minimalist
    Network Marketing
    Organization
    Plants
    Product Reviews
    Quotes
    Recipes
    ROI
    Rv
    Sewing
    Simplicity
    Spanish
    Spending Report
    Travel

    Archives

    May 2021
    April 2021
    March 2021
    February 2021
    January 2021
    August 2020
    May 2020
    April 2020
    March 2020
    February 2020
    January 2020
    December 2019
    November 2019
    October 2019
    September 2019
    August 2019
    July 2019
    June 2019
    May 2019
    April 2019
    March 2019
    February 2019
    January 2019
    December 2018
    November 2018
    October 2018
    September 2018
    August 2018
    July 2018
    June 2018
    May 2018
    April 2018
    March 2018
    February 2018
    January 2018
    December 2017
    November 2017
    October 2017
    September 2017
    August 2017
    July 2017
    June 2017
    May 2017
    April 2017
    March 2017
    February 2017
    January 2017
    December 2016
    November 2016
    October 2016
    September 2016
    August 2016
    July 2016
    June 2016
    May 2016
    April 2016
    March 2016
    February 2016
    January 2016
    December 2015
    November 2015
    October 2015
    September 2015
    August 2015
    July 2015
    June 2015
    May 2015
    April 2015
    March 2015
    February 2015
    January 2015
    December 2014
    November 2014
    October 2014
    September 2014

    Full Disclosure & Disclaimer

    Picture
    Picture
    I get cash back for many online purchases including wedding gifts and Ebay stuff!

Powered by Create your own unique website with customizable templates.
Photos used under Creative Commons from dasWebweib, amanessinger, thewritingreader, diakosmein