the Renaissance Housewife
  • Home
  • Topics
    • Saving >
      • Kitchen >
        • Food >
          • Recipes
      • Bath & Laundry
      • Medicine Cabinet
      • Office
      • Electricity
      • Gardening
      • Foraging
      • Animals
      • Weekly F. A.'s
      • Printables & Downloads
    • Earning
    • Investing
  • Books
  • About
    • RH Recommends
    • Newsletter & Updates
    • Travel
    • Beta Readers
    • Legal Stuff

How to Hem Jeans

10/30/2015

2 Comments

 
Picture
Picture
Before
Picture
After
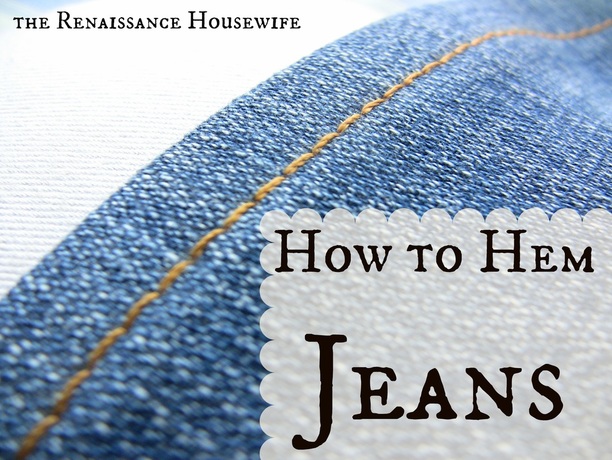
Do you ever get tired of stepping on your jeans? I do. I get tired of dragging a clump of threads behind my feet as I take each step, chewing up what is left of the back of my pant legs. Several weeks ago on a Sunday morning, I got tired of all this nonsense and chopped the bottoms off until they were only a half-inch longer than needed. Then I folded up the end and stitched along the bottom. It wasn't the best job ever, but at least I didn't have any raggy tag-alongs. Relief!

Up until recently, I would just flip up the bottoms of my too-long pants. I mean, that's cool, right? Maybe not, but they were NICE jeans and it wasn't like I was going to cut them up. Besides, they looked great when I wore heels or boots. The problem was: they were nice jeans. Before stepping on the hem for months started wearing them down to a mess of dirty threads.

Extending the Life of Jeans
In addition to patching, hemming to the correct break point (that is, where to pant leg falls on your shoe) will extend the life and usefulness of any pair of jeans. 

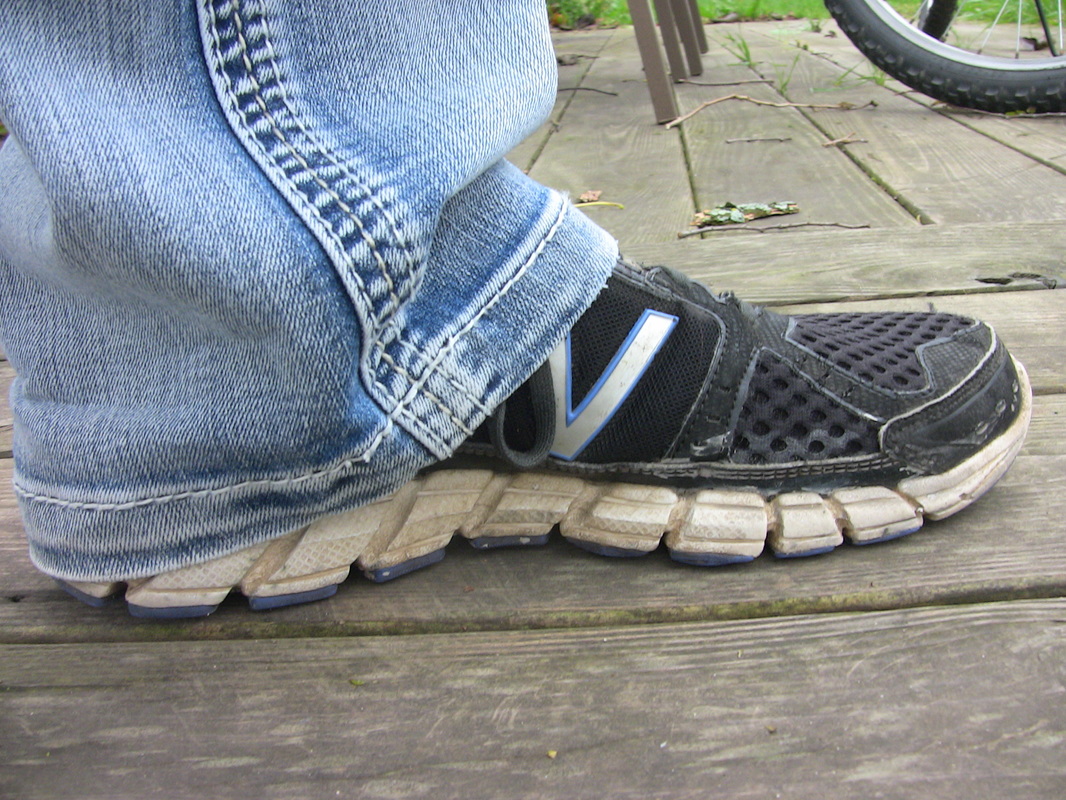
Before you start cutting, it's important to know what shoes you normally wear with each pair of jeans. This will affect where your hemline should be. Longer hems are better with high heels and boots, but shorter hems work great with flip flops or ballet flats. Tennis shoes- what I wear with most jeans- are somewhere in between.

There are a million different "guides" out there to how long your jeans are supposed to be. I found that the best guides were actually from men's websites. Sites for women were all over the place in regards to hem advice, and most of it was based on unflattering fads like skinny jeans or ballet flats. I didn't see a single site that addressed wearing tennis shoes or anything else that is actually comfortable. Women's fashion is so fickle.

How to Hem
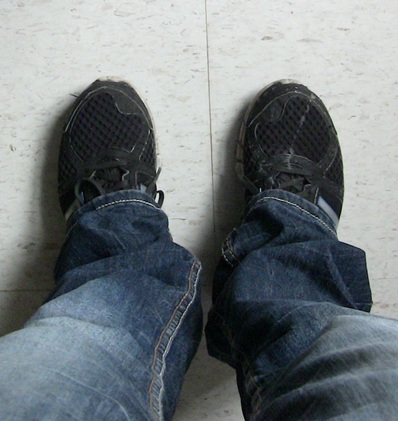
1. Determine the proper break for your jeans. You can do this by folding and pinning, and then looking at the hem in a mirror. In general, you want the hem to fall on the top of your shoe, but not be all bunched up. And you want to be able to walk around with stepping on your pants. Once you have found the right length, sit down. Are you flashing a bunch of ankle or sock? You don't want to look perfect when you're standing up and dorky when you sit down, because let's face it- most of our lives are spent sitting down anyway. 
Picture
This one is a little too long.
Picture
Folded under to desired hem length. Add 1" for hem, then cut.
After you determine where you want the hem to fall, add one inch* and cut off the extra. On this pair of pants, I only ended up cutting about an inch off each leg, even though I wanted the hem to be two inches shorter. It's important to leave some seam allowance! You can always cut more off, but you can't put it back on.
Picture
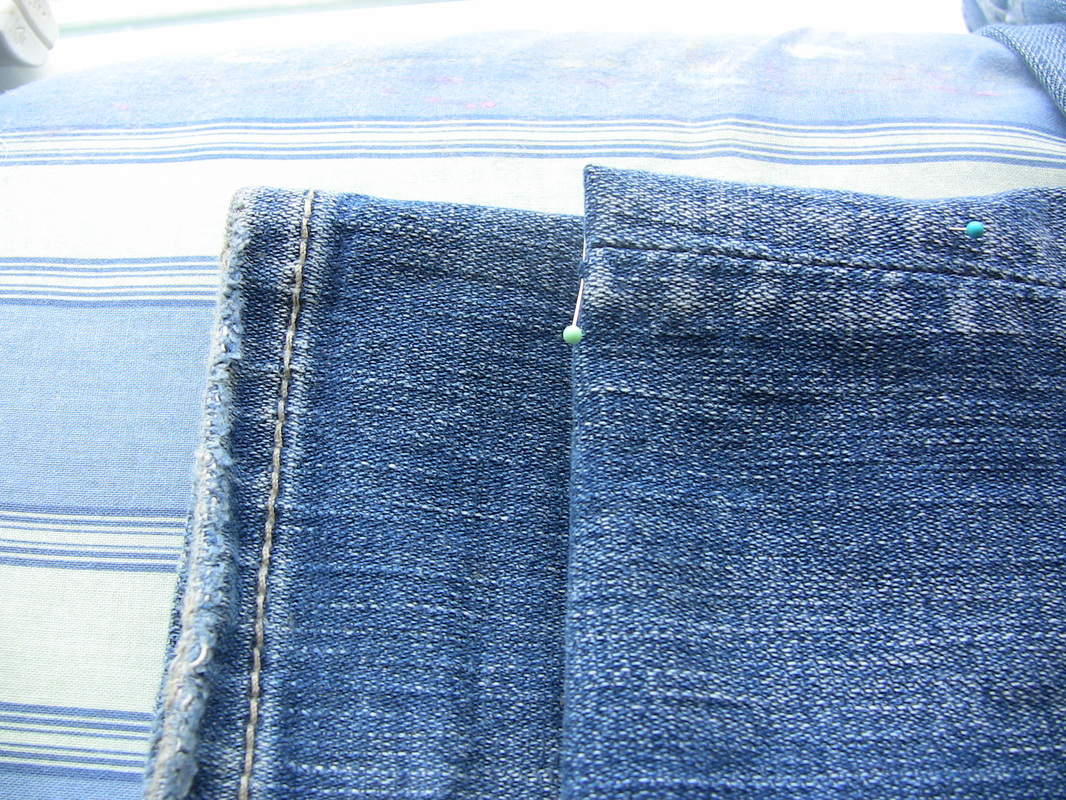
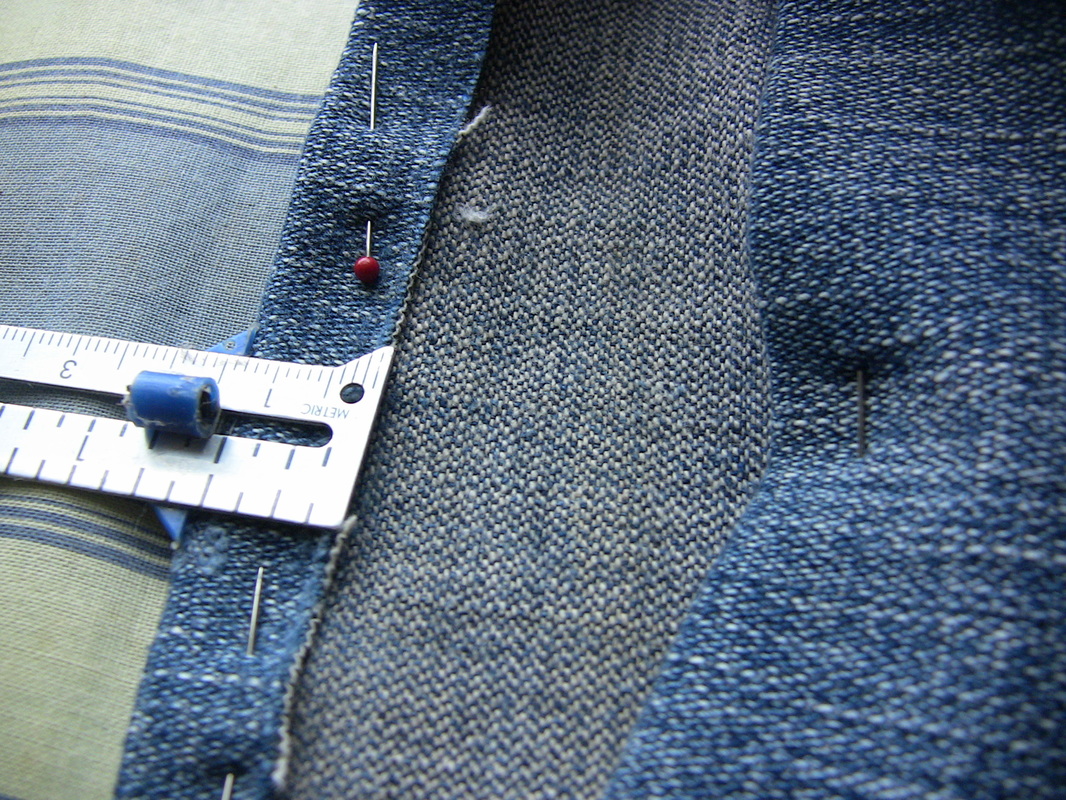
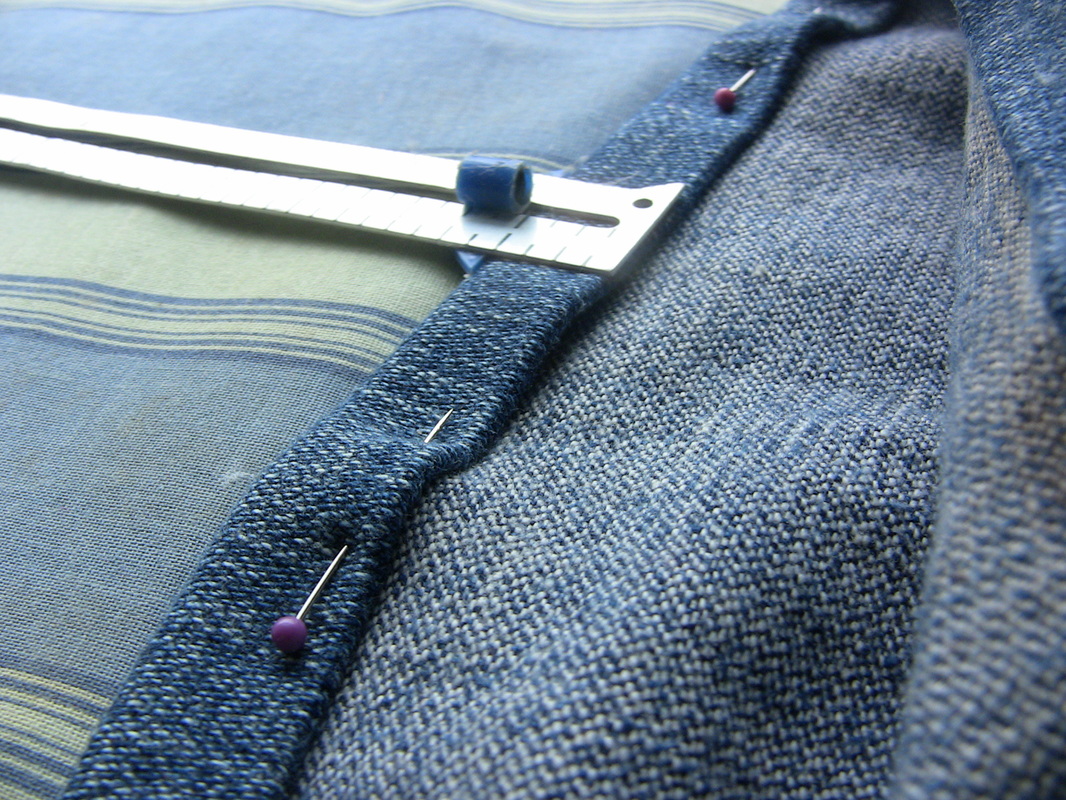
Fold the end under a half inch, and then pin it down. Use a hem gauge to keep checking for the right length. After you've pinned everything, iron it little by little. Take out a pin, iron that section, put the pin back. Take out another pin... you get the idea.
Picture
Now it's time to do it all over again. Fold the hem up another half inch; this hides any raw edges. Take out a pin, fold over another half inch, iron, and pin it back into place. Unpin, fold, iron, pin. Repeat until the whole leg is done. If you are working with flared jeans, you may have some issues with puckering and/or stretching. Here is a great tutorial for working with flared or tapered jeans. In fact, I am binge-reading her website like candy right now... you should too, after you finish reading this.
Picture
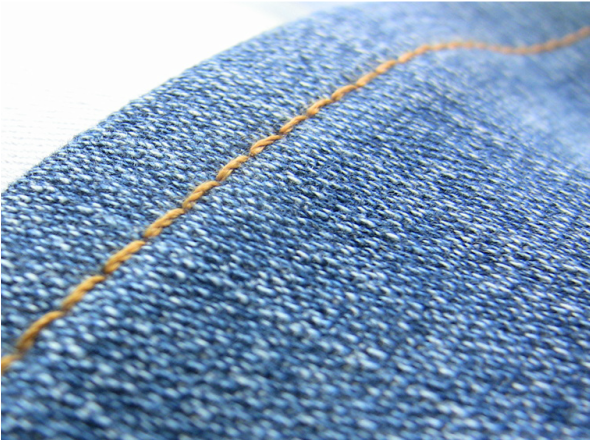
Load your bobbin and thread your sewing machine with orange (or another color) thread. I use "Dual Duty Plus" from Walmart, advertised as "extra strong for jeans". It's a little more expensive, so hemming is about the only thing I use it for.

Sew 3/8 inch from the bottom of the pants, all around each pant leg. You want the stitch length to be pretty long. You might have to slow down and gently work your way through thick side seams. Usually the inseam is the thickest. While you are sewing, try not to stretch the fabric. This can make the fabric bubble in and out.
Picture
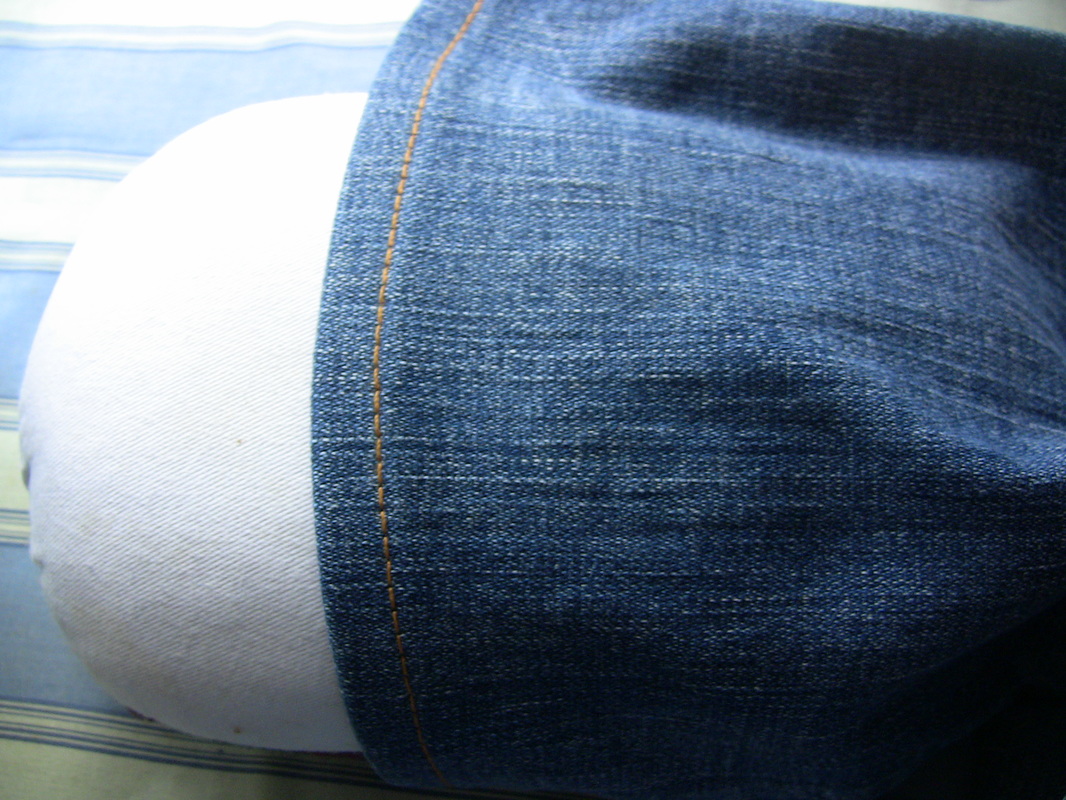
After you've finished sewing, iron the hem from top to bottom, with the grain line. If you iron the pant leg from left to right, it will skew the hem line. Ironing is very important. Here I'm using a round pressing ham to make it easier.
Picture
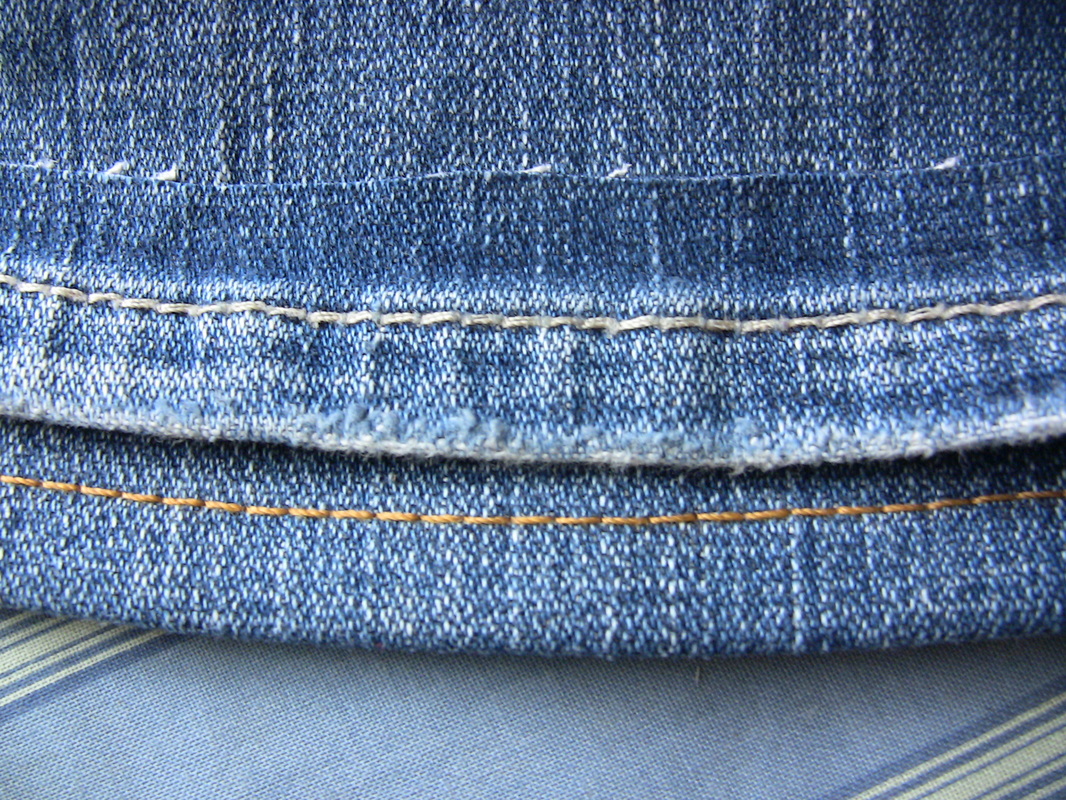
The new hem will be a little more stiff than the old one, and it won't be distressed. There are plenty of tutorials and Youtube videos that show how to distress jeans. I might do a tutorial on this when I get it figured out. :) 
Picture
Not to short, not too long!
I'm really looking forward to not stepping on the backs of my pant legs!

Do you find that pants are always too long or short on you? Have you had your pants hemmed before, or possibly hemmed them yourself? Tell me about it!

-Bethany

*This is just a standard length to add. Some jeans have wide hems (1" instead of 1/2"- this means you would have to add 1.5-2" past the break point marked with pins) and you can make the hem as wide or narrow as you'd like. One inch (a half inch for each time you fold up) is easy to remember, though.
2 Comments

Bookshelf-Only Reading Challenge Revisited

10/28/2015

0 Comments

 
Picture
​From what I can tell, the last book review I posted on Goodreads was in June. Oops! According to my bookshelf reading challenge, I'm supposed to be reading one book (that I already own) every month. While I haven't posted reviews in July, August, September, and October, I've still managed to get some reading in.

However, I must admit that in July I broke down and bought a new book. It was a very unique book that I had 0% chance of finding at a garage sale. I paid $10 for the Kindle ebook, Early Retirement Extreme by Jacob Lund Fisker. You can read my review and why I didn't think I got my money's worth over at Goodreads.

In the meantime, I'll restate WHY my bookshelf-only reading challenge is a great idea, and how it is still possible to get a great education with free or cheap books.

Save $120+ Per Year
If you are a voracious reader, you probably spend a lot of money on books. Books are like your candy. When a new one comes out, you just have to have it. After I got my Kindle several years ago, I was spending about $10 a month (that's only ONE book people!) on ebooks alone, not including other used books that I bought on Amazon. It was just so easy to click and buy. It wasn't so easy to finish reading a book before I found more books that I just had to have. It came to the point where collecting books was more my hobby than actually reading them.

Now I'm at the point where I'm starting to chip away at my book collection. My goal this year was to read and then donate or sell one book per month. Out of my 263 real books and 60 Kindle books (yep, I just counted), I've been able to finish and review eight this year. Not a bad start, really. Hopefully before Christmas I'll be able to finish reading and review a couple more. If I read 12 books per year, my collection should last at least 26 years.

The Good News- More Books for Less Money
The good news is that going on a Bookshelf-Only Reading challenge (even for 26 years) is not as hard as you think. Here were my rules:

Rules:
1. No buying books on Amazon or other bookstores (high-value books found for free or very cheap at garage sales may be exceptions). A good rule for garage sale books is to not pay more than $1.
2. Try to read one book every month from your current collection.
3. Post a review on Goodreads.
4. Sell or donate the book so someone else can enjoy it.

Even if you don't shop at bookstores, there are plenty of VERY affordable books at thrift stores and garage sales. In 2015 I bought probably 15 books at garage sales, thrift stores and library book sales. In addition, I was also given some books. I also downloaded at least ten free books on to my Kindle. 

You can see that even if I NEVER buy a book from Amazon (or any bookstore) again, I won't run out of new reading material. At this rate, I'm still more a book collector than a book reader. But simply cutting out bookstores and Amazon purchases has allowed me to spend far less on this habit. It's like a coffee addict who stops going to coffee shops. He's still a coffee addict- just a richer one.

Free Books are Just As Good
After you've read so many books, you'll find out that really, there is nothing new under the sun. In almost every area except technology, information remains the same. Reading a history book from 1890 will provide almost the same story about George Washington as a history book from 1930 or 2005. Most authors and publishers are great at repackaging and marketing information. Cooking techniques, marriage advice, herbal medicine- none of it really changes. And if there is truly something new out there, it is probably available for free on the internet.


What does this mean for us? Simply that any book written in the last century is probably just as good as most written last week. And many books in the public domain (anything pre- 1923) are available online for free.
Even Kids Can Thrive on Free Books
One of the funniest things is when frugal people buy the latest and greatest homeschool curriculum for their 5-year-olds. Really, guys? You're teaching a kid to read! People have been doing this for ages, before education was cool. Dick and Jane will work just as well as BOB books or any other boutique learning fad. At a yard sale recently I picked some curriculum I hope to use for my kids, should we be blessed to have any. It is a 50-year-old children's book called "Our Wonderful World". It has easy and hard words. It is illustrated by some of my favorite artists, including Garth Williams, who drew pictures for Laura Ingalls Wilder. It has stories about plants, seeds, birds, fish, boats, and farmers. It has charts of different kinds of crabs, the solar system, and how to carry and fold a United States flag. Of course somebody tore off the front and back covers of the book, but no 5-year-old is going to know the difference. This one book (along with some refrigerator magnets and other assorted toys and games) will serve as English, Reading, Geography, History, and Science for preschool and some of elementary school.  
Picture
Of course this lesson will necessitate a nighttime field trip to the back yard.
Though I do expect to buy a new book here and there in my lifetime, it will be more for convenience than anything. I know that there is nothing new under the sun, and the best, most time-tested stuff can be had for free... or at least less than a dollar. :)

Happy reading!
-Bethany
0 Comments

New Farm Friends!

10/27/2015

1 Comment

 
Picture
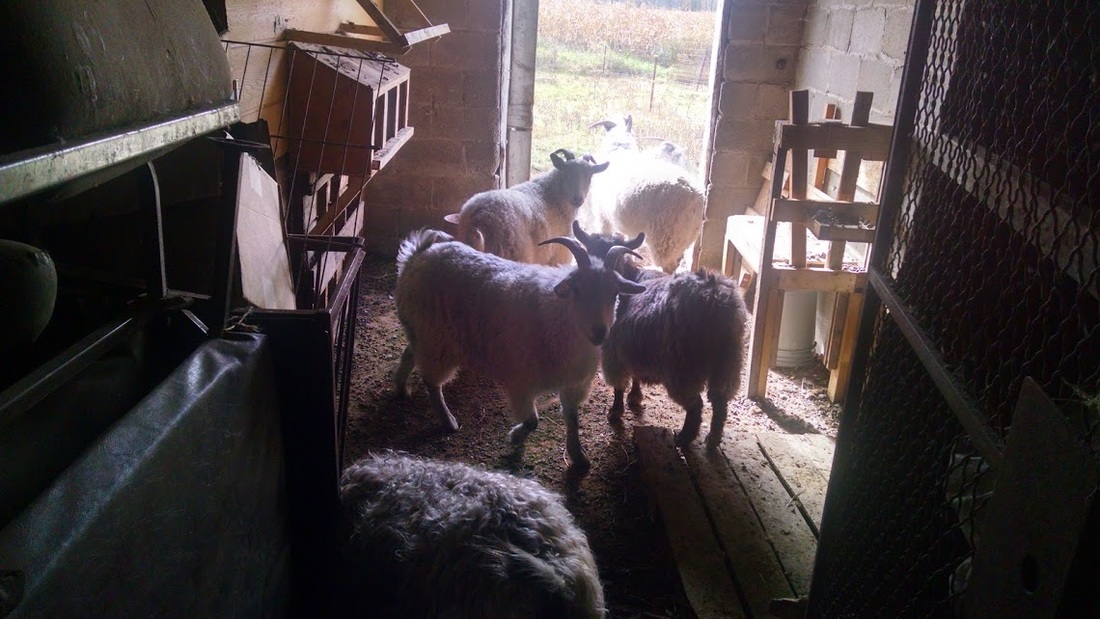
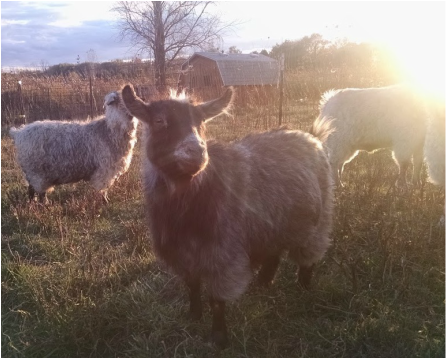
I'm excited to announce that we've TRIPLED the size of our little hobby farm! A family friend was downsizing her farm, and we inherited six beautiful Pygora goats and a big family of chickens.
Obi, Adi, and Hilda (the sheep) meet our new friends.
Picture
Pygoras are a multi-purpose breed of goat. A cross of pygmy and angora, they can be used for milk, meat and wool. The former owner has offered to help me learn how to shear and spin the fiber, which I am SUPER excited about!! 
Picture
After the animals arrived, we took the opportunity to finish expanding our pasture and make some upgrades to the barn area. It was getting a little crowded.
Picture
We took down the separating wall (to the left, above) and also removed a whole gob of school bus seats. Yes, we had a pile of school bus seats in the barn.
Picture
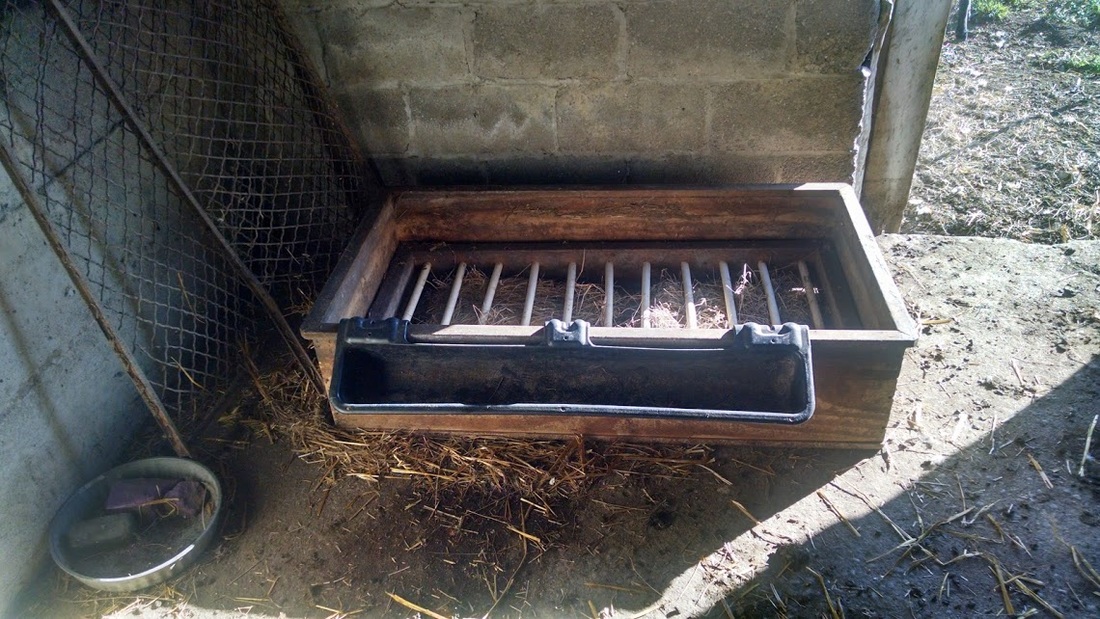
A new hay feeder.
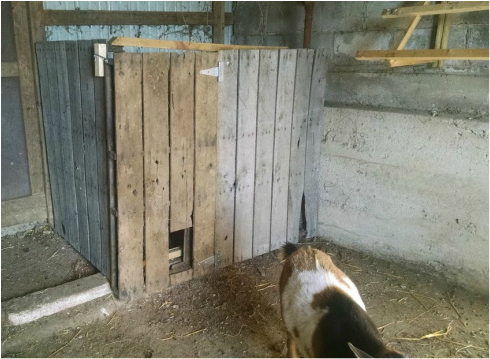
In preparation for the arrival of more chickens, Hubs helped me make a "chicken corner" instead of having a separate chicken coop. This makes it easy to feed the goats, sheep and chickens all at one time. Over the summer we had eight chickens wandering around. They liked "sharing" food with the goats. With winter coming and tripling the size of our chicken flock, I thought it would be a good time to start giving them real laying mash. Apparently, chickens can eat goat feed but goats aren't supposed to eat chicken feed, so we had to separate the chicken feeding area.
Picture
The Chicken Corner, complete with a little chicken door.
We put nesting boxes into the chicken corner as well, and I took the opportunity to refill the boxes with sawdust. Hubs put up a new roosting area (upper right hand corner) as well. 

In the future, I look forward to writing about our co-housing experiment with the animals. So far, it has worked out well. The goats act as good guard animals for the chickens so we don't have to lock them up at night. The goats eat up brush, the sheep munches on shorter grass, and the chickens dig through the dirt and pick out bugs. 
Picture
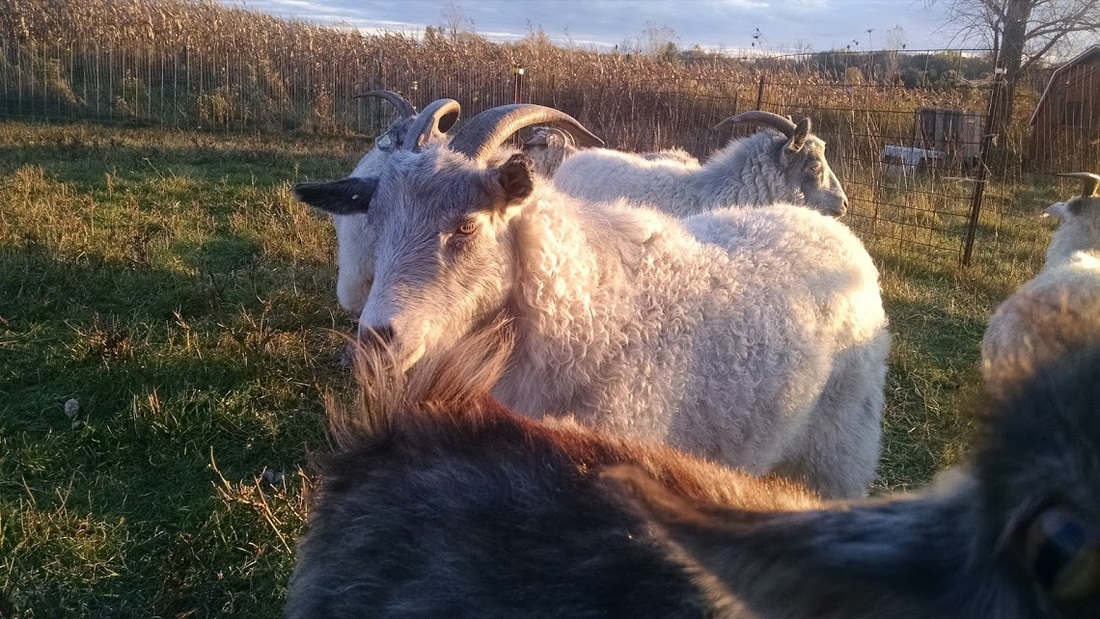
Fiona likes the camera.
So far, the new goats are settling in well.
Picture
Til next time,
​-Bethany
1 Comment

 The Ebay Flip Project

10/26/2015

2 Comments

 
Picture
Hey peeps! Last week we ended the farmers market experiment, where I got a 70% return on my initial monetary investment, but ended up working for $1.54 per hour. In November I'll be trying my hand at a different venture; selling vintage sewing patterns. 

An Old Gig
I'll admit- I'm pretty excited about this new project because I've done it before. Unlike selling at a farmers market, I know what sells best in my Ebay niche and the best way to sell it. In the past, I've purchased patterns for $5 and resold them for $30. Not to brag, but that's a better return than many weeks at the farmers market.

Why Sewing Patterns?
There are several reasons why I like selling patterns as opposed to other vintage finds. 

1. I love them. The only reason I don't keep all of the patterns I find is because I will never have time to use them all. It makes me happy to offer some of these beautiful vintage patterns to the general public on Ebay. 

2. I know them. Having sewn for many years, I'm comfortable and familiar with using patterns. When I was still in high school, I used my very first vintage pattern and it was WAY different than I was used to! The pattern came pre-cut, and all of the markings were punched out with holes instead of printed. There was not a drop of ink on the whole pattern. This made it confusing at first, but later I got the hang of it. As I bought and used different eras of clothing patterns, I learned how to read, identify and take care of the pieces. 

3. They don't cost very much. If you buy them at garage sales and thrift stores, patterns seldom go for more than a dollar each. Antique stores charge a bit more, but you can still make money if you buy the right patterns. If you know what to look for, you can re-sell them for $5 and up.

4. They don't cost very much to ship. Because they are so light, I offer free shipping on any patterns I sell on Ebay. This often costs less than a dollar, and it attracts more buyers.

My Treasure Box
This Spring, I found an entire box of vintage patterns at a garage sale. Each pattern was selling for $0.25. I could feel my heart rate climb as I snatched up piece after piece. My hands were full when I found the gem-  a mid-century glove pattern. Forget this! I said to myself. I'm buying the whole box! After some haggling, the owner sold it to me for $6.00. I knew I could sell one pattern and recoup the cost of the entire box, so it was a great deal. At home I drooled over my finds, and then put them away until winter.

Well, winter is upon us. November is a great time to sell things on Ebay, because Christmas is coming but also because more people have time to work on sewing projects. I'm hoping to make a lot of money on this treasure box. Join me in the following weeks as I attempt to sell as many of these patterns as possible, for the highest price possible.

What will the ROI be on my $6.00 treasure box? Next Monday* we'll start selling.

-Bethany 

*All fellow Ebayers probably know that Monday isn't the best time to end an auction. This is true. I'll actually be scheduling my auctions to end on Sunday, so each Monday I'll be able to review what I listed and sold over the weekend. :)
2 Comments

Growing & Using Mustard Seeds

10/23/2015

0 Comments

 
Picture
One of my garden experiments this year was growing mustard seeds. In March, a fried mentioned that she had never made mustard. I remembered making some mustard in high school as a 4-H project. It was 1) stinky, and 2) expensive. I bought about $8 worth of ingredients to make a pint of mustard. I'll never do this again! I thought. Especially when you can buy mustard for $0.88 per bottle.

As I remembered that experience, a thought came to my mind. What if you could grow the seeds yourself? The most expensive part of making mustard is the seeds and mustard powder (which is just ground mustard seeds). The cost would come down to almost nothing if you had free seeds.

Growing
So, pulled out my tin of mustard seeds that I'd bought in 2014 for making relish, and I planted a few in some seed starter. In a few days (to my surprise), they sprouted! I tried transplanting the seeds, but the seedlings died outside in the colder weather. Then I tried sowing some directly in the garden, which was more successful.

My mustard plants grew to be 3-4' tall and fell over from their own weight. Because they were covering some of my other plants, I tied them all to a stake. This seemed to work well.

Harvesting
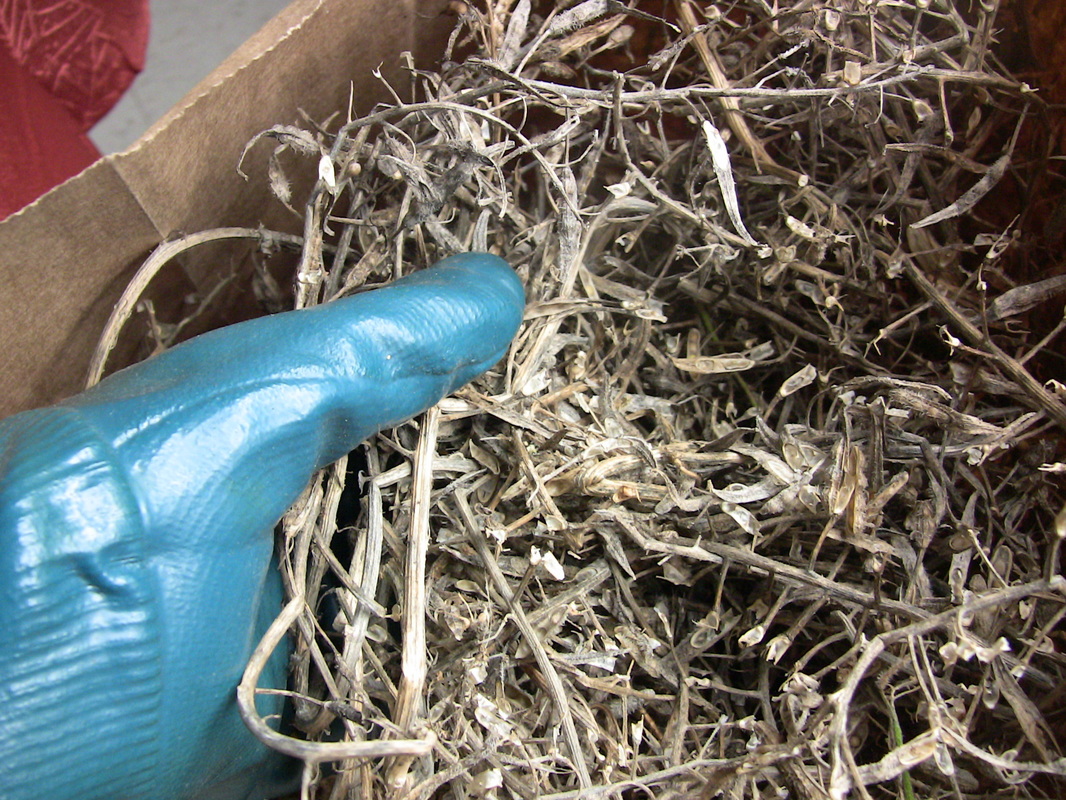
After the seed pods were done growing, they turned a tan-gray color and dried out. I cut off branches full of pods and put them in a paper grocery bag. After folding up the bag, I took it inside and shook it as hard as I could. The shaking was enough to open a lot of the pods and release the seeds to the bottom of the bag. Then I put on some rubber-coated gloves and crushed the remaining pods with my hands.
Picture
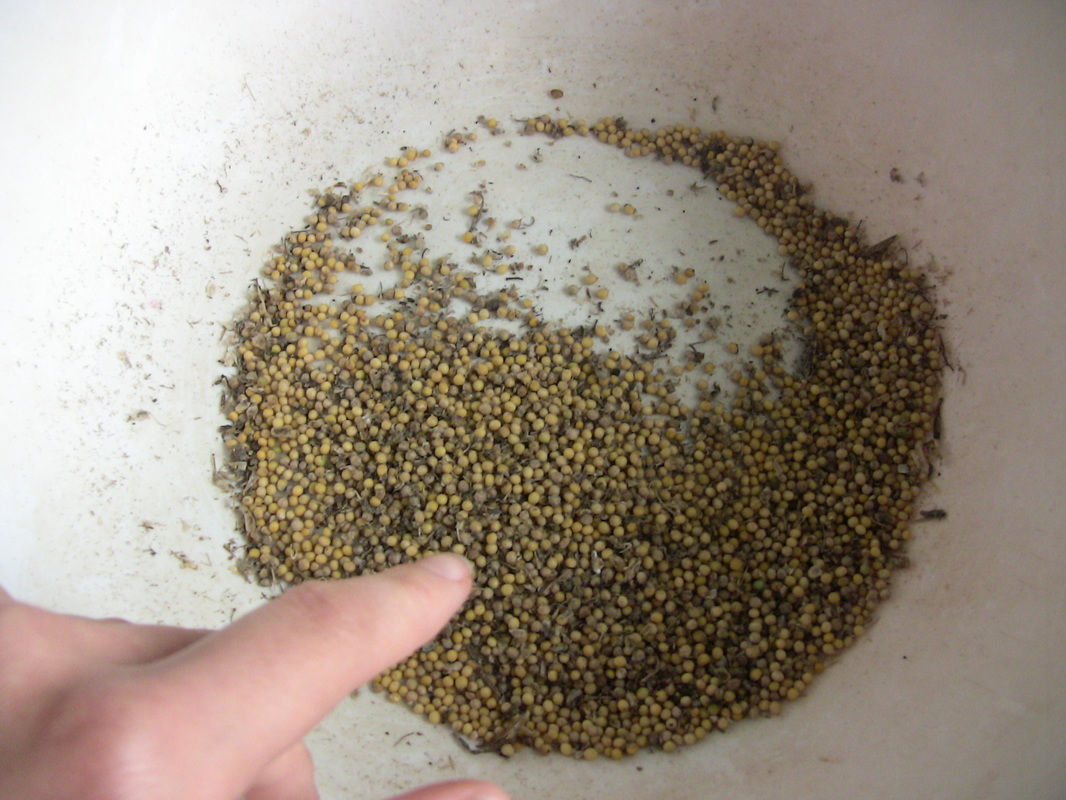
After crushing and shaking, crushing and shaking, I had released as many seeds as possible. After removing the pods and branches, I poured the seeds from the bottom of the bag into a bowl.

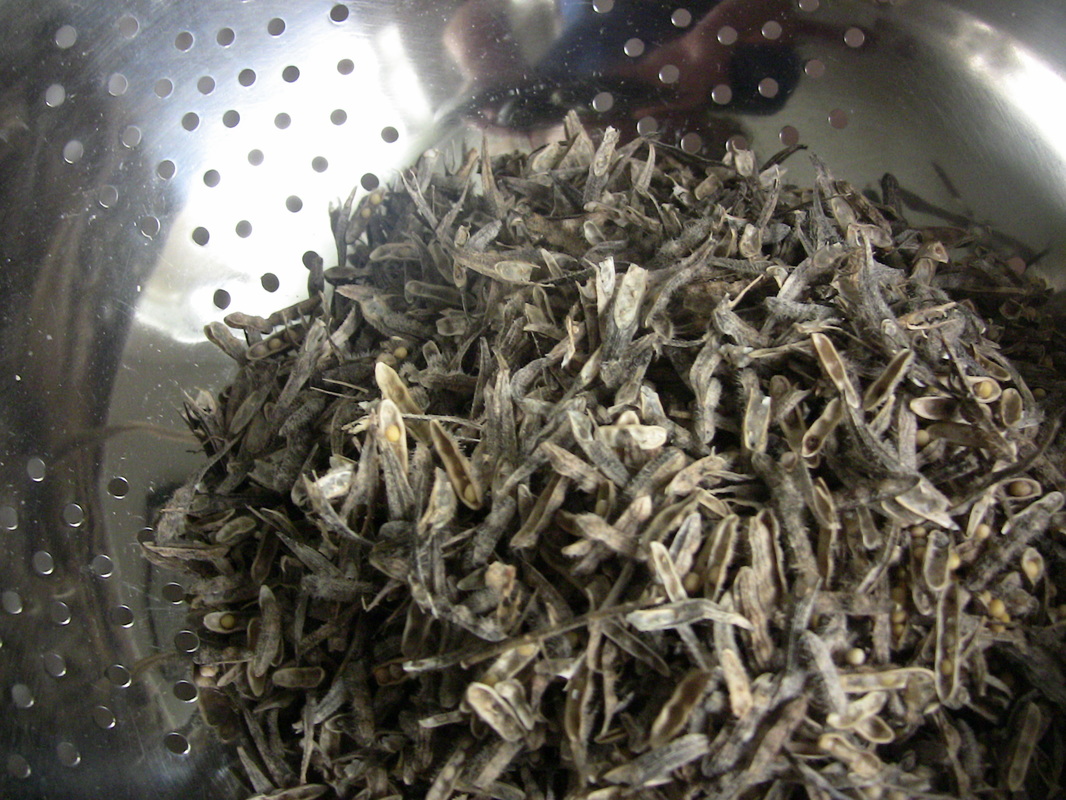
There were still a lot of stray pods in with the seeds, so I put it all into a colander, again moving the pods around with my hands. The seeds fell through the colander, while the pods and larger pieces of debris stayed on top. There was a bowl underneath to catch the seeds.
Picture
Picture
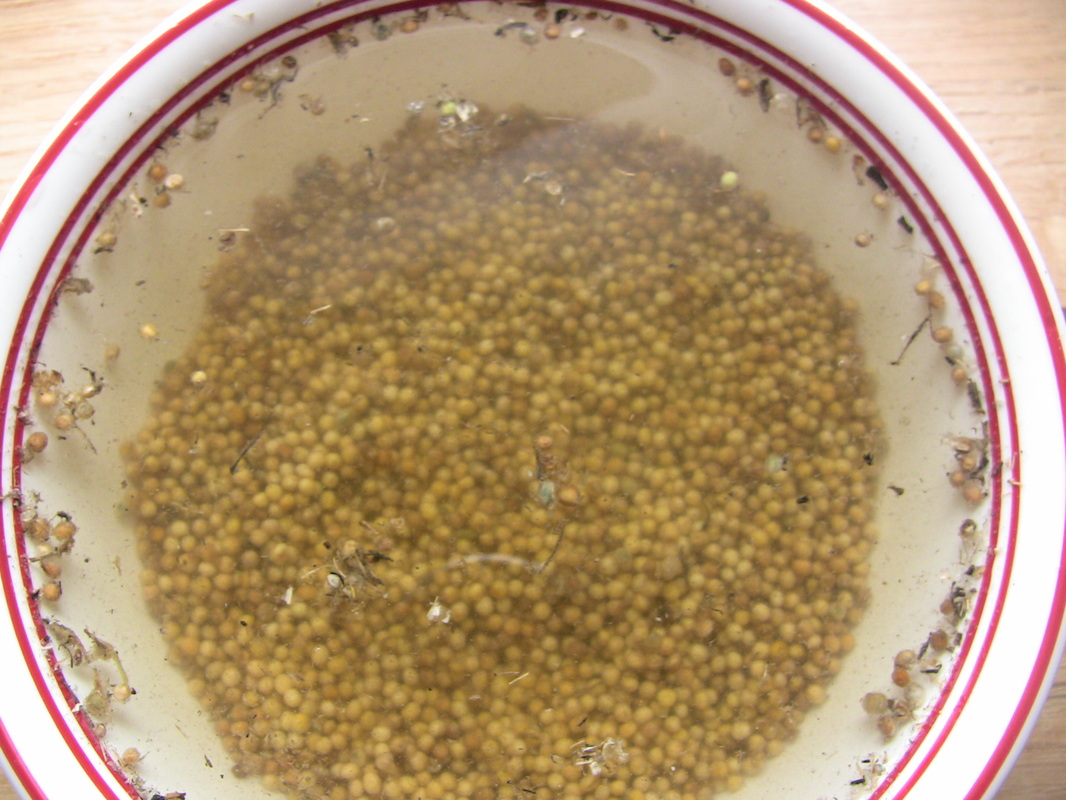
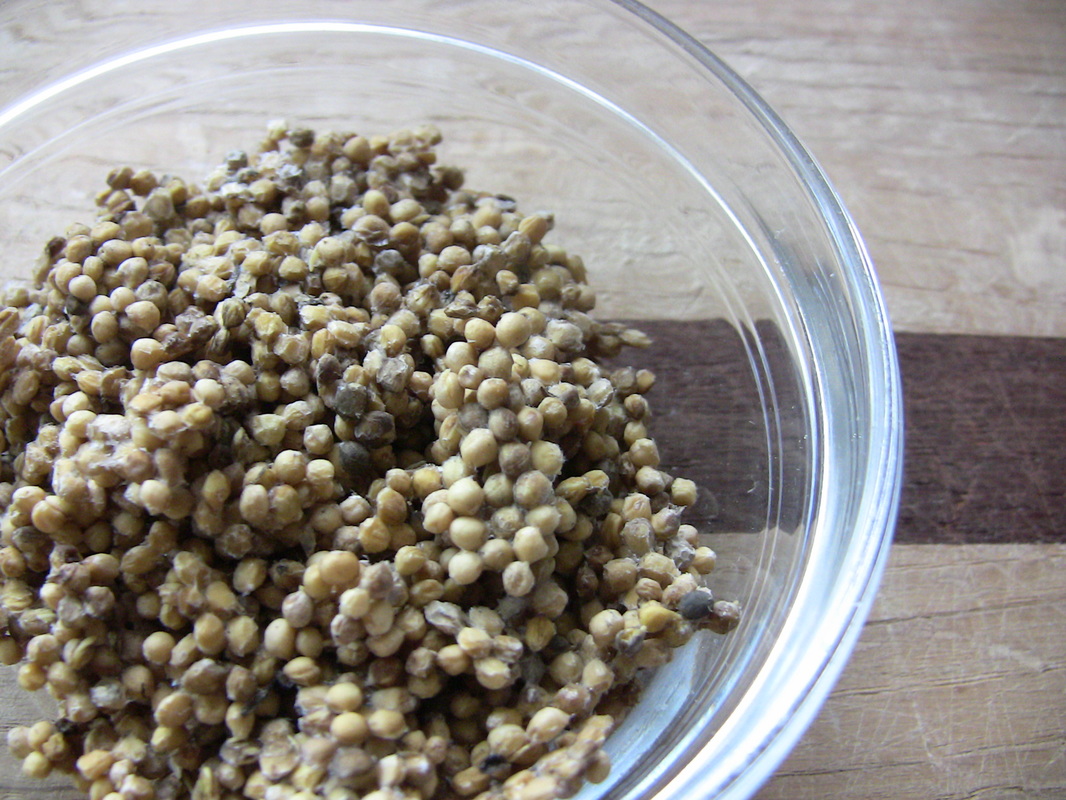
To remove the small debris, I poured the seeds into a smaller bowl and added water. After stirring, the good seeds sank to the bottom, while the bad seeds and debris floated to the top. I scooped out the debris.
Picture
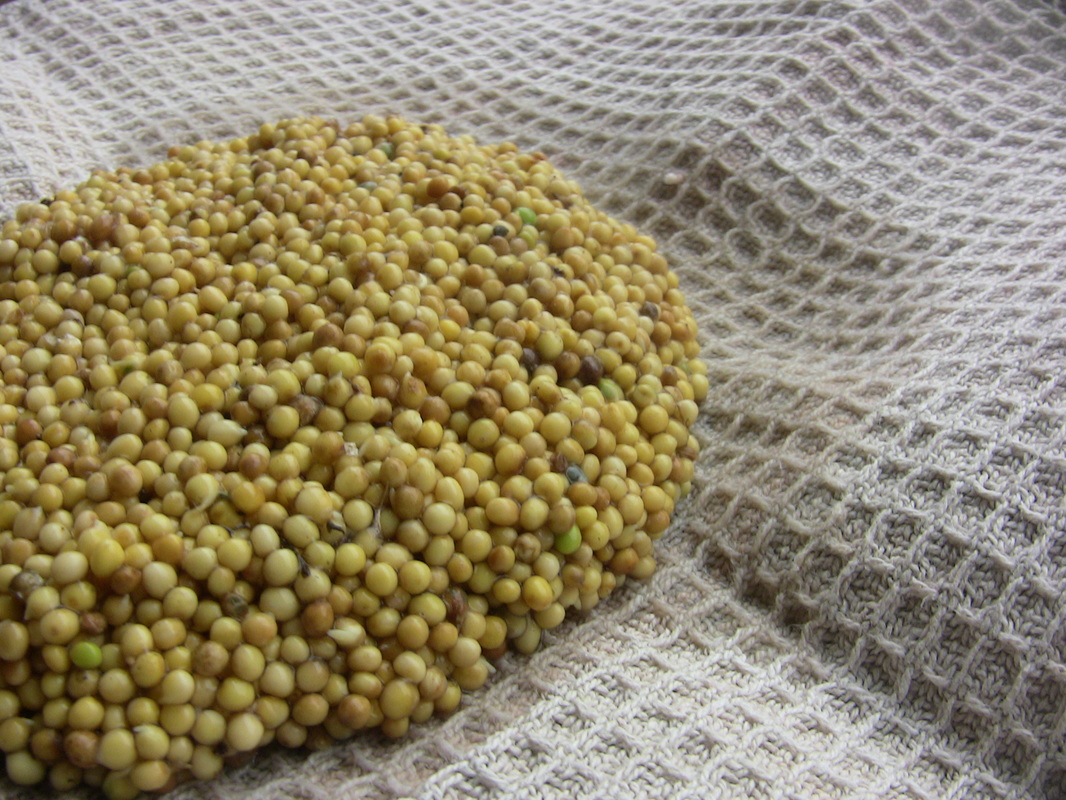
After that, I poured the water off the top and poured the seeds onto a washcloth to remove the rest of the water. To my surprise, the seeds were kind of slimy.
Picture
After that, I dumped/scraped the slimy seeds on to a cookie sheet and put them in the oven to dry like I would any other herb. The pilot light in our gas oven is enough to dry most herbs in a few days. After the seeds were dry, I picked them off the cookie sheet. The slime made some of them stick together.
Picture
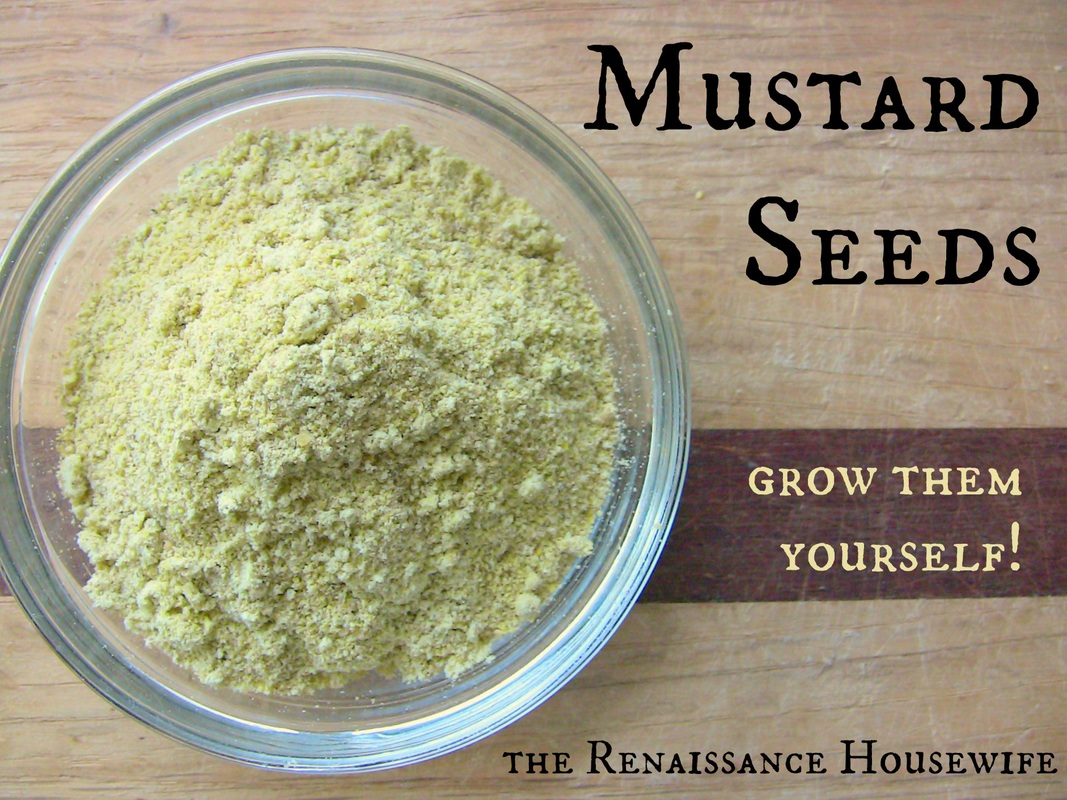
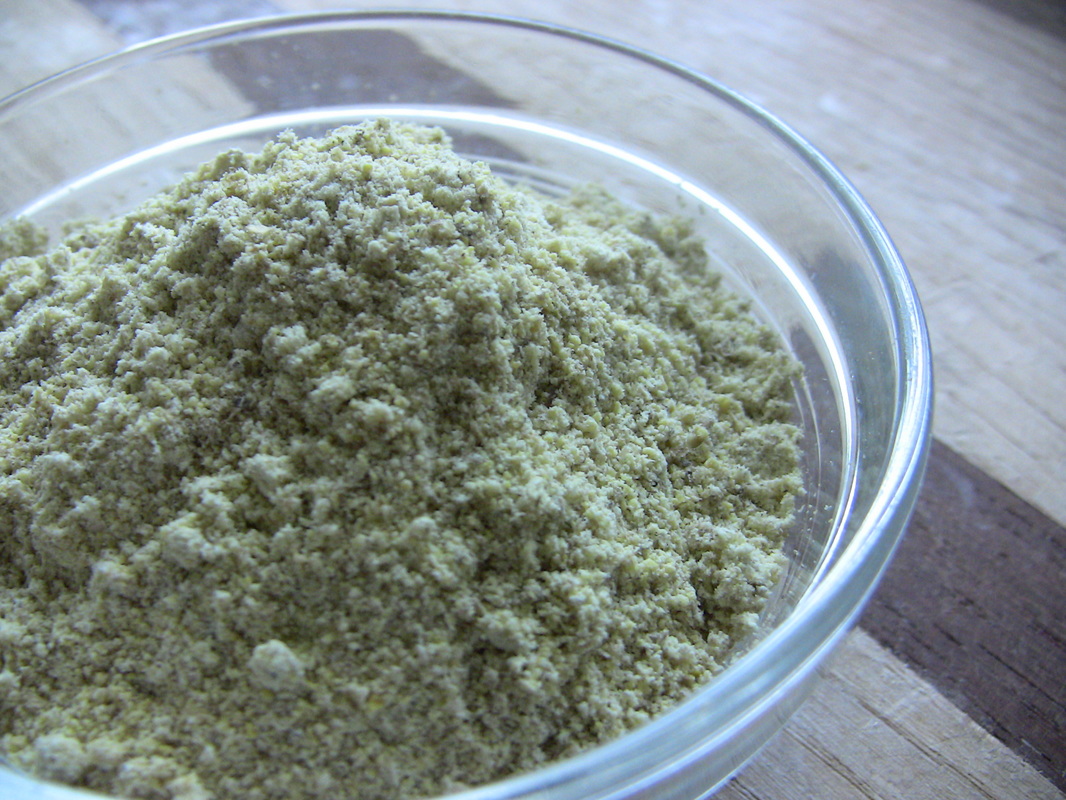
And now, the fun part! I poured all of the seeds into my Vitamix Dry container and pulverized them to pieces. This made some wonderful mustard powder. Altogether, I got 1/3 - 1/2 cup of powder.
Picture
Bought from Kroger, this amount of spice costs about $4.00. When I made my own mustard, I spent $4 on mustard powder and a little less on mustard seeds. Thus, if I went out and harvested the rest of my mustard seeds, I will have collected $8.00 worth of product from my mustard plant.

Is It Worth It?
I'll admit- harvesting mustard seeds is a little time-consuming. It's not like other herbs where you just cut them, pop them in the oven to dry and pulverize them. Because of this, and because of the fact that Hubs and I don't use very much mustard, I'll probably just buy mustard in the future. A bottle of $0.88 mustard will last us an entire year.

However, I do think it is worth it to grow your own seeds to use as a spice. I'll probably continue to grow mustard every few years, but not every year. My current supply of homemade mustard powder will last at least two years if I use it as a seasoning and not to make mustard. 

If someone is dead set on making their own mustard or buying gourmet mustard (at $8 or more per bottle), than it might be worth it to grow their own seeds to make condiments with. Otherwise, they would be better off just spending $1 every year on mustard. If I use my precious homegrown seeds to make mustard, they are worth less than a dollar. If I use them to make mustard powder and mustard seeds, they are worth $8. I probably have 3-4 hours into planting, weeding, staking, picking, sorting, washing, drying, and powdering the seeds. This brings my hourly wage to about $2 if I make spices, and $0.25 per hour if I make condiments with those spices. It seems wrong, but that's just how everything works out. 

The other thing about mustard seeds is that they take up a lot of garden space. In my opinion, this space (that you are going to have to weed and mulch and water anyway) is better used to grow something like tomatoes, which can also be used to make condiments but yield a whole lot more condiment per square foot.

Do you like mustard? Have you ever made your own?
0 Comments

Fall 2015 Garden Update

10/21/2015

0 Comments

 
It's time for my fall update! The first frost has hit, all of my vegetables have been harvested and now we're preparing for next year's garden. For the months of July, August and September I only picked vegetables. No weeding, watering, mulching or other maintenence. I picked a ton of beans and tomatoes. My cucumber plant did not do well at all; I think I picked three cucumbers, and then the plant shriveled up and died. Likewise my corn didn't do very well either. I used non-hybrid seeds this year, and also planted a bit late. The kernels on many cobs were scarce and crooked. 

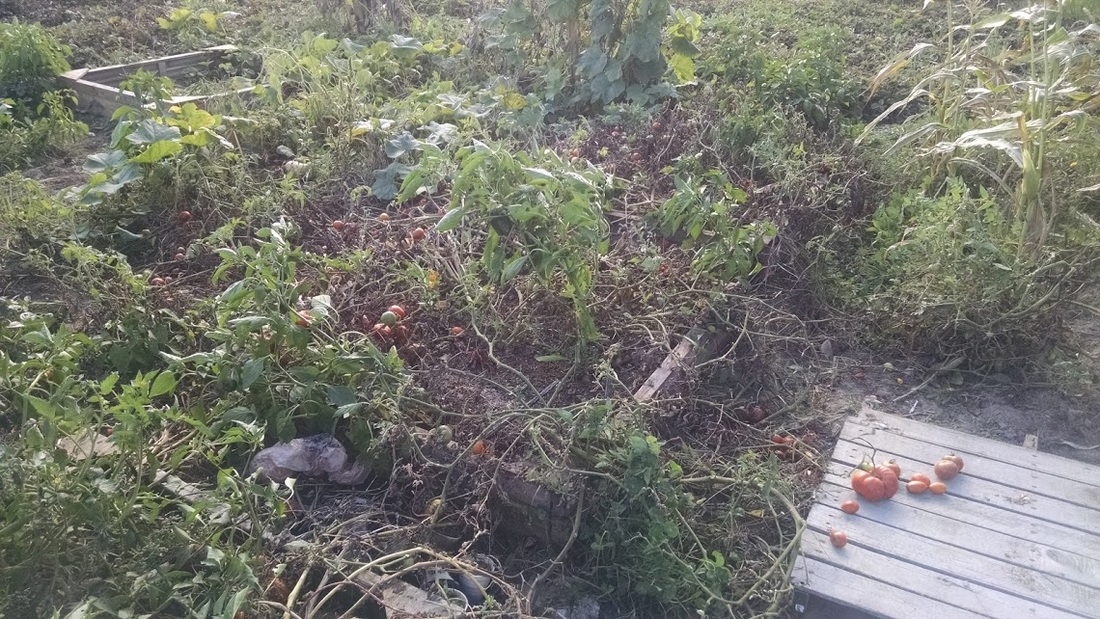
It may seem strange, but I do as much garden work in the fall as I do in the Spring. In early October I decided to start cleaning up the garden and picking the last of the produce. This is what I found:
Picture
Neglected garden.
Of course, that had to be dealt with. I completely weeded the places where things were done growing (and that included pulling out the spent vegetable plants) to make spaces for new raised beds. I also picked every single tomato (including the green ones!) and pulled out those sprawling tomato plants.

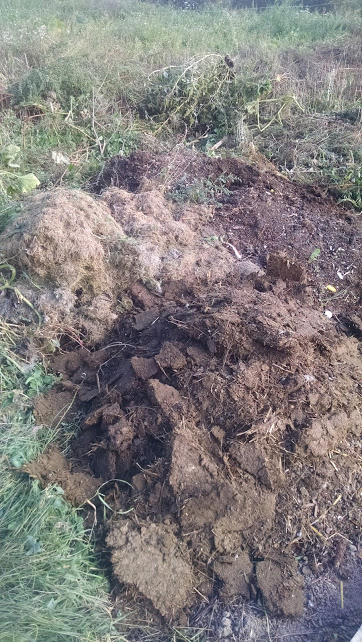
After the clean-out, I swept the goat barn and brought the "brown gold" up to the garden. I dumped it in a pile beside last year's compost and the grass clippings that I've been collecting throughout the summer. I was using the clippings as mulch, but in the fall I use them in my raised beds, as I will the manure.
Picture
Clockwise from left: grass clippings, 2014 compost, and 2015 barn litter/manure.
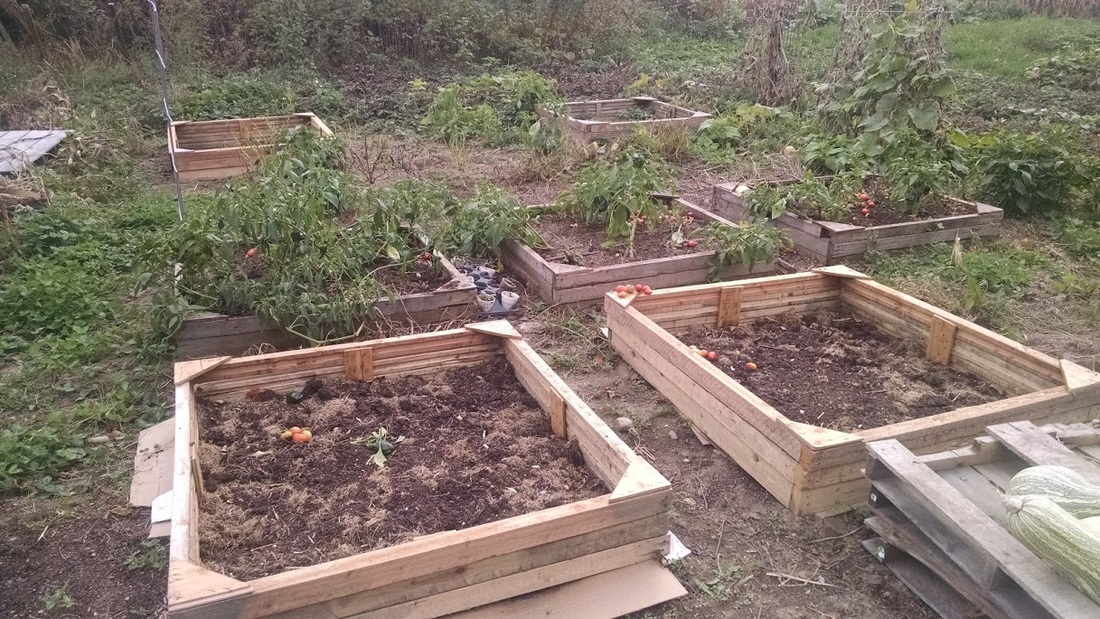
After collecting materials, Hubs helped me build some new raised beds. Before putting them in place, we set down a big piece of cardboard to prevent weeds from popping up. Then in the bottom, I put a thick layer of "new" manure.
Picture
Slowly, I've been working to fill up these new beds. I put in one layer of green (grass), one layer of brown. For the brown I used 2014 compost, but recently our leaves have been falling, and I will use that "brown" for the last three raised beds in addition to the old compost.

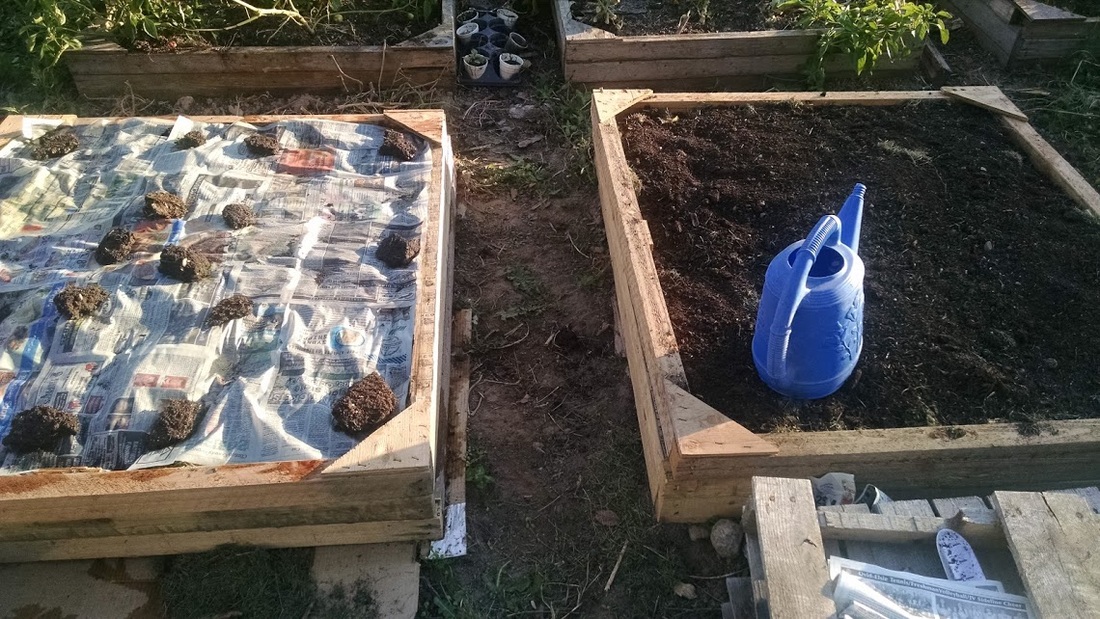
After filling them up, I put a layer of newspaper on top, weighted by chunks of manure, and then soak it all with water. This will help the layers break down into beautiful compost for next season. After the last layer, I put a pallet on top to prevent the newspaper from blowing off. It gets crazy windy in the fall!
Picture
Overall, I would have to call this year's garden a success. I grew strawberries, tomatoes, green beans, butternut and acorn squash, poblano and bell peppers, peas, cucumbers, sweet corn, cabbage, basil, sage, cilantro, fennel, dill, chili peppers, and mustard seeds. On average from May-September, I probably spent three hours per week in the garden weeding, mulching and picking produce. There were a lot of tomatoes, so I was able to make salsa, marinara sauce, enchilada sauce, simmer sauce, ketchup and tomato juice. I was also able to make pesto with my fresh, free basil and dry a lot of herbs to use as spices this winter. Below are my estimated savings, as compared to non-organic* frozen/dried produce from the grocery store. 

$145 strawberries
$12 green beans
$25 squash 
$80 tomato products
$12 bell peppers
$20 herbs & spices
$5 corn
$5 peas
Total savings: $304

The Payoff
My hourly wage for this project is just over $5 an hour. This is not bad compared to a part time job. Next year I will be doing mostly raised beds, which will cut my gardening time at least in half (no mulching or weeding), thus doubling my hourly wage. Because we are installing the beds this year, next fall I will only have a fraction of the work to do. No building boxes or filling- just topping off. It took me a half hour to top off three beds this year, so it should only take a couple hours to do them all next October.

If you would like to start a garden primarily to save money, I would grow strawberries, tomatoes, peppers and winter squash (if you eat those, of course!). These are fairly easy to grow, easy to freeze/can, and provide the most savings. The reason I only saved $12 by growing peppers is that most of my peppers got killed out by the tomatoes. :(

Mistakes & Lessons Learned
Next year I will NOT be inter-planting tomatoes and peppers! The tomatoes almost completely obliterated my pepper plants. After the tomato vines died, some of the peppers were able to grow. However, there wasn't enough time for them to mature before our first frost. This was sad, and I won't plant that way again.

I was disappointed in my acorn squash and sweet corn varieties, so I will be buying new seeds for those. I'll also be purchasing a different variety of tomato seed- a bigger tomato, in order to cut down on processing time. Romas just weren't big enough, and they suffered from blossom end rot.

Lastly, I'll be starting my herb seeds much earlier (Feb.) and also starting my melon and squash seeds indoors. This is only because Michigan weather is so crazy that it isn't "safe" to plant until the middle or end of May if you want to avoid frost. I'll give my plants more growing time if I start them indoors. 

Happy garden planning!
-Bethany

*My garden produce qualifies as organic, but I would not buy organic produce from the store. This is why I use non-organic prices to calculate savings. If I used organic prices, the savings would be much, much higher. Anyone who is buying organic produce should grow their own, period.
0 Comments

Farmers Market Experiment: Results are in!

10/19/2015

0 Comments

 
Picture
Hello dedicated readers! My little farmers market experiment has got the most and best feedback on this blog thus far. I was a little surprised to see how popular it was. It gave me something to write about all summer and ultimately answered my question of "Can you make money selling at a farmers market?"

The Bottom Line
The results are in. Over the course of 21 weeks, I personally grossed...

********************

To find out how much I sold, how much money I made, what my hourly wage was, how much the entire booth sold, and what my personal return on investment was for the money that I put into the farmers market, you'll have to read my book, One Season at the Farmers Market.

The book is part how-to for starting your own little baked goods stand, and part epic tale of how I survived and learned during my first season of the farmers market. You'll learn:

-Whether or not you should share your booth (and costs!) with another baker
-What kind of products sell the best
-Why people shop at a farmers market anyway
-Whether you should get a booth for the whole season or only certain days
-What role the weather has in your sales
-How sales affect profit
-How pricing affects profit
-Emotional ups and downs of being a vendor
-Relating with other vendors
-Relating with customers
-What records to keep and why 
-What you should name your business

In this book are my answers to all the above questions (plus some), a good game plan for getting started, and included lastly is each blog post I wrote every week during my first season at the farmers market. These are probably the most valuable, so be sure to highlight and learn from my successes and mistakes.

As long as we're talking returns on investment, I would have made AT LEAST three times net profit of what I did, had I read One Season of Farmers Market before I got started. I can guarantee you'll save (or make) far more than the $10.00 investment. It's worth it for anyone who has ever thought about selling at a farmers market, or wondered if it is even right for them.

Anyone Can Do It
I love the idea of selling baked goods at a farmers market because anyone can do it, and if you stick it out you WILL make money. It probably won't replace your income, but it could generate some capital for a new venture you've been thinking about. It could introduce you to new people and banish your fear of selling. 

So what are you waiting for? Start reading up!
0 Comments

Harvesting Hickory Nuts

10/18/2015

1 Comment

 
Picture
'Tis the season for harvesting nuts! A few weeks ago I wrote a post about gathering and processing black walnuts. While those are my first choice of free Michigan nuts, another good nut for foraging is the hickory nut.

October is the month when you will find hickory nuts scattered along roadsides as you go for a daily walk or bike ride. It's easy to identify the shagbark hickory because of... well, it's shaggy bark. It always looks like it's peeling off.
Picture
Once you find a tree, you can probably find some nuts on the ground as well. It's easiest to find these where the grass is short- say alongside a corn field or close to the road. Some nuts will have the hull on, and some of the hulls will have fallen off. I try to get fresh-looking nuts with part of the hull on. Sometimes there are nuts left from the year before that have bugs in them. This will have a little pinhole somewhere on the nut. It will be disappointing if you bring home a load of empty nut shells.
Picture
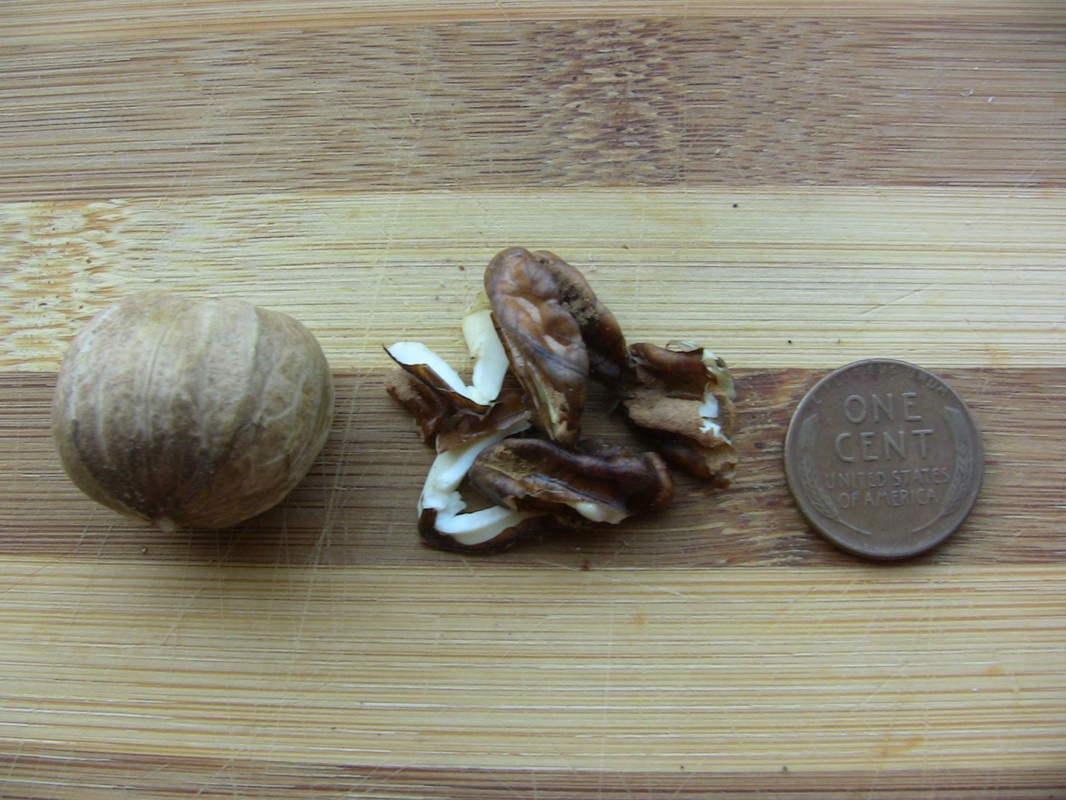
Yield of one hickory nut.
Be sure to store the nuts someplace where mice cannot find them. Because yes, they chew through the shells. You can either store them in a mouse-proof container or hang them in an old nylon stocking.

Once you're ready (this could be anytime in the winter), the nutmeats can be extracted. I usually crack hickory nuts with a hammer on a hard surface- cement floor or cement block. Hickory nuts are much harder to crack than black walnuts, and there is less nutmeat to show for it. However, I very much prefer the taste of hickory to that of walnut. Plus, cracking nuts is fun for anyone old enough to use a hammer. It's cheap fun for kids. My sister and I spent hours out in my dad's shop cracking hickory nuts. Eating the yummy nutmeats was reward enough. :)
Have you ever had hickory nuts? What do you use them for?
1 Comment

Working vs. Homemaking

10/16/2015

2 Comments

 
Picture
This article was inspired by a question I've had for quite a long time. I quit my job when we got married, mostly because I could, but also because I didn't think I made enough money to make it worth keeping a second car, etc. Did I make the right choice financially?

The Analysis
What we need to find out is 1) how much money I actually save being at home, versus 1) how much money I make at a job, minus taxes, transportation and other work-related costs. A lot of "wages of a stay at home mom" articles skew the figures by saying you would have to pay a chauffeur, professional cook, personal stylist, etc. I'm not trying to make some political point here, I'm just trying to honestly answer a question. If I worked outside the home, we would still buy cheap food and drive a Craigslist car, so those are my "job cost figures". On the other hand, I'm a decent gardener and pretty good cook, garage sale shopper, hair cutter, etc. These skills are reflected in our savings. I would recommend that each family do their own calculations based on their own real job costs and stay-at-home savings. Perhaps you really do need a second income, but it's smart to do the math anyway.

Extra costs to having a job:
Car: $1731.96
Food: $2938.44*
Other: $1,135.31 **
Daycare***: $7200    (***for one kid)
Taxes: $4500 (30% of income)

I figure that a housewife can easily save/earn $4 per hour (working 40 hrs/week), or $5760 per year. In order to pay for job-related expenses AND earn $4/hr. for her time, a working wife without kids would have to be making at least $13,307.42 per year.

When that same working wife has a baby that needs daycare, she must increase her earnings to $22,667.42 in order to still be making $4 per hour for her time. Every additional child will force Mom to earn an extra $10,000 in order to pay for daycare and baby costs.

Working From Home?
Recently we asked our accountant if it would make sense for me to make an extra income with our farm/homestead. "Not really," she said, "because you would be taxed based on your entire household income. You would run into the same problem you have [with Hubs' business], in that 30-40% of your $5,000-$10,000 would come out to pay taxes. It wouldn't be worth your time." My extra income might put us in a higher tax bracket, thus causing Hubs' earnings to be taxed at a higher rate. And my small earnings would be taxed at Hubs' higher rate. It doesn't make sense any way you look at it.

So for us, it makes more sense for me to stay home and continue to save money doing what I love every day. At my previous job, I was making $15,000 per year- only slightly above $4 per hour. It made financial sense for me to quit, in addition to the better lifestyle I would have without the job.

The problem with going back to work (in addition to the cost of work-related expenses and higher taxes) is that your entire frugal lifestyle starts to fall apart. Nights and weekends are spent doing basic cleaning and basic meal planning. There is no time to shop for deals, no time to go to garage sales or garden or do extra money-saving cooking. There is no time to hang laundry on the line or go for bike rides in the middle of the day, let alone time for making gifts or other more advanced frugal endeavors.

In addition to the frugality aspect falling apart, I would have to be very, very diligent with my time in order to eat healthy and find time to exercise outside of work. I wouldn't be able to do things I enjoy every day, nor would I be able to spend as much time with my husband. Instead of both of us being "off work" at 6:00 pm, I would come home from work and still have laundry, cooking and cleaning to do. My work would never stop, and it would squeeze out any time for my beloved hobbies. 

Is working away from home worth a few extra dollars? For me, absolutely not. Obviously if a lady is making $100,000 or something the family can hire someone to do cleaning and cooking and their lifestyle is not going to suffer. And there is always the option of a stay-at-home dad. But I think many times it would make more sense for a lady to quit her $15k-$30k job (that she doesn't like) if the husband is earning a lot more.

Back To the 1950's
When I say that the low-earner of the family should quit their job, I'm not advocating laziness or relying on welfare. I am advocating a return of good old-fashioned division of labor. The other day I read a "survival budget" put out by the local homeless coalition, which stated that a family of four is barely getting by on $50,000 per year. This is absolutely ridiculous and false... unless you are dealing with a non-frugal family who needs daycare because mom and dad both work. The paper never even addressed the possibility that maybe mom could stay home. It is getting to the point in this country where people think a stay-at-home spouse is a luxury, when in some cases it may be a financial necessity.

I've also talked to many stay-at-home moms who worked outside the home between marriage and kids. Some expressed regret that they continued to work after getting married, even though they didn't have to. Most people think that you have to have kids in order to quit your job, and that's not true. The time between marriage and kids is special because you can be supported financially, but still have no school or work obligations and therefore plenty of time to do whatever you want. This likely hasn't happened since you were four years old, and won't happen again until you are middle aged. This season can be used to reach non-monetary goals like restoring health and fitness, learning new skills or even getting a small business off the ground. 

********************
*This number is the difference between the USDA's cheapest meal plan for two people, and what I spend on groceries for Hubs and I. I'm assuming that a working wife/mom is super organized and can make thrifty meals on nights and weekends.
**This number includes random savings for things like shopping at garage sales, line drying clothes, and other savings. As mentioned above, I'm assuming that a working wife/mom is super organized and can manage doing her own basic laundry and cleaning on nights and weekends.
2 Comments

Rediscovering Hot Water Bottles

10/14/2015

3 Comments

 
Picture
Growing up, I never used a hot water bottle. Actually, I don't think I ever SAW a real hot water bottle. Those were things they used back in the old days, or in the movies. At home we used a "corn bag" for muscle aches, earaches, other aches and pains, and also for keeping warm on a cold night. These were little pillows of fabric filled with shelled corn, a.k.a cow feed. I had friends that used "rice bags"- socks filled with rice and knotted at the top. With the corn/rice bag, you heat it up in the microwave, put it on the achy part and it stays warm for 20-30 minutes. Then you put it somewhere safe where the mice can't chew into it. And don't cook the bag for too long... or else the whole place smells like burned corn.

When I began working in an office, I started using the more new-fangled disposable sticky patches that warm up with exposure to air. These were much more convenient to use and discreet, but they came with a heavy price tag and couldn't be used with something like an ear ache.

When we got married, I discovered that mice had gotten into my corn bag, plus we didn't have a microwave so I couldn't heat it anyway. There was no reason to buy expensive heat patches because I work at home and nobody cares if I walk around clutching a large, bulky heat-giving device. While reading the book Mommy Diagnostics, I found my solution.

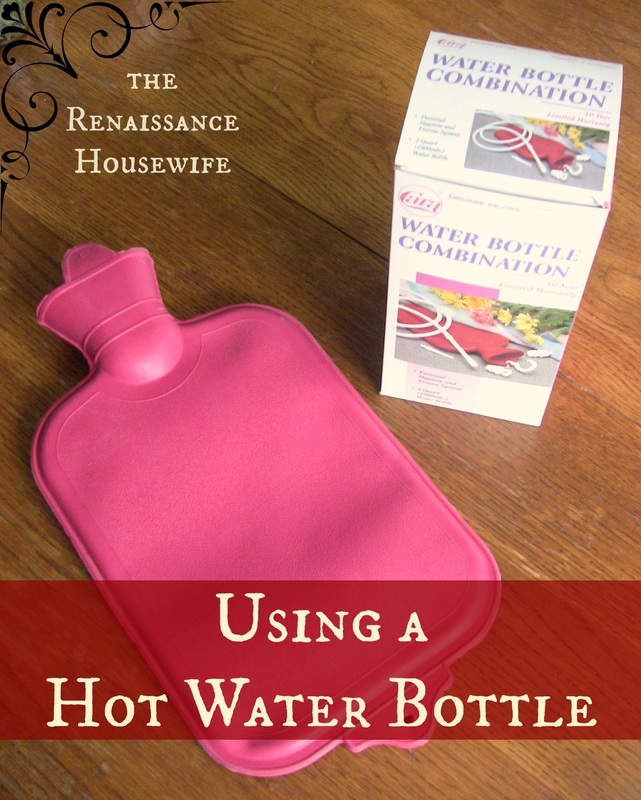
It's in a $5 box at Walmart.

The Hot Water Bottle
If you're looking for a hot water bottle, you may look for a while because they certainly aren't popular. I had to ask the pharmacy lady where they were, and she pointed me out to exactly ONE hot water bottle on the shelf. No choices, no options, just one ugly old-ladyish box. Lucky for me, it was only $5.

When I got home and opened it up, the first thing I noticed was the smell. I'm not sure if it was the rubber, or the factory it came from, but the bottle smelled like an auto shop. Kind of off-putting, but what other choice did I have? The bottle itself was enormous compared to the petite little patches and microwavable corn bags that I had used before. But boy, could it hold some water. I turned on the hot tap until it reached its hottest, and then followed the directions to fill the bag halfway. Then I let out the excess air and screwed on the top. This was when my conversion began.

I was impressed at how the hot water bottle was hot at first, but not too hot to touch, and then it KEPT the heat for at least an hour- probably a couple hours. This alone made it better than the corn bag, which didn't hold heat and came out of the microwave piping hot so you couldn't touch it for the first 10 minutes anyway.  

Let me recap the benefits of using a hot water bottle vs. corn bag or sticky patch.
1. No hot/cold problems.
2. It HOLDS heat for a long time.
3. Reusable and cheap to purchase.
4. No mice problems.
5. No burning smells.
6. No microwave required.

But wait, THERE'S MORE!
Got an ache? Got a pain? Need an ENEMA? This bottle is for you! The hot water bottle that Walmart carries also doubles as an enema system.  Now, I have no need for enemas and hope I never do, but at least I have the option of administering one.

Do you use a hot water bottle? Why or why not?

3 Comments
<<Previous
    Picture

    Bethany

    Housewife, happy wife, and mama to one. :)

    Picture

    Picture
    The Housewife's Guide to Frugal Food
    How to Eat for $10.00
    ​per Week

    Picture
    The Housewife's Guide to Menu Planning
    A Weekly Menu to Save
    Time & Money
    Picture
    The Housewife's Guide to
    Frugal Fruits and Vegetables

    No Garden? No Problem!

    Watch Meals From the Bunker:

    Picture

    Check out my Youtube Channel!

    RSS Feed


    Picture
    Baby Girl's Birth Story
    Picture
    8 Cheap Ways to Eat Healthy
    Picture

    Categories

    All
    Animals
    Book Reviews
    Books
    Christmas
    Cleaning
    Clothing
    Cooking
    Couponing
    Education
    Ego
    Electricity
    Farmers Market
    Finance
    Foraging
    Frugal
    Frugal Accomplishments
    Frugality
    Garage Sales
    Gardening
    Gifts
    Grocery Budget
    Grocery Shopping
    Herbs
    History
    Hobby Farm
    Home Based Business
    Home-based Business
    Home Decorating
    Housekeeping
    Industry
    Languages
    Laundry
    Marriage
    Meal Planning
    Medicine
    Minimalist
    Network Marketing
    Organization
    Plants
    Product Reviews
    Quotes
    Recipes
    ROI
    Rv
    Sewing
    Simplicity
    Spanish
    Spending Report
    Travel

    Archives

    May 2021
    April 2021
    March 2021
    February 2021
    January 2021
    August 2020
    May 2020
    April 2020
    March 2020
    February 2020
    January 2020
    December 2019
    November 2019
    October 2019
    September 2019
    August 2019
    July 2019
    June 2019
    May 2019
    April 2019
    March 2019
    February 2019
    January 2019
    December 2018
    November 2018
    October 2018
    September 2018
    August 2018
    July 2018
    June 2018
    May 2018
    April 2018
    March 2018
    February 2018
    January 2018
    December 2017
    November 2017
    October 2017
    September 2017
    August 2017
    July 2017
    June 2017
    May 2017
    April 2017
    March 2017
    February 2017
    January 2017
    December 2016
    November 2016
    October 2016
    September 2016
    August 2016
    July 2016
    June 2016
    May 2016
    April 2016
    March 2016
    February 2016
    January 2016
    December 2015
    November 2015
    October 2015
    September 2015
    August 2015
    July 2015
    June 2015
    May 2015
    April 2015
    March 2015
    February 2015
    January 2015
    December 2014
    November 2014
    October 2014
    September 2014

    Full Disclosure & Disclaimer

    Picture
    Picture
    I get cash back for many online purchases including wedding gifts and Ebay stuff!

Powered by Create your own unique website with customizable templates.
Photos used under Creative Commons from dasWebweib, amanessinger, thewritingreader, diakosmein