the Renaissance Housewife
  • Home
  • Topics
    • Saving >
      • Kitchen >
        • Food >
          • Recipes
      • Bath & Laundry
      • Medicine Cabinet
      • Office
      • Electricity
      • Gardening
      • Foraging
      • Animals
      • Weekly F. A.'s
      • Printables & Downloads
    • Earning
    • Investing
  • Books
  • About
    • RH Recommends
    • Newsletter & Updates
    • Travel
    • Beta Readers
    • Legal Stuff

Basket Liners and... HONEY!!!

4/9/2019

0 Comments

 
Picture
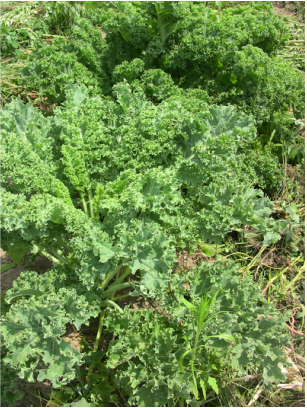
​Well, I warned you all that we might get busy around here, and I'm excited to see the spring starting to show her face! Of course all Michiganders know that it takes two or three months for her to stop playing peekaboo and actually stick around (by which time you call it "summer", not spring), but we are excited nonetheless.

​
Basket Liners

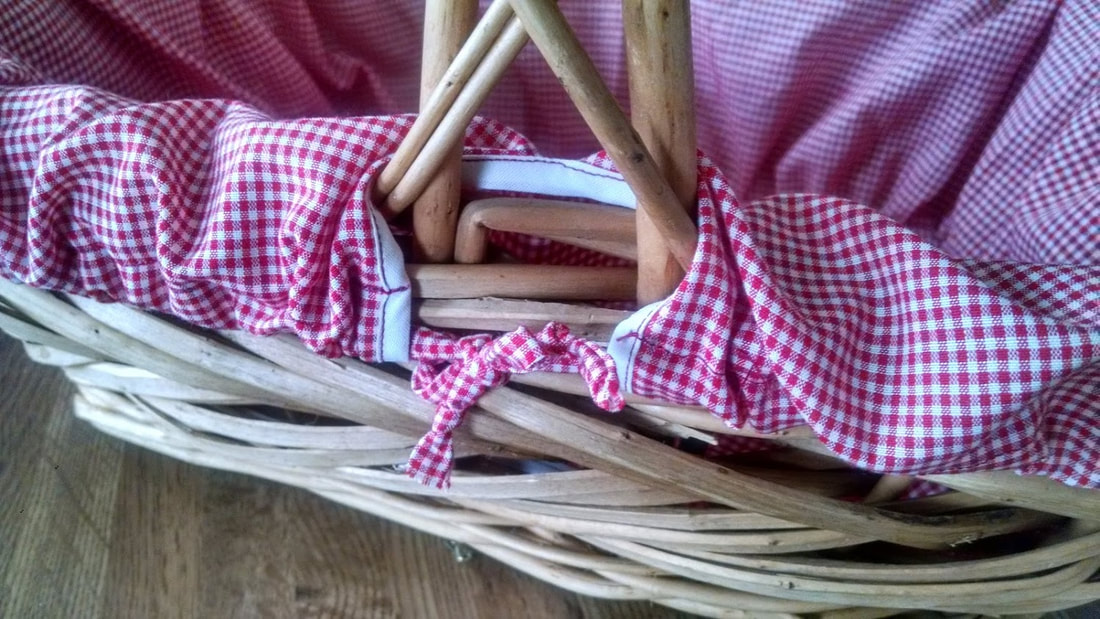
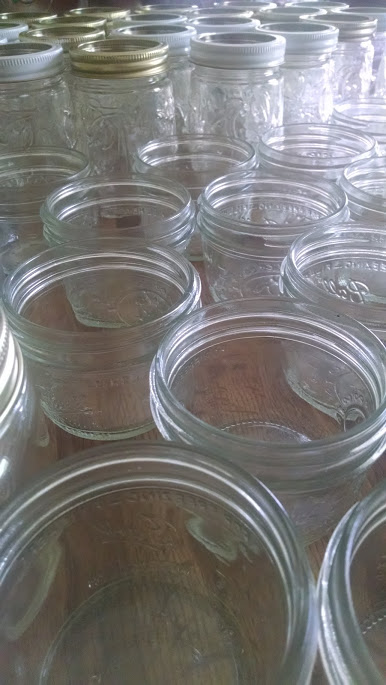
I made two basket liners in anticipation for our garden harvest. I used to think basket liners were tacky and outdated, but if you're actually using the basket, it makes cleanup so much easier. Instead of having random seeds and bits of dirt stuck in between the cracks, you just remove the liner, dump it out and throw the whole thing (the liner, that is... not the basket) in the washer.
Picture
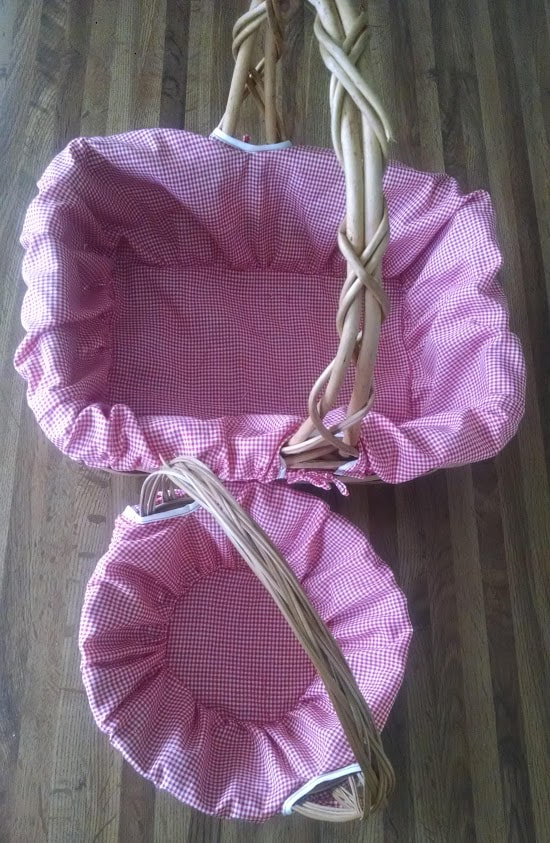
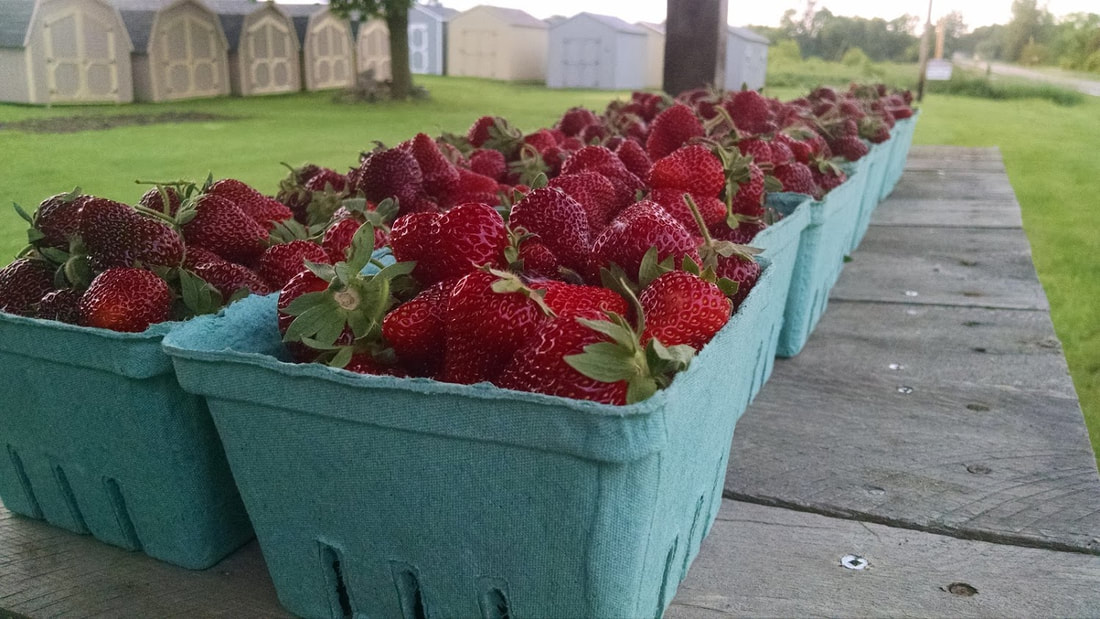
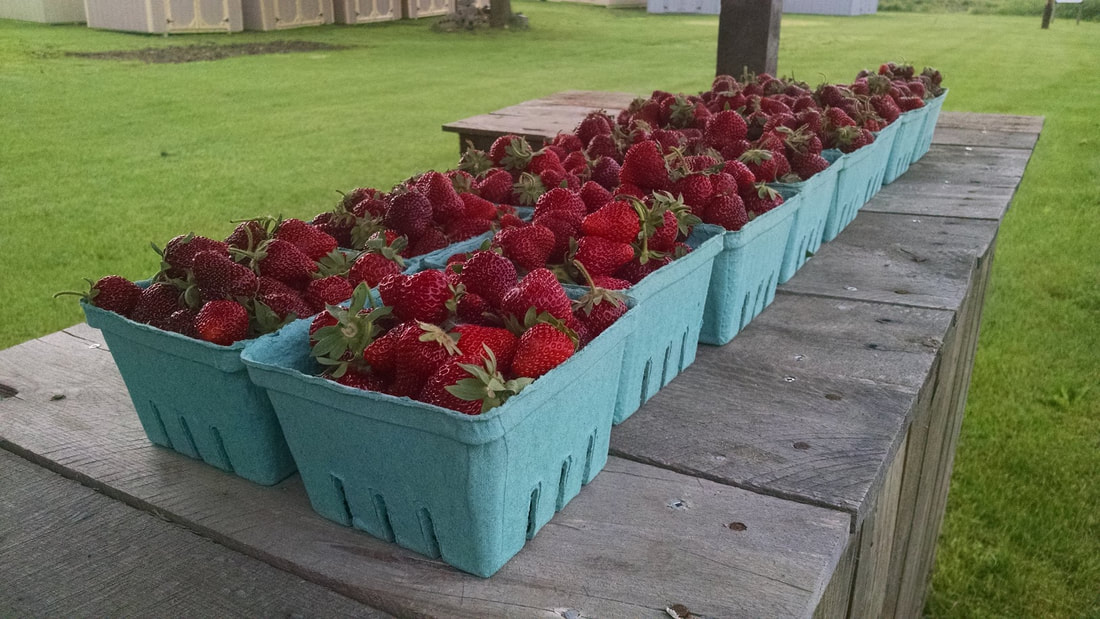
​The big basket is for our regular everyday garden harvests; rhubarb, asparagus, lettuce, radishes, etc. The smaller basket is for herbs and to use as a backup harvest basket. 

It was more of a pain than I thought it would be to make the liners. I had to draft a pattern, finish the edges for durability, etc. Since the liners were custom made to fit the baskets, I probably won't be able to use them with other baskets (but I'll try). Before I invest more time into making basket liners, I'll make sure the baskets are sturdy and will last for years. Many of the baskets I have now are already on their last leg. So that's something to keep in mind if you, too, are thinking about making a liner for your harvest basket.

​
Honey Harvest

I'm not the best beekeeper. Actually, I'm a pretty rotten beekeeper, but it turns out that even rotten beekeepers have their rewards.

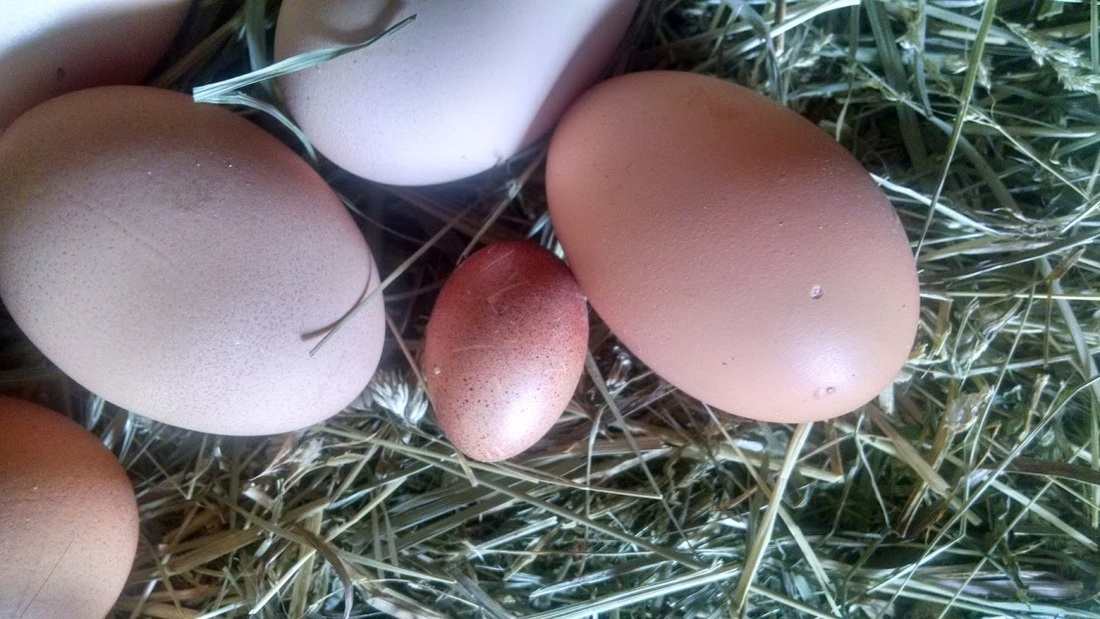
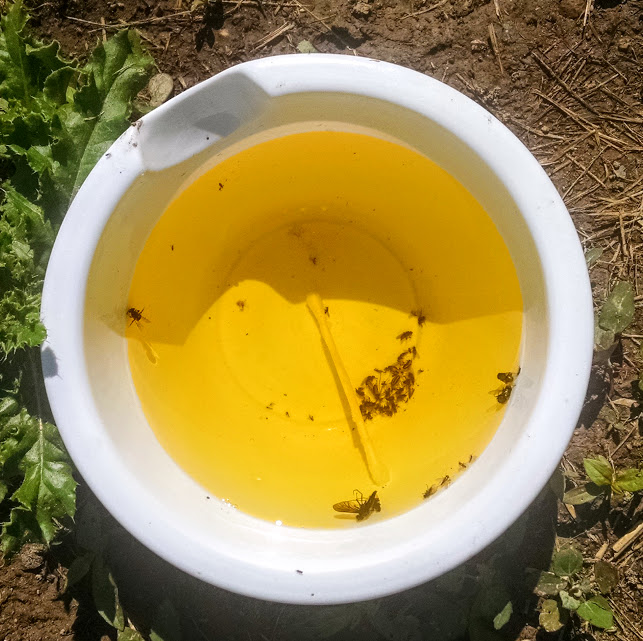
I cracked open the old hive on Saturday and this is what I found:
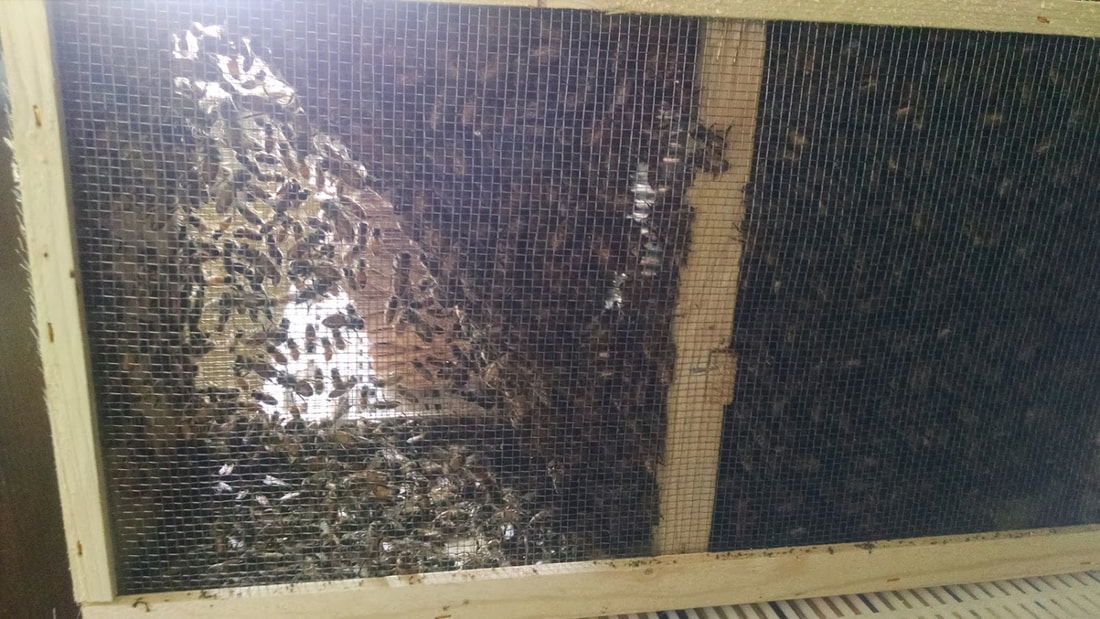
​If any of you can help diagnose the problem, that would be great! I contacted the people who I bought the bees through, and they suggested that the queen probably died. Obviously, all of the other bees died as well. But before they died—bless their hearts—they left me some honey.
Picture
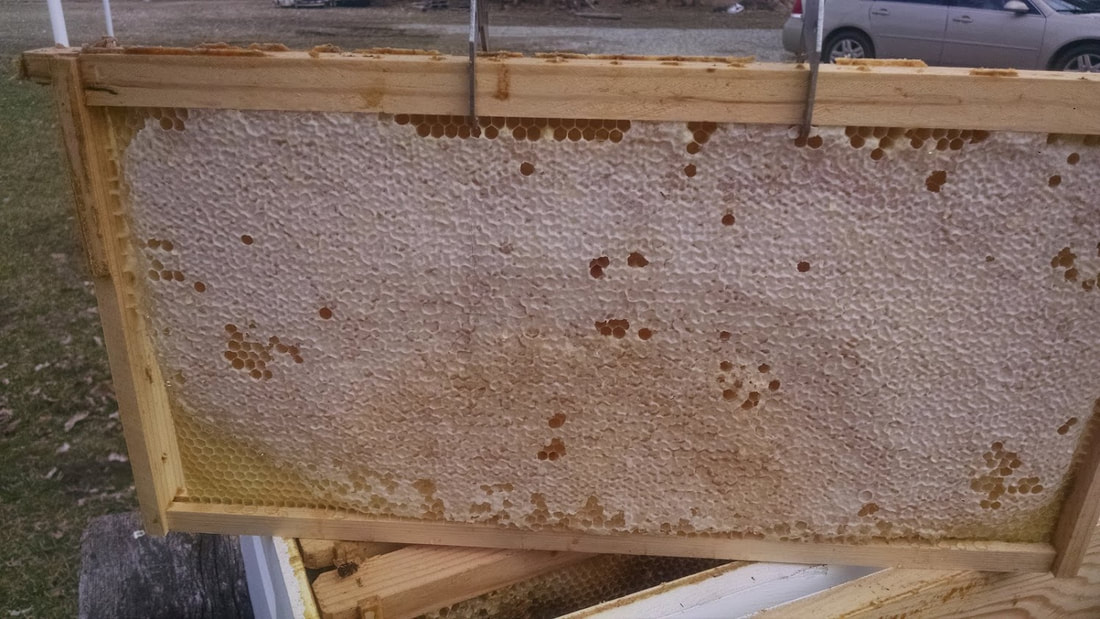
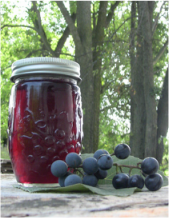
I was able to harvest almost a whole gallon of honey!! I'm super excited about that, since one of my goals this year was to eat healthier (raw local honey is so good for you!). Not only that, but I wasn't expecting any harvest. Now I have honey AND beeswax to work with.

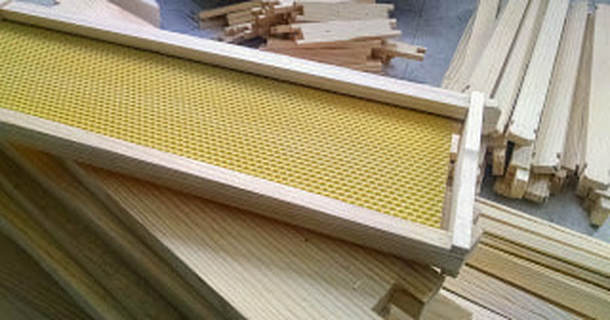
Even though beekeeping won't work for me this year, I plan on trying it again during a less busy season. I'll be keeping the equipment and hopefully reusing everything. Another bright point is that I found a free way to harvest the honey, without the use of an extractor. I used this tutorial. Hubs made the wood piece with some scrap lumber, and I made the bag out of cheesecloth that I already had.

Even though the value of my little harvest doesn't nearly cover the cost of equipment, it really encouraged me to keep on trying. Beekeeping is something I've wanted to do for years, and I was so happy to have the opportunity to try it out in 2018. Now that I know the ropes (or at least, a lot of what NOT to do), I hope next time will be more successful.

I think that's all for now!
-Bethany
0 Comments

Frugal Accomplishments; Garden Plans!

1/14/2019

2 Comments

 
Picture
Thrift store egg servers!
We are officially one half way through our zero-spend month of cooking!

1. Groceries: We didn't buy any groceries. I did salvage some packaged food that was headed for the dumpster. I also harvested lettuce from our cold frame, and collected eggs from our chickens. I also shelled some almonds from Christmas.   

2. Cooking: I cooked a turkey this week, and made broth. I used powdered milk from the pantry to make milk for cereal. You can watch a clip of my turkey process on this week's Youtube vlog:​
I have been having so much fun with this zero-spend month. We have a lot of ingredients in the pantry that I plumb forgot about. I made some wonderful smoothies with dates and canned coconut milk, for example.

As of several months ago, I've been celebrating "Sugar Saturday". This is where I save all of the sugary snacks and desserts for one day of the week. On Friday nights I get out the stash and artfully arrange it under a cake dome. Then on Saturday... it's feast time! Slowly we've been eating down the leftover Christmas sugar. I still have some candy left, but this week I was down to graham crackers, Nutella, some frozen oatmeal bars I made awhile ago, and an instant oatmeal packet. 


3. ​Thrift store finds: I bought a game, book, and a set of eight egg servers at the thrift store. The egg servers were on my "dream kitchen" list. I was so happy to find them! I kept two of the servers out, in the china cabinet, and put the other six into storage until we have a bigger kitchen.  

4. Cans to recycle: Princess and I went for several short walks this week and collected almost $2.00 worth of cans and bottles. Free exercise AND free money!  

5. Marketing declutter: I' unsubscribed to email lists and cleaned out my email inbox. I still had things from November sitting unopened. Yikes! Unsubscribing from lists is an ongoing process, just like house decluttering is. Right now, for example, I'm unsubscribing to all of the cloth diaper retailers. There was a season when I was still looking to build my stash, but now I have everything we need (plus some). Not only that, but I see potty training in our 2019 future.

Oftentimes I'll subscribe to a list just to get the sign-up incentive. Or, I'll buy something online and automatically get signed up for the list. Most of these lists are just trying to sell more stuff. If the stuff is no longer relevant our helpful, there's no reason to be signed up for the list.

A fast way to clean out your inbox of 326 emails (not kidding, that's what it was!) is to first unsubscribe to a list, and then use the "sweep" function to get rid of all the other emails from that sender.

6. I finished garden planning for the year. This is the first year that I'm not as excited about having a garden. I think I burned out in 2018 from trying to do both my vegetable garden and the strawberry patch. It wasn't just my time that had to be divided (do I spend Baby's nap time gardening, or finishing some other pressing task? Do I work on the strawberries or the vegetables?), but also which garden got the sprinkler (it malfunctioned all summer). While the 2018 vegetable garden got a great start, I didn't end up harvesting very much from it. When I did get a harvest, I had to choose between preserving the harvest, harvesting even more, or—you guessed it—weeding strawberries. 

This year my focus is going to be growing fresh vegetables, with little or no emphasis on canning and freezing. I have a dozen 4x4' raised beds, most of which are ready to use come spring. In the past I've also planted row garden crops beside the raised beds, but this year I'll keep everything confined to the beds. Last fall we converted two of them into cold frames. My goal is to plant a salad garden in one of the cold frames, and a root vegetable garden in the other cold frame. I hope to extend the season by four months this year (March, April, October, November).
Picture
Tacos during our zero-spend month. Free lettuce from the garden cold frame!
In order to cut costs, I am attempting to start some of my own seedlings this year; heirloom tomatoes, peppers, sweet potatoes, cucumbers and some herb and flower seeds. I'll be purchasing five seed packets from Baker Creek Heirloom Seeds ($15.00), five seed packets from Walmart ($10.00 or less), and five plants (mostly herbs—$15.00) from a nursery. That sounds like a lot of money to spend on a garden, but I will use the seeds for several years, and the herb plants are perennials. The "vegetable" garden will also produce fresh herbs, fruit and flowers, and those things increase the value of my garden significantly.

I've planned the following beds: 1) culinary herbs, 2) flowers, 3) medicinal herbs 4) mints and tea herbs, 5) long beans, 6) sweet potatoes, 7) peppers, 8) tomatoes, 9 &10) cold frames and 11 & 12) open beds for any miscellaneous plants. During the warmer months I'm going to replace the greenhouse lid with a chicken-wire climbing frame to hold cucumbers. Hopefully the vining plants will provide shade for the lettuce and keep it from bolting.

Instead of using grass clippings for mulch, I will (again) use landscape fabric for the transplants, and old strawberry straw for the seeded items. This will reduce the amount of time needed to gather mulch. I have a LOT of straw on the strawberry patch right now, so I'll be able to use that for mulching even the flowers, bulbs and raspberries.

I made a general calendar of when each gardening task should be done. For example, I know that raccoons, Japanese beetles and blister beetles all come out at a certain time. I've made a note to purchase and/or set traps before those months, in order to reduce time spent picking off bugs, as well as lost crops. 

I plan on putting in an hour of strawberry weeding time every day. It may take less than an hour every day, but I'm planning an hour just to be safe. The trick is to do it consistently, and not wait for a once-a-month weeding marathon (which is what I did last year... big mistake). I hope that by keeping up a strong deer fence, that the strawberries will be able to overpower the weeds this year. ​

So, that is about it! I hope your week was full of frugal accomplishments. :)

​Til next time,
​-Bethany
2 Comments

2018 Hobby Farm Update

12/3/2018

1 Comment

 
Picture
​I quit doing monthly hobby farm updates because... well, there's not much to report on from month to month. But I thought I'd at least do an end-of-the-year recap.

Chickens

My last duck died earlier this year, so all I have left is chickens. Thanks to predators and old age, by October my flock was whittled down to 11 birds; 9 hens, 2 roosters. I bought three more pullets from a local 4Her. Those should begin laying in a couple of months.

I've got to say this: it's very nice not having ducks. As much as I loved to watch them swim and play in their pond, it was annoying having to empty and refill the kiddie pool of water every two or three days. The chicken water stays clean for much longer now. Unlike the ducks, they don't need an entire kiddie pool, so I can transport fresh water in a five-gallon bucket. Speaking of which:

I broke down and bought a heated water bucket this year. It was $30.00 on sale at a local farm store. The bucket is thermostatically controlled so it only runs when needed, plus it requires very little energy. Hubs was concerned that an additional heating element would not be worth the added electricity costs, but after reading the label on the bucket, he changed his mind. The heated bucket will reduce the amount of water I have to carry this winter, and also make chores easier for others when we are away.

I also splurged and bought the chickens some "real" bedding; a bale of pine shavings. I had been using sawdust from Hubs' shop, but since he got a sawdust-sucker (sorry, I don't know what it's actually called) it's more complicated to get the bedding when I need it. The bale of pine shavings was far easier to carry than wheelbarrows full of sawdust, plus less messy, and it looks so nice in the coop. For $5.00, I think it was a pretty good purchase.

I grew some oat grass fodder for the hens last week, for the first time. It was very easy and cheap. When we get back from our trip, I'm going to set up a system for doing the fodder. I know, I know... I say that every year. But really, I think I will do it.

I tried using the waterglass technique for preserving eggs, instead of selling the extra like I normally do. The waterglassing was a failure. A third of the eggs were well preserved, but the other two thirds developed "smells" over the months in storage. The good eggs were only good for baking, not scrambling. After starting this project, I read that waterglassing is not ideal for fertilized eggs, plus over time the solution weakens the shells and makes them more susceptible to breakage. One broken egg in the bucket, and all of the rest will develop smells. Somehow, flies got into my egg bucket and started laying their own eggs, which developed into maggots. Disgusting! I won't be doing this preservation method again, unless the eggs are unfertilized and there are only a few to preserve. Also, I wouldn't preserve spring eggs for winter; only fall eggs.


Bees

Unfortunately, my beehive this year was not a success. I did not harvest any honey, and yellow jackets invaded the hive without me realizing it, until it was too late. I made quite a few mistakes along the way, but I also got the hang of doing routine hive checks, using the smoker, etc. I'm slightly less terrified of bees than I was a year ago.
Picture
​I thought that after I started working with the bees, my fear of them would go away. It definitely did not. About halfway through the summer, they plastered their entire hive with propolis, a sticky, gooey substance made of tree sap (I actually saw them collecting the pine sap one night... it was very interesting!). I dropped an entire frame one day while checking the bees, which definitely made them mad. After that I just felt like a terrible beekeeper, and it was like pulling my own teeth to go out there. Everything was covered in propolis and burr comb and a huge hassle to get into. I stopped checking the lower deep, for fear of crushing the queen, who I hadn't seen in weeks. When I went out to check the supers for honey, I thought the bees were moving slower, acting almost drowsy. The supers were entirely empty, though there was still capped honey in the upper deep. In September, I noticed a few yellow jackets crawling around the hive. Just a week or two later, there were more yellow jackets than there were guard bees. That was pretty much the end of my bees. In October there was a very small population of honey bees still in the hive, but I doubt there is enough to make it through winter.

I would like to try the bee project again. I'll order another package of bees, and maybe build another small hive just in case my old one is bad. I would love this project to be a success, but it didn't happen this year.
Picture
​Strawberries

The other new project for 2018 was selling strawberries. I planted my strawberry field in 2017, but this was our first year of harvesting and selling berries. It went okay. I really should have got a babysitter for our daughter during picking season. The deer ravaged my plants and they only produced half of what they should have. By the end of June I was about to go crazy, and the darn plants still needed weeding. I took July off of strawberry farming (a mistake) and made up for it tenfold by weeding the berries almost every day for the next two months. 

Financially, the strawberry project more than paid for itself. I made $500.00 net profit, when all was said and done. Next year I will not have as many costs, and hopefully will harvest more berries and thus, earn more money like I had expected to do this year.
Picture
​Garden

I didn't realize how much the strawberry patch would interfere with my gardening time. I also didn't realize how many BEES would be swarming around my raised beds and how much that would bother me. The bees actually scared me away from weeding and harvesting, which cut my garden yield. Next year I will plant the bee-friendly herbs and flowers farther away from the garden.

For spending almost no time in the garden, I got a decent yield. Chinese long beans were a smashing success. Beets were a success. The heirloom tomatoes I planted were beautiful, but not very good for canning and didn't produce much for all of the space they took up. Peppers were a fail (I think it was the hot weather?). All throughout the summer I had sprinkler and hose problems. I did actually grow some watermelon, which was a first for me!! Sweet corn patch was a fail. Pumpkin and acorn squash was a fail.
Picture
​One success for the garden this year was an extended lettuce harvest. We invested $40.00 into a plastic greenhouse panel and used it to make two cold frames. The first cold frame had pepper plants in it, which froze right away. The second frame had lettuce in it, and the lettuce is still growing in early December! We save about $2.00 per week by not buying lettuce, plus my lettuce is organic (in which case, the savings are probably even more). We've already saved $16.00, so the second frame has almost paid for itself.


Re-evaluating Profit and Loss

Ultimately, I think the hobby farm balance was a loss. I sunk $600.00 or more into bee supplies, a couple hundred dollars into chicken feed. I think I spent about $100.00 on garden supplies (greenhouse panel, seeds, bulbs, landscape fabric). The strawberry profits probably covered chicken costs, but that's it.


I've spent the last several years trying to make my hobby farm earn an income, or at least pay for itself. I've had goats, chickens, ducks, a sheep, a farmers market stand, a farm stand, and and Etsy shop. Trying to make each project pay for itself was very difficult. Some projects just aren't very economical. Bees and chickens, for example, are definitely "hobby" projects. Milk goats and strawberries, on the other hand, can easily support themselves plus bring a profit.

The most efficient way to get your hobby farm to pay for itself is to have a cash crop (or "cow", if you will) and use that to pay for your other unprofitable projects. Even so, I've discovered my hobby farm is much less about earning money than it is about providing good quality food for my family, learning new things and getting outside. I also want to keep the hobby farm going so our daughter can reap the benefits of gardening and learning animal husbandry.
Picture
Extending the harvest: garden produce in November!
Looking Forward

Next year, I'm going to make the hobby farm my "local food fund". Any profits from the strawberry patch will either be put back into the farm (paying for chicken feed, beekeeping supplies, etc.) or spent on food from other local farms. This will technically increase our food budget (hopefully, anyway). It will allow me to contribute to the local economy not just by consuming, but also by producing. 

At this point, I don't have any new projects planned. My goals are to 1) double profits on the strawberries, 2) get some kind of honey harvest, 3) extend the garden growing season and 4) keep my chickens happy and healthy. I'm excited to see how much I can do with the farm in 2019!  
1 Comment

2018 Strawberry Stand Report

7/23/2018

2 Comments

 
Picture
​Hi everyone! In place of frugal accomplishments, I bring you: 

How Well I Did Selling Strawberries Out By The Road.

First off, just a few notes. Generally, you can expect to harvest about one quart of strawberries for each plant that you have. Based on these calculations, I expected to earn about $1000.00 gross income. Unfortunately, we only harvested half that amount, whether by my error or because of something out of my control, like the weather. I'm doing my best to increase next year's harvest.

Total quarts picked: 155

Last year we planted 300 strawberry plants. Some of them died. Deer also defoliated quite a bit of the patch, which cut down on strawberries production. 

Gross income: $573.50

Expenses:
Boxes- $39.76
Pickers- $25.00
Total expenses: $64.76

(Note: I also spent $75.00 on weedkiller and $52.00 on plants last year. I used hobby farm money and income from picking at another patch to cover those costs. Hubs made the roadside stand last year for almost free. We repainted old signs, so those were free as well.)

Net income: $508.74


What I Liked About Selling Strawberries

What I really liked about having a strawberry stand was the fact that it was possible to do all of the work with Baby. I can plop her on a blanket right beside me with some toys, and she is (mostly) happy to be out in the patch while I pick and weed. Then I put her in a backpack, and we both carried flats out to the road and put up the signs every day. She also came with me to clean out the money box and take the signs down. 

The second thing I liked about selling strawberries was that I could sell every single quart that I had. I could have sold two or three times as much if I would've had it. I didn't waste time and money like I did, sometimes, selling baked goods or produce at a farmers market. Regarding hourly wage, I probably spent just as many hours to earn the same amount ($500.00) on either enterprise.

The third thing I liked was... I am not a people person. So I was thrilled not to spend all morning talking to customers like I had at the farmers market. I did speak to a few customers, but most were people I knew. Toward the end of the season, a lot more people started wanting to make orders (for berries I didn't have), which was a bit of a hassle. I think next year I will have an order system (payment and pickup) set up beforehand, so people don't wait until the last minute to order.


What I Didn't Like About Selling Strawberries

While it was possible to do every single task with Baby, I didn't actually DO every single task with Baby. During the picking season, I needed to be out there for an hour and a half straight- twice that if my pickers weren't there. Because of her napping, feeding and mood schedule, this was a challenge. At the time of picking, she was about eight months old- old enough to enjoy playing with toys, but not old enough to play with them for an hour and a half straight. I ended up using Hubs as a babysitter some of the days. Other days I had to pick in 20-minute increments and put berries on the stand quart by quart, which wasn't very efficient. But every additional $3.75 added to the bottom line!

We used the honor system for payment. This worked... mostly. Toward the end of the two-week picking season, I noticed that not all of the money was showing up in the cash box at the end of the day. Sometimes the money would mysteriously show up on a different day; other times it didn't. I thought maybe this was because people were having a hard time doing the math for multiple quarts of berries, so I put out a price sheet. Another possibility was that people were taking the berries as soon as they saw them (because of the high demand) and putting what cash they had in the cash box and meaning to pay the rest later (but forgetting to do so). My second theory would explain the random amounts of cash we found. On the last day of selling, we only got half the money. This was kind of depressing, on top of the fact that our harvest was small to begin with. But thankfully we didn't lose more than $30.00 altogether (BIL was also selling some berries). Also, some people overpaid by a quarter here and there, which also offset losses. The small loss was worth not having to "man the stand" every day.

As I mentioned before, though, taking prepaid orders would solve a lot of the money box confusion.


Concluding Thoughts

After a few weeks away from the patch (or at least, away from the stand), I'm looking forward to selling again next year. Unfortunately, the income in 2018 was not enough to cover the cost for my honeybees, but it is more than enough to cover the cost of gardening supplies and chicken feed ($18.00 per month, for my flock of 14 chickens). In the past, I've tried to make the hobby farm pay for itself by selling items from each animal/garden project. I had mixed success with this because some products were a lot more valuable than others. Some plants or animals saved more money than others. By selling the most valuable item (fruit) and using the other products (eggs, beans, lettuce) just for us, I can cover all of my costs plus have a little bit of pocket money left over. Not only does this make more sense financially, but I can focus all of my marketing/customer work on just one product, for a small window of time. That's a lot easier than trying to find customers for ten different products and spending 10 hours every week trying to sell those products.

Well, that's all for now! I haven't been doing regular hobby farm updates because there's not a whole lot to report on, with just the bees, chickens and garden. I've had chickens for years, so it's just the same old humdrum boring stuff. I don't feel entirely qualified to tell you about my beekeeping experiences, because I make new massive mistakes every time I go out there. I guess I could be doing garden updates, but I should really be WORKING in the garden instead of writing about working in the garden. So... yeah.

Til next time,
-Bethany
2 Comments

July Hobby Farm Update

8/3/2017

0 Comments

 
Picture
Barry acting "bucky".
​Goats

​Both goats are doing great. Adi is growing a shiny new coat of hair, presumably for winter already. She is currently giving about 1 1/3 cups of milk per milking; just over one pint per day. I am going to continue milking through the month of August, and then start milking once a day for the first 1-2 weeks in September. After that I'll dry her off until breeding in early/mid October.
Picture
I wonder where he got his burdock beard?
​Chickens

I have good news and bad news from the chicken department. The good news is that none of the hens or roosters died. Another good point is that my broody hen finally hatched out her chick. The bad news is that the chick died a few days later. :( We never did figure it out, as the chick didn't drown and wasn't attacked by a predator. Our best guess is that it died of heat or got stepped on by the goat. That was kind of sad, because I thought the broody hen would take better care of her chick without my assistance.

​The chickens are laying between 6-9 eggs per day, and I am feeding the the same $0.66/day in feed. If I weren't selling any of the eggs, my cost per dozen would be $1.06. This month, egg sales paid for feed costs with an additional $7.00 profit. So all of the eggs we ate were free.


Ducks

​I finally got around to butchering my two remaining male ducks. Hubs helped. This was a huge burden off my shoulders! I had forgotten a few key points on how to do it, so the processing took a LOT longer than it should have. I did freeze the body and drumsticks separately because they are best cooked at different temperatures (something I learned from my first duck). I still have two roosters to go, but those are easy enough to do on my own.

My one remaining female duck is recovering from some kind of foot infection (it's not bumble foot/staph) and is currently not laying eggs.


Strawberries

For those who don't know, I put in a 300-plant strawberry patch this spring in order to sell strawberries at a roadside stand next year. This income will hopefully replace the need for farmers markets. Not much is going on with the strawberry patch. We set up a sprinkler system earlier in the month that can be easily moved around to wherever it's needed. Ideally I'd have put in drip irrigation, but for the amount of plants we have I don't think it would make sense financially. Plus the patch is not established yet, and it would be a pain to till/weed around the hoses.

Besides watering once a week or so, I've also been tilling between the rows and weeding between individual plants. Actually, Hubs has been tilling and I have been weeding. We till once every 3-4 weeks (it takes about 30 minutes) and I weed after everything has been tilled. The first weeding sessions didn't take all too long because the plants were smaller. I could use a hoe for most of the weeds, and then just hand weed right up close to the strawberry plants. Now that the plants are bigger and sending out runners, the hoe is counter-productive and almost everything must be done by hand. After the last tilling, it took me between 5-10 hours (a week's worth of afternoons) to weed the whole patch.
Picture
​There are a few empty spots in the patch where plants died. I am going to fill in these spots with strawberry plants from my old garden patch, which I'll probably till and reseed with a cover crop this fall.


Other Garden-Related Items

This year I tried to use some of my garden space to save money on hobby farm expenses. I grew a patch of mangel beets for animal fodder, and also grew some new herbs to use in soaps and other products to sell. As far as I can tell, both the herbs and beets were a success. The seed packets (all of which were from Baker Creek Heirloom Seeds) only cost a few dollars and paid for themselves in the first year. I am saving seed from the calendula so I won't have to buy it again.


Book of the Month: The Bio-Integrated Farm
I read one farm-related book this month on permaculture; The Bio-Integrated Farm (affiliate link) by Shawn Jadrnicek. I was almost surprised to see it available through the interloan system already, since it was just published in March of last year. Borrowing from the library was a good frugal move because the book costs $25.00- used- on Amazon. Unfortunately I had to return the information-packed book before I finished it, but nonetheless I picked up a few great ideas for my chickens in particular. A lot of the information on ponds and greenhouses was fascinating to read about, but far beyond my budget and mechanical ability to implement.
​

Summer Goals

There are a few more things on my hobby farm to-do list before the summer is over. I'd like to use up all of my freezer fat to make soap and also butcher those two roosters. In the garden department, I'd like to till my old strawberry patch and move some of my old herbs (sage, 2016 lavender plant and thyme) into raised beds. Lastly, I'd like to make some revisions to my farmers market book (affiliate link) and re-release it.


Profit & Loss

Expenses:
Shelled corn- $22.00
Layer mash- $22.00
Total expenses: $44.00

Income: 
Books- $10.80
Eggs- $27.00 
Babysitting- $25.00
Total income: $62.80

Net profit: $18.80
Year-to-date net profit: $137.69


So, I cheated on income this month. Instead of doing a farmers market, I just threw in some babysitting money and pretended that was "farm" income. It was a lot easier than actually doing a farmers market. 

My original plan this year was to do one day of market per month in order to support the hobby farm. Ideally, I would net $40.00 each time and this would more than pay for farm expenses. However, my June market was a complete bust, and I actually lost money after working 10+ hours. It was very discouraging and made me re-think doing any more markets this year. In addition, there are some big changes coming for us in October and I decided it would be wise to spend my free time preparing for those instead of earning a few more dollars for the homestead.

I thought I would be drastically behind this month without the babysitting subsidy, but before the month was over I sold several dozen more eggs than anticipated. In addition, I received some royalties from my farmers market book (which is the one I count toward "farm income"). So in the end, I would have *almost* broke even without the babysitting money. But I left it in there because an $18.00 net profit looks good on the books. :)

That's about it for this month! Hope you guys had a great July.
-Bethany
0 Comments

Fall 2016 Garden Update

11/2/2016

1 Comment

 
It's that time of year again! As I was cleaning out the garden last week, I decided to make a video to show you my garden instead of just taking pictures. I also explain how I spend less time in the garden by prepping the beds six months in advance.
My raised bed gardens are pretty much on autopilot for most of the year. The row garden, which I show at one point in the video, has always been a mess because it is too much for me to take care of by myself.

I estimate that I harvested between $100.00 and $200.00 worth of food out of the raised beds, and spent less than an hour per week maintaining them. I put about $10.00 worth of plants/seeds into this year's garden, so I would consider that a good investment. Other years have been better, so next year I really want to focus on yield and growing vegetables that pay. This year I grew a few crops (onions an tomatoes) that took up space but didn't produce a lot of monetary value.

If you have access to dead leaves in the fall and grass clippings during the warmer months, this method is for you. If you have chickens or other animals to provide manure, this method is especially for you. 


Excuses People Use for Not Gardening

"You're so lucky to have all that land, and animals to provide compost. I live in an apartment/in town, so that's why I don't garden. If I had enough land like you do, I would garden."  

"That's nice that you can grow your own food, but I actually have a job. You don't work, so you have time to spend all day in the garden."

"I liked your book about eating for $10.00 per week. But it doesn't really apply to me because I don't have a garden. How am I supposed to spend that little on food if I don't have a garden?"


Some people are honest and just say they don't want to have a garden. That's great!! You don't have to have a garden to have a worthy life. If you don't want to garden, the conversation can stop right here.

I'm not being judgy by trying to get you to garden- it's just an easy way to save a lot of money on food (especially organic food, which I know a lot of my readers like). If you are trying to pinch pennies and there is any way possible for you to have a garden, I think you should at least try it. And then try it a few more ways, just to make sure you're not missing anything before you call it quits.  

The truth is that you DON'T have to have a lot of land to garden. A little yard or even a couple of flower beds (sowed in vegetables, of course) will be enough room to grow plants to save money on food. Another truth is that I don't spend that much time growing fruit and vegetables for us to eat. I've tried to explain this in my video above. And lastly, it IS impossible to eat for $10.00 per week when you aren't growing at least some of your own food. Maybe someday I will write another book about how to eat for $20.00 per week without a garden.

Ideas for City-Dwellers
One of the drawbacks of living without a yard (for example, being in an apartment) is that you can't easily have a garden. However, your town might have a "community garden" that you can be a part of and get vegetables that way. The other thing city-dwellers can do is "spin farming", which is using other people's compost and backyards to grow plants in. You do all of the work, they provide the property, and you both split the harvest. 

Thoughts On Time Management
If you don't think you have enough time to garden, evaluate all of your money-saving activities. I only save $3.00 per hour of line-drying clothes. I only save $1.00 per hour making tortillas.

If I spent 20 hours on my raised bed gardens and only harvested $100.00 worth of produce, I would still be saving $5.00 per hour.

That means my time is worth more gardening that it is line drying clothes OR making tortillas; two popular frugal activities that many people think are worth their time.
 

Changes for Next Year

Here are some things I plan on doing differently next year with my garden. 

1. Do less row gardening and more raised bed gardening. This is always a goal!

2. If I do plant a row garden, lay down plastic instead of tilling. I discovered this year that I didn't have enough mulch material to mulch between the plants (not the rows, just the plants) in my row garden. I mulched the first few rows, but when we rototilled the pathways in between, the tiller just pulled off all of my mulch. It was kind of depressing, especially because I didn't have any more mulch. This left me hopelessly weeding in fits and starts. I despise weeding!

3. If I do a row garden next year, I will at least cut it in half. I haven't done corn or carrots well in raised beds, so those two crops will need to be in rows or patches if I decide to do them next year. However, other things can be planted in the raised beds.

4. Only grow one or two tomato plants. I will let these grow up volunteer and transplant them. Like last year, my tomatoes overtook a lot of the garden and I had way too many. 

5. Work more on picking off bugs and organic pest control.

Other than those few things, I was pretty satisfied with my garden this year.

How did your garden grow? Are there some things you were very happy with, or disappointed with?
1 Comment

Summer Garden Update 2016

8/12/2016

0 Comments

 
Picture
I think it's more than time I did a summer update here... if I waited much longer, it would be my fall update!

Currently Harvesting... Not Too Much

In the last few weeks, I've slowly been harvesting green beans, broccoli, summer squash and peppers.

Though the garden is twice as big as it was last year, 25% of it is flowers, and 25% is pumpkins/squash/sweet corn. The pumpkins and squash are not ready yet, and the sweet corn was a total bummer. I didn't water it enough earlier this summer, and then the raccoons got what was left.

My bed of carrots produced exactly two carrots, and the lettuce bed has gone to seed.

In the next month or so, I'll start harvesting tomatoes and peppers, which are two of my major crops. I would like to get another crop of carrots in, but we'll see if that happens.

Out of my one row of kale, two or three plants spouted. Those that did sprout are doing well.
Picture
Herbs: Holding Steady

Out of the three lavender plants I started this spring, one has survived and is doing well. It took FOREVER to get established, though. I've come to realize that lavender plants started from seed will require a year to just get started. Right now my home-grown lavender plant is about 2/3 the size of the lavender plant that I bought. 

In addition to lavender, my rosemary plant is holding steady and there is a very small patch of thyme out there, as well. The mints I transplanted this spring absolutely took off in growth. Next year I will plant an entire bed of mints instead of just a few square feet. That will be my "tea garden".

Flowers: A Big Disappointment

As I mentioned before, I planted 1/4th of my garden in flowers: sweet peas, delphiniums, glads, freesias, pumpkin-on-a-stick, sunflowers, and many others. The "many others" did not even come up, probably because weeds choked them out. The sunflowers and glads did decently well. However, between the frost and bugs, only a small percentage of the pumpkin-on-a-stick and delphinium plants survived to maturity. None of the freesias even came up, which was a disappointment because they were rather expensive. After babying them for months, the sweet peas are finally starting to flower and they are beautiful. But like the other flowers, only a few plants are left.
​
It looks like my pumpkin-on-a-stick plants have overcome the bugs at last. I was wondering if I'd have more than a few stems to use, but it looks like most of my row will produce some stalks. I look forward to to using them in flower arrangements (or selling at the farmers market!) this fall.

Mistakes & Changes for Next Year

1. Planted too early. I planted many things in mid-late April. Most of them did not actually GROW until May, when it warmed up. I decided that next year I'll wait until May 1st to plant anything. This means that I'll start my transplants a month later.

2. Tomato & pepper transplants died. Something happened to almost all of my tomato seedlings, to where I planted them in the raised and then they withered and died. About 3/4 of my pepper plants froze. So I ended up purchasing tomato plants. They were not all that expensive, and have done very well. Next year I am going to buy at least tomato plants, possibly pepper plants as well, and focus my seed starting efforts on flowers and herbs, which are more expensive to buy.

3. Not enough watering. In June we experienced a small drought, which permanently stunted my corn. I didn't start watering the entire garden (I was just using a watering can on certain plants) until after that, because I had procrastinated putting a splitter on the hose and hooking up my own sprinkler. Next year the sprinkler/watering system will be all ready to go.

4. Too many weeds in the row garden. I knew that would happen, because... row garden. The tiller and I don't get along. I did have Hubs till once or twice, but the tiller tilled under all of my mulch (primary weed defense) and I did not have enough mulch to put any more on. So tilling is really not an option if I want a weed-free garden. Next year if I do a row garden, I will put mulch between the plants and plastic between the rows.

5. Bug infestations. I had major problems with striped cucumber beetles, blister beetles, rose beetles and grasshoppers. I'm not sure how to take care of the grasshoppers, except perhaps fencing in the garden and throwing a duck or chicken in there. However, I found some traps and did some hand-picking of the bugs (much easier when there are no weeds, which was problem number 1) and for the most part we pulled through.

6. Raccoon infestations. So the coons got my corn... or whatever there was of it. Only thing I can think of to stop that is fencing in the garden or trapping the coons.

7. Low germination rate for herbs. I mistakenly transplanted individual thyme and oregano seedlings, and later realized that the thyme plants you buy are actually clumps of plants, not one plant like lavender or rosemary. Speaking of those two herbs, I probably had three or four of each germinate, but only a single plant (lavender) survived to maturity. Next year I will do some research on germinating those two herbs (especially lavender) and also basil (only one plant survived to maturity).

8. Mulched the strawberries with straw. That was a disaster. Weeds all over the place! Next year I am just going to use grass like I do for everything else.

Some things I think we did right this year were 1) utilizing more raised beds. They were half of the garden, but only 10% of the work. 2) Weed whacked between the raised beds. It took 15 minutes every 3-4 weeks, and looked great compared to bare dirt or even mulch. 3) Adding flowers. Even though the flowers don't feed us and I didn't have enough to sell at the farmer's market, they kept me interested in the garden and were beautiful to look at. I think growing flowers (especially from seed) for vase arrangements can stretch your home decorating budget a long way.

Til next time,
-Bethany
0 Comments

Frugal Accomplishments This Week

7/11/2016

0 Comments

 
Picture
Last week was super productive. We didn't have a lot going on, so I got to spend more time in the house and garden.

1. Made a vase arrangement for the table using lilies and ferns from the garden.

2. Harvested over five quarts of berries, 1 quart of green beans, lettuce and chamomile from the garden. I also harvested a bowl of Japanese beetles for my chickens.

In order to hand-pick the beetles, fill a container 75% full of water and add a drop of dish soap. Then go out early in the morning when the bugs are still sleeping. My beetles LOVE the raspberry patch, so that is where I collect. If they are still tired, you can usually brush or shake the bugs off into the bowl of water. After collecting, I leave the bugs for an hour or two until I know they have all died. Then I feed them to the chickens.

This accomplishes two things. First it gets the bugs off the raspberries without any chemicals, and second it feeds the chickens a nice protein-filled snack. It only takes 15-20 minutes in the morning to do this.

3. Mounted/framed some paintings from Honduras and Guatemala. Hubs measured and built frames for the paintings out of scrap lumber, and then I helped him stretch and staple the canvas over each frame. They turned out very nice.
Picture
4. Made cheese.
​

5. Went to garage sales! I ended up spending about $48.00, but $24.00 of that was on canning jars. I paid $0.33 on the jars, which were half-pint and pint sized. This price was only 50% off retail for the normal half-pints that I bought, but I also purchased an equal amount of specialty jars that cost $1.00 or more new. So those jars were 75%+ off retail. I will use the specialty jars for farmers market stuff and gifts.
Picture

In addition to the jars, I also bought some vintage items for selling on Ebay/Etsy, several candles, lamp oil, an electricity timer, a belt, two baskets, a like-new pair of flip flops, a spatula, three small rubbermaid food containers with lids (I needed more of that size, plus they had lids!), a necklace, a clothes drying rack, a dish drainer (the one I have doesn't fit in the sink and takes up a lot of counter space when not in use), a pizza pan, two cookie sheets, brand new heart-shaped cookie cutters, baby-themed stamps for making cards, a lined notebook/journal, a folder/binder for storing coupons, a box of sewing notions (thread, buttons, snaps, velcro, etc.) and several items for the "prize box" I keep for my piano students.


My Garage Sale Strategy
​It can be easy to just fill your house with garage sale junk. However, there are some things you can do to prevent useless garage sale buildup in your home.

1) Carefully select housewares for the purpose of upgrading your lifestyle. These things should be specific items you are looking for, not impulse purchases. For example, I don't go around collecting dish drainers. I had my eye on one at Walmart, and actually considered buying it. However, by waiting for a garage sale I saved about 70% retail price.

2) Buy tools that you will use to make stuff or save money with. The stampers, clothes drying rack and meat slicer are all things I hope to save money by using.

3) Buy things to sell. That way you can make money with them AND get rid of them! You can also sell tools that you buy and end up not using.

4) Buy supplies and consumables. Things like sewing notions or lamp oil are items that I may have bought anyway and will eventually get used up. The sewing box was $1.00 and included several different thread colors. Building up a supply of thread through garage sales and then matching those threads to your project is a lot cheaper than starting a project and buying new thread to match exactly. In fact, using steeply discounted supplies is essential to frugal sewing. If you are making a skirt and spend $1.50 on thread (and that is the cheap kind), you've already spent half of what a Goodwill skirt would cost.

5) Don't buy something you already have. The problem with garage sales (and sales in general) is that people buy something just because it's a good deal. They don't have a plan for the item, so it ends up sitting in the garage or barn or attic until THEY have a garage sale. In the mean time, the item has only been taking up space and depreciating in value.

Picture
6. Sold 2 dozen eggs.

7. Earned $53.04 at the farmers market. Technically I am taking the months of July and August off, but this Saturday Hubs was busy and I thought I'd take the opportunity to try out a different Saturday market in my home town. This one was smaller, but also had smaller fees and was close by. I was curious to see how things would work out. I priced my baked goods a little lower than I normally do. As it turns out, they were still a little bit higher than the other bakers, but people bought anyway.

At the end of the day, I actually made more money this week at a small market than I did either week of June ($47.06 and $44.36 respectively) at the large market. Though I marked my prices down and didn't sell as much stuff on Saturday, the $15 less in booth fee and $1 less in gas money allowed my net profit to be more. Who knew? Now I can plan on doing the larger market during the month of May (before the small market opens), and then move to the smaller market in June. From June-August I will probably only sell once a month. $53.00 is more than enough to cover monthly summer feed costs for the animals.

The only thing I didn't like about my hometown market was selling (or not selling) to people I grew up with. That was a little weird. I felt like some of the people I knew were critiquing my stuff. I wondered if they thought my products were stupid or overpriced or bad. "Oh, there's Bethany, trying to sell a bunch of stuff she made. I know her- she's not a REAL baker/soap-maker/author/farmer. Let me look at this... nope, totally not legit. I'll bet she doesn't even make any money at this. What a waste of time. What a loser. She should just go get a real job like all the rest of us."

We tend to take strangers more seriously than friends (especially the ones we grew up with), so my suspicions/fears were probably correct in some cases. There will always be a few people who think you are "not legit" just because you grew up down the street. However, the bottom line is that I did make more money and it was easier and less stressful than the large market. So, I'll probably sell there again.

Unfortunately, on the way home one of my tires blew. So, my market car is out of commission until Hubs finds another tire. Good thing I'm not doing market again for a while!
Picture
​8. Separated Adi from her kids. Now we are milking twice a day and keeping twice as much milk for ourselves. Last year I didn't have any kids from Adi, so milk from her was abundant. Life with [goat] kids has been... interesting. One challenge we were not prepared to deal with was their size. If goats are escape artists, baby goats are master escape artists. Because they are so small, they can not only squeeze through tiny holes, but also propel themselves over fences and onto barn roofs. We've managed to separate them from the buck and their mother, but they are still squeezing/jumping into the chicken corner and eating chicken feed on the sly. Oh dear.

Anyhow, while we were gone for essentially two weeks (first for Honduras, then across the country for a funeral), Adi's milk production dropped to 1 1/2 cups per day. I believe this is because we left the kids on her instead of separating them and milking her (to make chores easier on the animal babysitters), and she naturally started to wean them. So during that time she went from 3 cups per milking to 1.5 cups per milking. Last year it took months, not weeks, for her to go down like that.

Now that we've separated her from the kids and are milking twice a day regularly, I'm hoping that her production will stay over 3 cups per day. 

Goals for Next Week:

1. Make soaps.
2. Photograph aprons for Etsy.
3. Continue to harvest garden produce.

Til next time,
-Bethany
0 Comments

Spring 2016 Garden Update

6/8/2016

1 Comment

 
I guess it's not really Spring anymore... which is why I've finally gotten around to posting a garden update.
Picture
Raised beds, and row garden to the left.
This year I doubled the size of my garden, back to the way it was in 2014. However, this time around half of the garden is planted in raised beds. This is going to help immensely.

Row Garden & Raised Beds
I also did a row garden this year, for flowers, pumpkins and sweet corn. I'm a little nervous about the row garden because o 1) I don't like to use the tiller, so 2) I have to hand weed or mulch a lot. The problem is that I don't have time to do that much weeding, and I cannot collect grass clippings fast enough to mulch the entire thing. I am only mulching the actual rows of vegetables, not the paths in between. We are tilling the paths (but only periodically, when Hubs has the time). However, when we till the paths, we end up tilling most of our mulch into the ground and thus every time we till, I am going to have to re-mulch the entire thing. And there is not enough mulch for that.

So, I have a feeling that my "market garden" or "fodder garden" (extra pumpkins, squash, peas will go to the animals) as I call it, is going to get a lot weedier than my raised beds. Which, by the way, only have to be mulched ONCE during the whole season, and never tilled. We've decided that instead of mulching the paths or laying down plastic, we'll just weed whack in between the beds. It still looks nice and clean that way.​
Picture
(Top to bottom) pepper bed, "carrot" bed with no carrots, and salad bed. I will be growing tomato plants vertically on the left (north) side of each bed.
I am thinking of doing long, rectangular raised beds for my row crops in the coming years, and hopefully in time my entire garden will be only raised beds. It is just the initial start-up investment of building and filling the beds (free for us, but it does take some time) that forces me to do a row garden. In the next five years I want EVERYTHING- vegetables, fruits, herbs, flowers, market & fodder crops- planted in raised beds.

Seed Starting Update
Earlier this year I started seeds. Last year went pretty well in the gardening department, so I thought I had everything figured out. Silly me! I transplanted most of my seedlings outdoors in the middle of May, and life happened. I mean, MICHIGAN happened and we had a whole week of cold weather, including at least one frost. A lot of my seedlings died at this point.


1. Forced tulip bulbs- sprouted and grew leaves, but no flowers. :(

2. Chili peppers- out of 15 seedlings, I have four plants left in the raised bed.

3. Basil seeds- both plants died in the frost (even though I covered one of them).

4. Echinacea seeds- not a single seed ever germinated, even after four months.

5. Rosemary seeds- one or two seeds germinated, but both failed to grow after I transplanted them into the egg carton planters.

6. Lavender seeds- I bought two different packets of lavender, and four or five seeds germinated. Of these, only one plant survived. I ended up buying a $3.00 lavender plant at the farmers market to accompany my baby plant.

​7. Passionflower seeds- not a single one of these sprouted.

8. Radishes- I only had a few seeds, planted them in a raised bed and they did pretty well.

9. Peas- I'm guessing about 20% of my peas germinated.

10. Onions- about 30-40% of my little sets came up.

11. Lettuce- I planted some in a raised bed, but I shouldn't have. It didn't grow very well, and I have volunteer lettuce from last year coming up like weeds.

12. Fennel, dill, cilantro and chamomile- these all successfully self-seeded from last year.

13. Carrots- I planted some seeds in a raised bed, with not a single germination from what I'm aware of.

14. Broccoli- started these seeds inside and planted them in a raised bed with mulch. About half the plants died, but the rest are doing well.
​
Picture
Top to bottom: broccoli bed, green bean bed, and pepper bed with some volunteer dill plants.

15. Watermelon seeds- I started these indoors, but some died from overwatering. The transplants died after the frost.

16. Cantelope seeds- like the watermelon, I also started these indoors. And likewise, they died during the frost.

17. Bell pepper seeds- I started these seeds in an actual plastic "greenhouse" that I bought at Walmart. The idea was that I wouldn't have to transplant the seedlings into individual containers. The seeds sprouted great, but I don't think the containers were big enough for the plants to thrive. Between frost and not enough  watering (my raised beds weren't mulched well with newspaper, plus I had to add some regular dirt), only about 25% of my seedlings survived.

18. Pumpkin-on-a-stick seeds- these were easy enough to sprout and did well in the egg carton planters. I transplanted them into the garden in mid-May. I covered all of the plants during the frost, but they failed to really grow at all until we had warmer weather at the end of May. Last week I found cucumber beetles eating and laying eggs on the plants, so I stripped all of the eggs and smashed the bugs. So far they haven't come back.

19. Tomato seeds- the tomatoes did about as well as my peppers. Lost all but 25%. I ended up buying new pepper and tomato plants (see below). 

​20. Pumpkins- I planted pumpkin seeds directly in my garden at the end of May. Almost all of them germinated and got really big. However, I'm now in a war with the squash bugs and cucumber bugs, because I made the mistake of planting where other cucurbits grew last year.

You can see some of my attempts at pest control below. I've found that it works best to hand pick the bugs early in the morning, when they are still sluggish. I check under the shingles, and oftentimes there are several bugs there that I can just scrape into my bowl of yellow water to die. The yellow water trap works best during the day when they are flying around.

Picture
The bugs like hiding under shingles.
Picture
Homemade bug trap: water with a little dish soap + yellow food coloring and a Q-tip dipped in clove essential oil.
21. Acorn squash- also germinated but is currently being decimated by bugs.

22. Green beans- I planted one raised bed full of green bean seeds. Most of the store-bought seeds sprouted, but my saved bean seeds only produced a few plants.

23. Cucumbers- I planted cucumbers on one side of my lettuce bed. They are doing well- no sign of bugs yet.

24. Straightneck squash- I planted two hills. One hill germinated.

25. Amaranth- I planted this several weeks ago. Right now I can just see the tiniest little seedlings coming up.

26. Sweet corn- pre-sprouted the seeds indoors, and then planted in the garden. I'm guessing about 60-70% of the planted corn came up.

27. Thyme & Oregano- both of these herbs germinated GREAT! Unfortunately the oregano and almost all of my thyme died after the frost.

28. Other stuff: in March I went on a spending spree and bought a bunch of flower seeds and bulbs. Some of
the flowers have come up and some haven't. I started some delphinium seeds indoors, and now the plants are doing okay out in the garden. Sunflowers are coming up nicely, glads are starting to pop up, and I've got some sweet peas on the way as well.
Picture
Strawberry raised beds, plus extra strawberry plants put in between. This fall we will put a raised bed in the middle to make three.
29. Fruit: I've been trying hard to keep the raspberries and strawberries free from thistles and weeds. I noticed that the Japanese beetles lay eggs on the thistles, which may be why the bugs decimated my raspberry patch last year. This year I made sure to get ALL the thistles from the raspberry patch, and thin out smaller raspberry plants that were just taking up space (both in the raspberry row AND the strawberry rows!). These small plants I used to make tree hay for my goats this winter.

The strawberries are starting to ripen. I am hoping they will last long enough to sell both this week and next week at the farmers market. 
Picture
Changes for Next Spring

Seed Starting:
1. Go back to my original seed starting method, transplanting seedlings to plastic cups (more room for roots to grow).
2. Grow herbs (oregano & thyme) in clumps (not single seedlings), in larger pots.
3. Use cuttings to propagate hard-to-germinate plants.

Raised Beds:
4. Make sure all raised beds have newspaper unless they are going to be direct-seeded (plan this out in the fall).
5. Wait to transplant/plant until the end of May. This will mean starting my seeds about a month later than I did this year.
6. Make sure to use viable seeds.
7. Possibly purchase tomato and pepper plants. I like this idea because the plants I bought were only $0.40 each. A bonus? My $3.00 bought two different varieties instead of one. This is great because I still haven't found a variety of tomato that I really like. If you think about it, there is no point in paying $3-4 for a pack of seeds if fewer than ten plants survive anyway. 

Row Garden:
8. Plant cucurbits later in the season, and rotate to a different spot in the garden. 
9. Start checking for bugs right away.
10. Start sprinkler earlier.

Whew! I think that's it. 

​Til next time,
-Bethany
1 Comment

ROI of Growing Herbal Tea

5/20/2016

1 Comment

 
Picture
Hello friends and homemakers! Today's topic is growing your own herbal tea. Herbal teas are some of the easiest things to grow, especially if they are perennial plants and come back year after year. In fact, you probably have some herbal teas already growing in your backyard, disguised as weeds or trees.

Potential Savings
I drink primarily herbal tea, or green/black tea & herbal tea blends. No coffee for me! Because of this, I tend to buy a fair amount of tea. In fact, I would probably say I drink enough tea to equal one bag every day, for the entire year. 

One of my favorite teas (Kroger Private Selection brand) costs $2.48 per box of 20 bags. That equals out to $0.12 per 2.0 g. bag of tea. A box contains 40g. (1.43 oz) of tea.

$0.12 per day x 365 days = $43.80 per year savings.

Return On Investment
As I mentioned before, if you know what to look for, you can potentially find herbal tea in your own backyard. You can also get a free transplant from a friend, or you can buy a small plant from a nursery. For our intents and purposes, I'll say that the plant or packet of seeds costs $2.00. So, that is your investment.

$41.80 return - ($43.80 - $2.00 investment) = 2090% return on investment

Hourly Wage
Collecting and preserving herbal tea is fairly straightforward. I go out there with a pair of scissors, or pick the leaves/stalks with my bare hands. Then I bring it inside and lay everything out on a cookie sheet. (Depending on the plant, I'll strip the leaves from the stalks either before or after drying.) Then I put the sheet in my gas oven overnight (the pilot light provides enough heat... I don't turn the oven on at all). When the leaves are crispy to the touch- and this may take up to two days- then I strip the leaves off of the stems and put them in an airtight container- usually a mason-type jar or recycled plastic container. Lastly, I label the contents.

Herbs commonly used for herbal tea: peppermint, spearmint, chamomile, raspberry leaf, nettles, pineapple weed, lemon balm. If you'd like to re-create some of your favorite teas, just save the ingredients list on the back of the box for reference. Unfortunately, many herbal teas have things like "natural flavors"... for example "peach flavor" or "pomegranate flavor" that you can't make at home. But there are some other ingredients that you can find at the store or make.

Common additions to herbal tea: stevia, hibiscus, dried ginger, dried orange & lemon peel. Whenever I have an orange (not very often) I try to save the zest. You can do this by taking a sharp paring knife and carefully removing the colored part of the rind... not the white pithy stuff! Dry the peel as you would herbal tea (in the oven) and break it into pieces before adding to loose leaf tea. Stevia is a sweetener that you can buy or grow in the garden. Hibiscus is very often used to add fruity flavor to teas. You can get hibiscus flowers in bulk, or buy tea bags with hibiscus in them.

I use a teapot with infusing insert to make herbal tea for Hubs and I. If I'm only making tea for myself, I just use a small tea ball infuser. You can also buy "press and brew" disposable tea bags, but I think that is too much bother for a $0.12 bag of tea. Plus it is a lot of waste. Brewing loose leaf tea allows you to use the old tea leaves for compost.

I figure it takes me about three minutes to prepare 2.0 grams of tea (as much as there is in a tea bag). Therefore: 

$0.12 per 3-minute increment x 20 (increments per hour) = $2.40 per hour 

Conclusion
​What I like about this "investment" (that is, planting a tea garden) is the high potential for savings. Tea for one person alone has the potential to save $0.84 per week. In a family with three or four tea drinkers, this little project could save over a hundred dollars per year. If you are gardener or forager anyway, why not grow some herbal tea?

Of course, the downside of this project is the "hourly wage". It's below my $4.00/hr. standard. However, some teas take far less time to prepare. This will increase the hourly wage substantially. For example, spearmint leaves are a lot less labor-intensive to prepare than peppermint leaves, which are smaller. Drying a whole stem of raspberry leaves and stripping them with a gloved hand is a lot easier than cutting tiny chamomile flower heads with a pair of scissors. So, some teas are better to grow at home than others.

Do you enjoy herbal tea? Have any tips or tricks for the rest of us?
1 Comment
<<Previous
    Picture

    Bethany

    Housewife, happy wife, and mama to one. :)

    Picture

    Picture
    The Housewife's Guide to Frugal Food
    How to Eat for $10.00
    ​per Week

    Picture
    The Housewife's Guide to Menu Planning
    A Weekly Menu to Save
    Time & Money
    Picture
    The Housewife's Guide to
    Frugal Fruits and Vegetables

    No Garden? No Problem!

    Watch Meals From the Bunker:

    Picture

    Check out my Youtube Channel!

    RSS Feed


    Picture
    Baby Girl's Birth Story
    Picture
    8 Cheap Ways to Eat Healthy
    Picture

    Categories

    All
    Animals
    Book Reviews
    Books
    Christmas
    Cleaning
    Clothing
    Cooking
    Couponing
    Education
    Ego
    Electricity
    Farmers Market
    Finance
    Foraging
    Frugal
    Frugal Accomplishments
    Frugality
    Garage Sales
    Gardening
    Gifts
    Grocery Budget
    Grocery Shopping
    Herbs
    History
    Hobby Farm
    Home Based Business
    Home-based Business
    Home Decorating
    Housekeeping
    Industry
    Languages
    Laundry
    Marriage
    Meal Planning
    Medicine
    Minimalist
    Network Marketing
    Organization
    Plants
    Product Reviews
    Quotes
    Recipes
    ROI
    Rv
    Sewing
    Simplicity
    Spanish
    Spending Report
    Travel

    Archives

    May 2021
    April 2021
    March 2021
    February 2021
    January 2021
    August 2020
    May 2020
    April 2020
    March 2020
    February 2020
    January 2020
    December 2019
    November 2019
    October 2019
    September 2019
    August 2019
    July 2019
    June 2019
    May 2019
    April 2019
    March 2019
    February 2019
    January 2019
    December 2018
    November 2018
    October 2018
    September 2018
    August 2018
    July 2018
    June 2018
    May 2018
    April 2018
    March 2018
    February 2018
    January 2018
    December 2017
    November 2017
    October 2017
    September 2017
    August 2017
    July 2017
    June 2017
    May 2017
    April 2017
    March 2017
    February 2017
    January 2017
    December 2016
    November 2016
    October 2016
    September 2016
    August 2016
    July 2016
    June 2016
    May 2016
    April 2016
    March 2016
    February 2016
    January 2016
    December 2015
    November 2015
    October 2015
    September 2015
    August 2015
    July 2015
    June 2015
    May 2015
    April 2015
    March 2015
    February 2015
    January 2015
    December 2014
    November 2014
    October 2014
    September 2014

    Full Disclosure & Disclaimer

    Picture
    Picture
    I get cash back for many online purchases including wedding gifts and Ebay stuff!

Powered by Create your own unique website with customizable templates.
Photos used under Creative Commons from dasWebweib, amanessinger, thewritingreader, diakosmein