the Renaissance Housewife
  • Home
  • Topics
    • Saving >
      • Kitchen >
        • Food >
          • Recipes
      • Bath & Laundry
      • Medicine Cabinet
      • Office
      • Electricity
      • Gardening
      • Foraging
      • Animals
      • Weekly F. A.'s
      • Printables & Downloads
    • Earning
    • Investing
  • Books
  • About
    • RH Recommends
    • Newsletter & Updates
    • Travel
    • Beta Readers
    • Legal Stuff

Frugal Accomplishments; Garden Plans!

1/14/2019

2 Comments

 
Picture
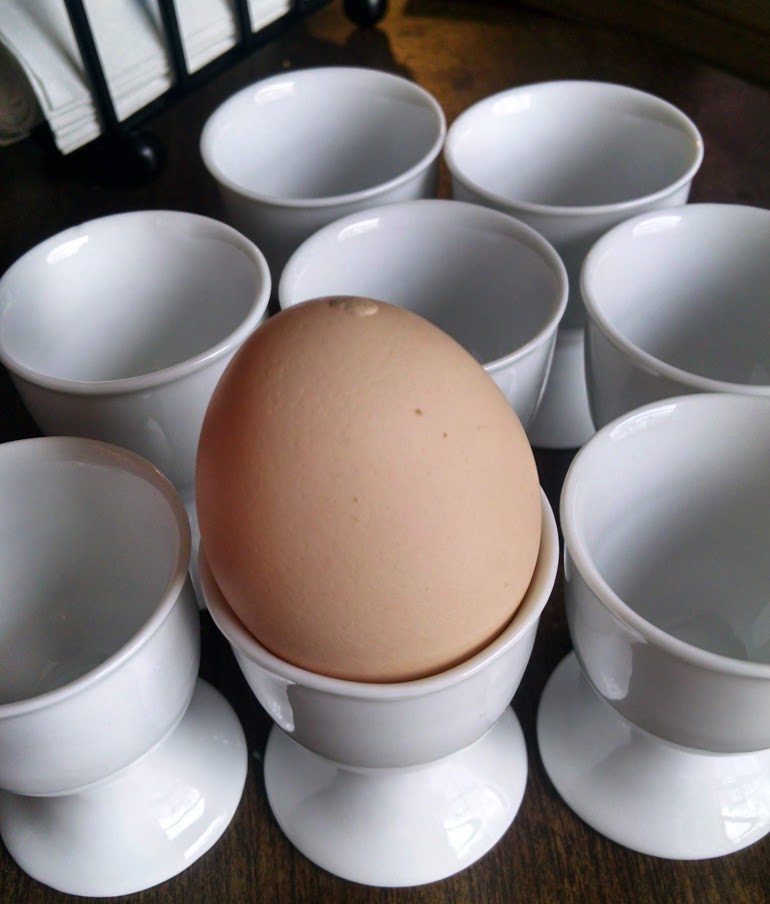
Thrift store egg servers!
We are officially one half way through our zero-spend month of cooking!

1. Groceries: We didn't buy any groceries. I did salvage some packaged food that was headed for the dumpster. I also harvested lettuce from our cold frame, and collected eggs from our chickens. I also shelled some almonds from Christmas.   

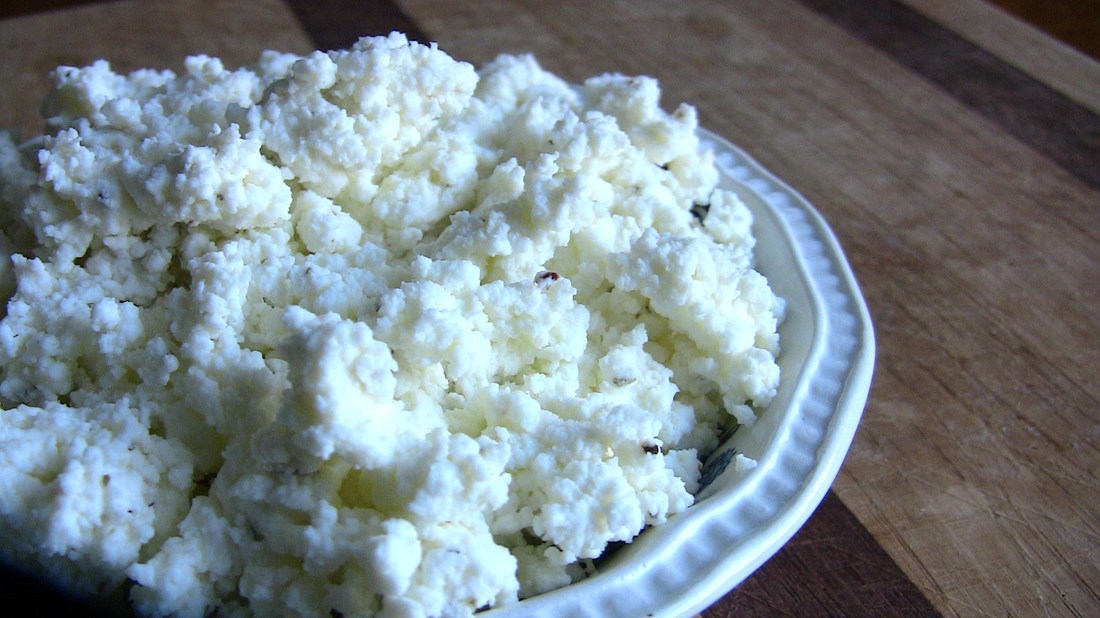
2. Cooking: I cooked a turkey this week, and made broth. I used powdered milk from the pantry to make milk for cereal. You can watch a clip of my turkey process on this week's Youtube vlog:​
I have been having so much fun with this zero-spend month. We have a lot of ingredients in the pantry that I plumb forgot about. I made some wonderful smoothies with dates and canned coconut milk, for example.

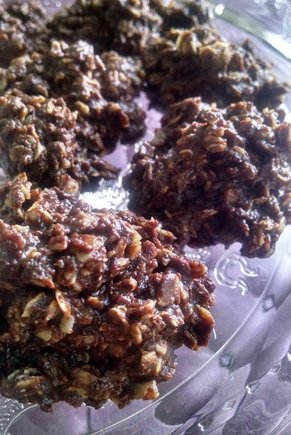
As of several months ago, I've been celebrating "Sugar Saturday". This is where I save all of the sugary snacks and desserts for one day of the week. On Friday nights I get out the stash and artfully arrange it under a cake dome. Then on Saturday... it's feast time! Slowly we've been eating down the leftover Christmas sugar. I still have some candy left, but this week I was down to graham crackers, Nutella, some frozen oatmeal bars I made awhile ago, and an instant oatmeal packet. 


3. ​Thrift store finds: I bought a game, book, and a set of eight egg servers at the thrift store. The egg servers were on my "dream kitchen" list. I was so happy to find them! I kept two of the servers out, in the china cabinet, and put the other six into storage until we have a bigger kitchen.  

4. Cans to recycle: Princess and I went for several short walks this week and collected almost $2.00 worth of cans and bottles. Free exercise AND free money!  

5. Marketing declutter: I' unsubscribed to email lists and cleaned out my email inbox. I still had things from November sitting unopened. Yikes! Unsubscribing from lists is an ongoing process, just like house decluttering is. Right now, for example, I'm unsubscribing to all of the cloth diaper retailers. There was a season when I was still looking to build my stash, but now I have everything we need (plus some). Not only that, but I see potty training in our 2019 future.

Oftentimes I'll subscribe to a list just to get the sign-up incentive. Or, I'll buy something online and automatically get signed up for the list. Most of these lists are just trying to sell more stuff. If the stuff is no longer relevant our helpful, there's no reason to be signed up for the list.

A fast way to clean out your inbox of 326 emails (not kidding, that's what it was!) is to first unsubscribe to a list, and then use the "sweep" function to get rid of all the other emails from that sender.

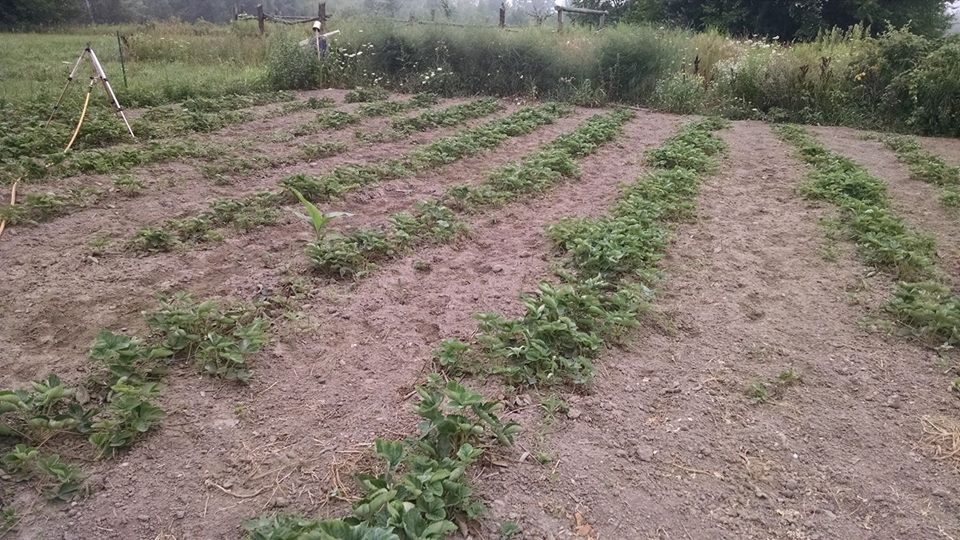
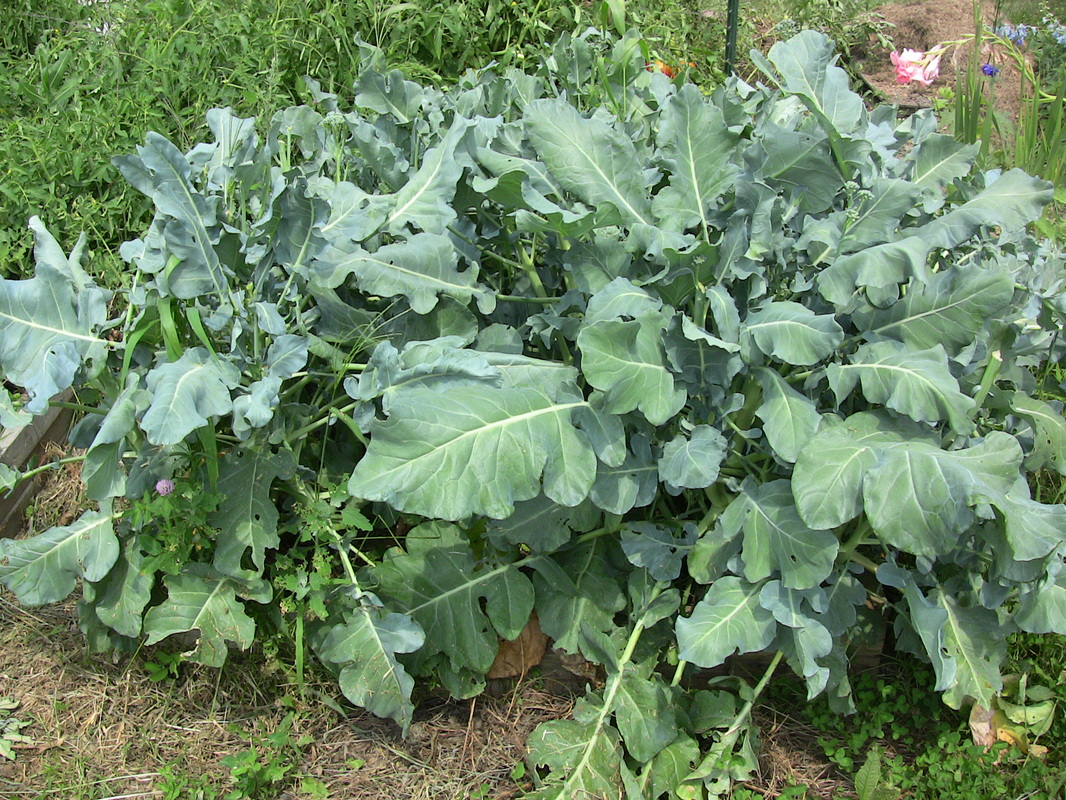
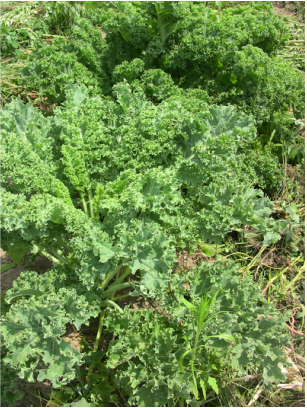
6. I finished garden planning for the year. This is the first year that I'm not as excited about having a garden. I think I burned out in 2018 from trying to do both my vegetable garden and the strawberry patch. It wasn't just my time that had to be divided (do I spend Baby's nap time gardening, or finishing some other pressing task? Do I work on the strawberries or the vegetables?), but also which garden got the sprinkler (it malfunctioned all summer). While the 2018 vegetable garden got a great start, I didn't end up harvesting very much from it. When I did get a harvest, I had to choose between preserving the harvest, harvesting even more, or—you guessed it—weeding strawberries. 

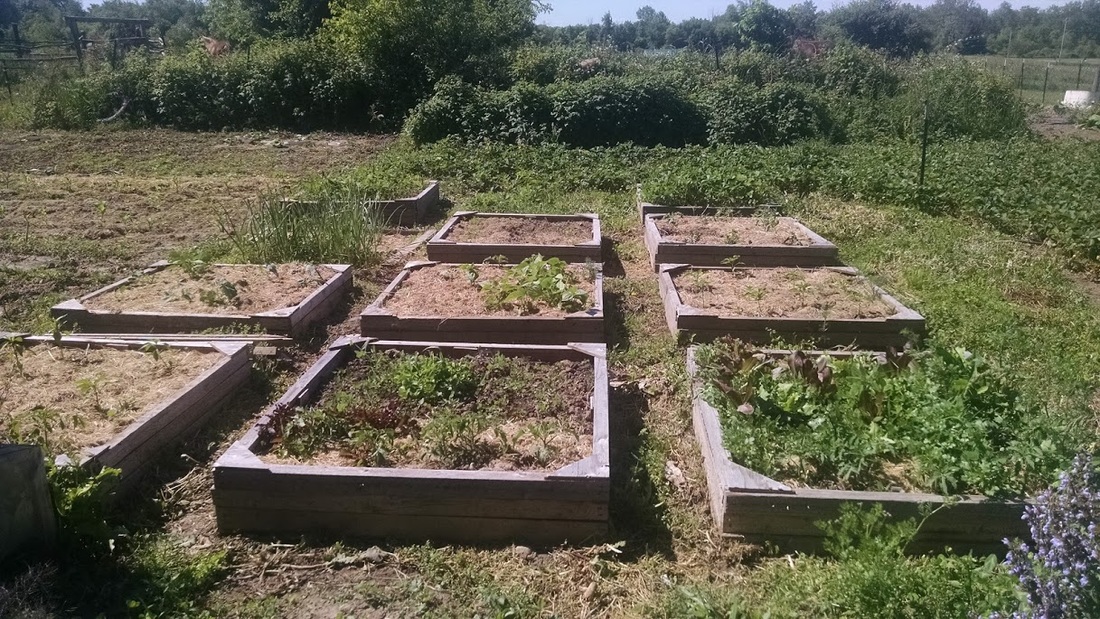
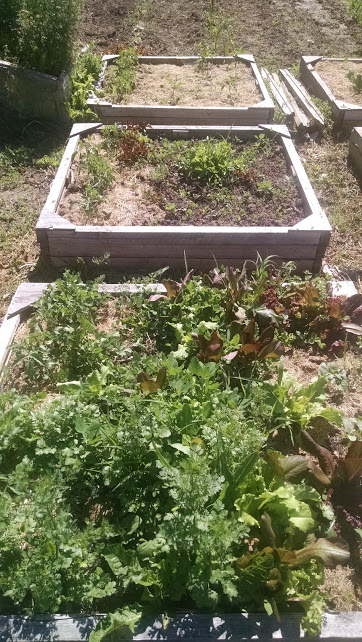
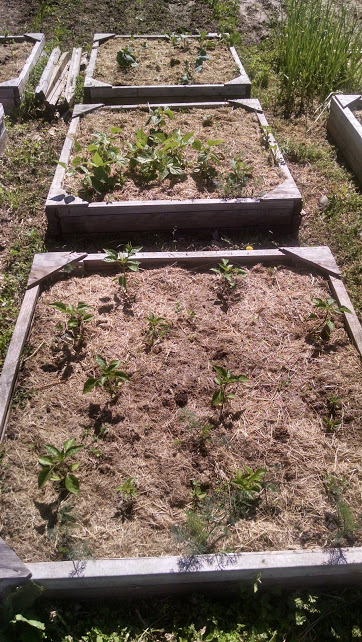
This year my focus is going to be growing fresh vegetables, with little or no emphasis on canning and freezing. I have a dozen 4x4' raised beds, most of which are ready to use come spring. In the past I've also planted row garden crops beside the raised beds, but this year I'll keep everything confined to the beds. Last fall we converted two of them into cold frames. My goal is to plant a salad garden in one of the cold frames, and a root vegetable garden in the other cold frame. I hope to extend the season by four months this year (March, April, October, November).
Picture
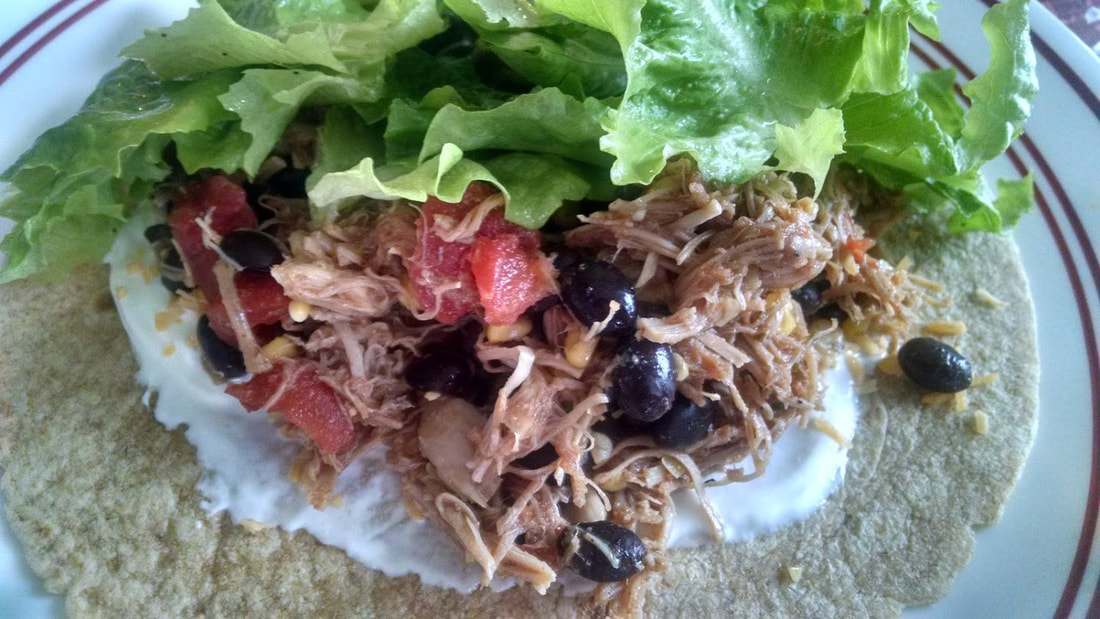
Tacos during our zero-spend month. Free lettuce from the garden cold frame!
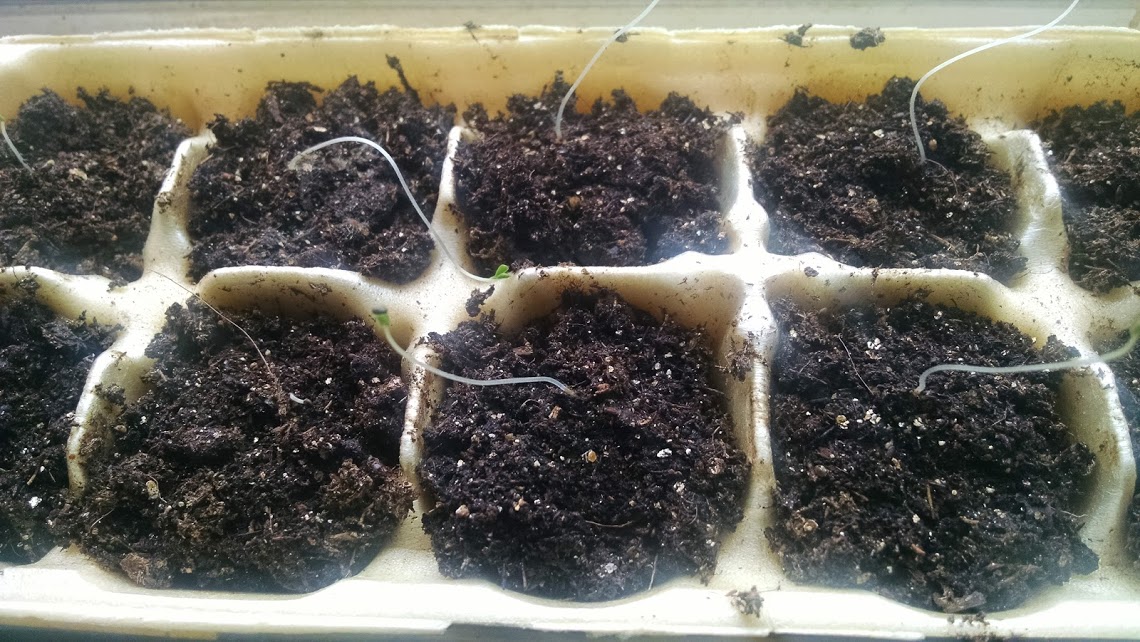
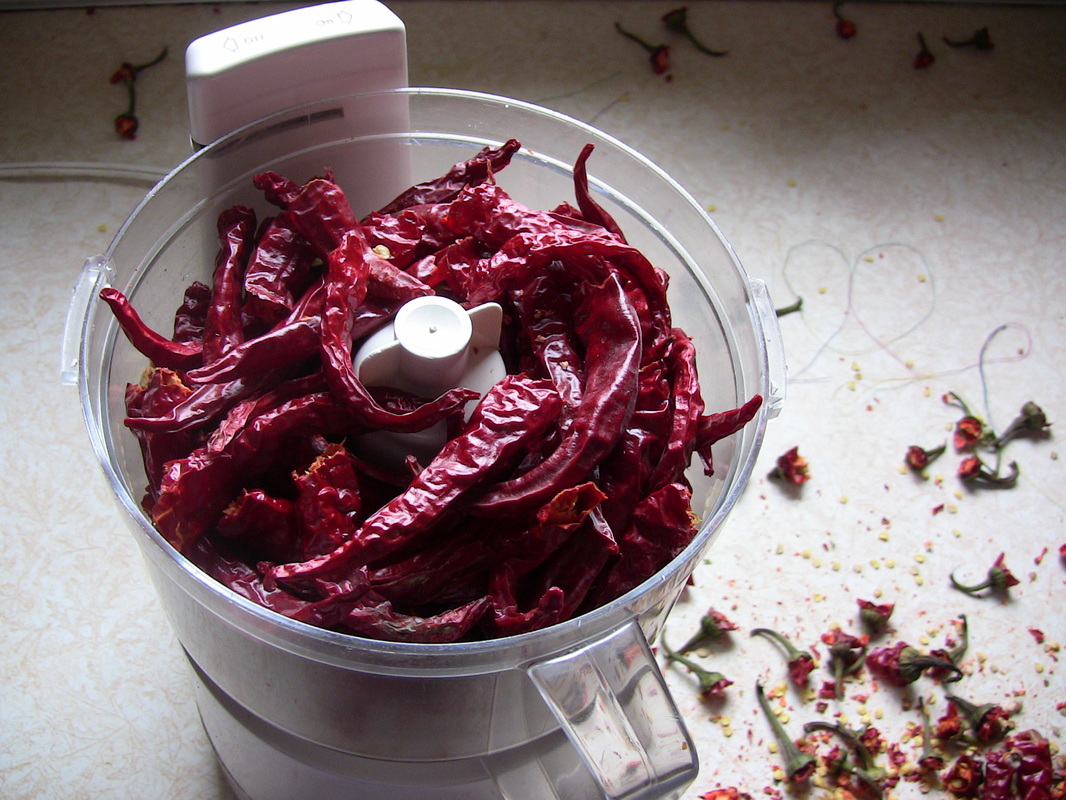
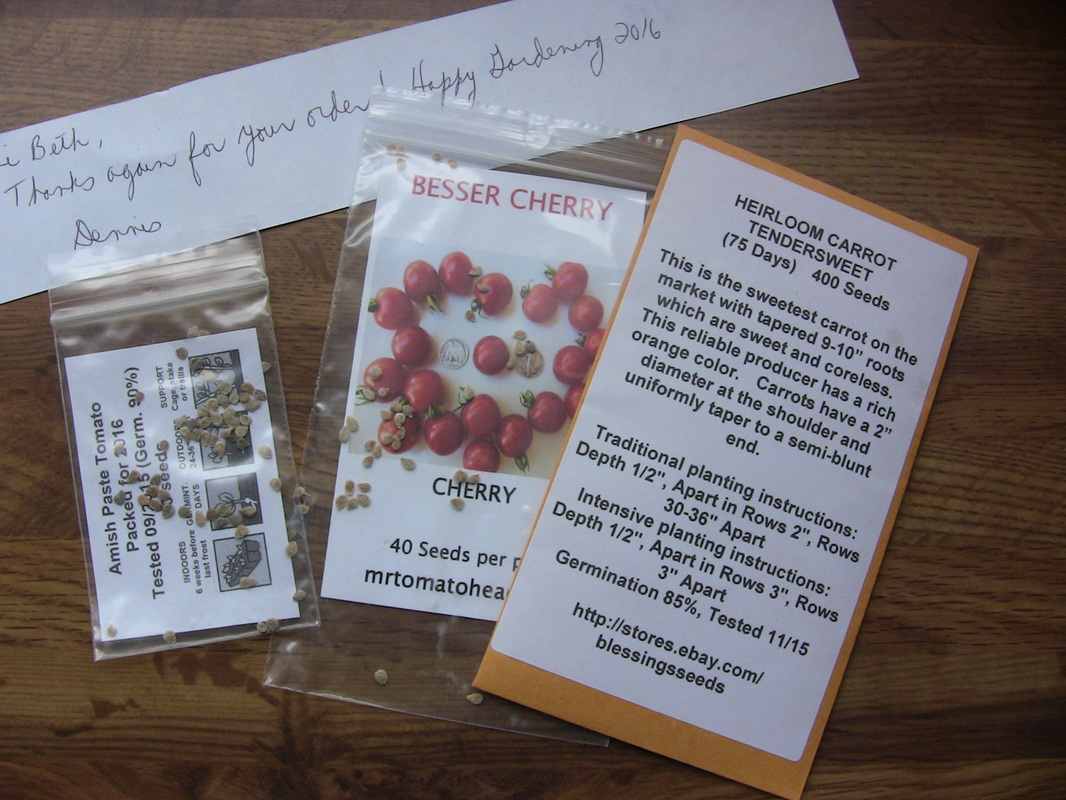
In order to cut costs, I am attempting to start some of my own seedlings this year; heirloom tomatoes, peppers, sweet potatoes, cucumbers and some herb and flower seeds. I'll be purchasing five seed packets from Baker Creek Heirloom Seeds ($15.00), five seed packets from Walmart ($10.00 or less), and five plants (mostly herbs—$15.00) from a nursery. That sounds like a lot of money to spend on a garden, but I will use the seeds for several years, and the herb plants are perennials. The "vegetable" garden will also produce fresh herbs, fruit and flowers, and those things increase the value of my garden significantly.

I've planned the following beds: 1) culinary herbs, 2) flowers, 3) medicinal herbs 4) mints and tea herbs, 5) long beans, 6) sweet potatoes, 7) peppers, 8) tomatoes, 9 &10) cold frames and 11 & 12) open beds for any miscellaneous plants. During the warmer months I'm going to replace the greenhouse lid with a chicken-wire climbing frame to hold cucumbers. Hopefully the vining plants will provide shade for the lettuce and keep it from bolting.

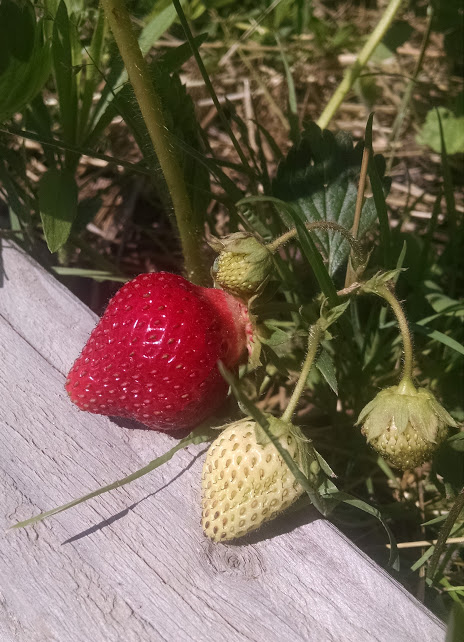
Instead of using grass clippings for mulch, I will (again) use landscape fabric for the transplants, and old strawberry straw for the seeded items. This will reduce the amount of time needed to gather mulch. I have a LOT of straw on the strawberry patch right now, so I'll be able to use that for mulching even the flowers, bulbs and raspberries.

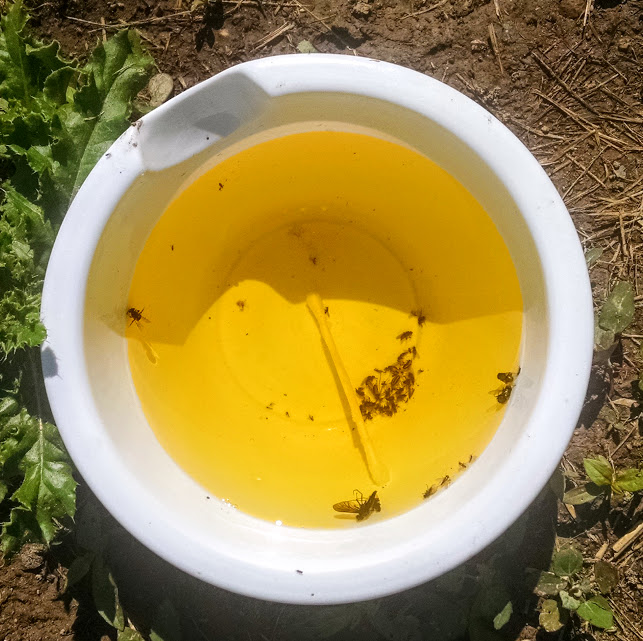
I made a general calendar of when each gardening task should be done. For example, I know that raccoons, Japanese beetles and blister beetles all come out at a certain time. I've made a note to purchase and/or set traps before those months, in order to reduce time spent picking off bugs, as well as lost crops. 

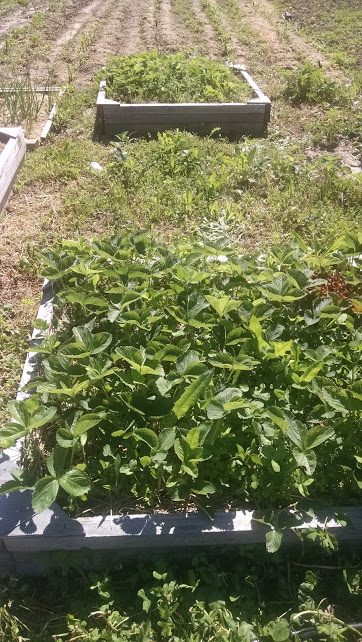
I plan on putting in an hour of strawberry weeding time every day. It may take less than an hour every day, but I'm planning an hour just to be safe. The trick is to do it consistently, and not wait for a once-a-month weeding marathon (which is what I did last year... big mistake). I hope that by keeping up a strong deer fence, that the strawberries will be able to overpower the weeds this year. ​

So, that is about it! I hope your week was full of frugal accomplishments. :)

​Til next time,
​-Bethany
2 Comments

July Hobby Farm Update

8/3/2017

0 Comments

 
Picture
Barry acting "bucky".
​Goats

​Both goats are doing great. Adi is growing a shiny new coat of hair, presumably for winter already. She is currently giving about 1 1/3 cups of milk per milking; just over one pint per day. I am going to continue milking through the month of August, and then start milking once a day for the first 1-2 weeks in September. After that I'll dry her off until breeding in early/mid October.
Picture
I wonder where he got his burdock beard?
​Chickens

I have good news and bad news from the chicken department. The good news is that none of the hens or roosters died. Another good point is that my broody hen finally hatched out her chick. The bad news is that the chick died a few days later. :( We never did figure it out, as the chick didn't drown and wasn't attacked by a predator. Our best guess is that it died of heat or got stepped on by the goat. That was kind of sad, because I thought the broody hen would take better care of her chick without my assistance.

​The chickens are laying between 6-9 eggs per day, and I am feeding the the same $0.66/day in feed. If I weren't selling any of the eggs, my cost per dozen would be $1.06. This month, egg sales paid for feed costs with an additional $7.00 profit. So all of the eggs we ate were free.


Ducks

​I finally got around to butchering my two remaining male ducks. Hubs helped. This was a huge burden off my shoulders! I had forgotten a few key points on how to do it, so the processing took a LOT longer than it should have. I did freeze the body and drumsticks separately because they are best cooked at different temperatures (something I learned from my first duck). I still have two roosters to go, but those are easy enough to do on my own.

My one remaining female duck is recovering from some kind of foot infection (it's not bumble foot/staph) and is currently not laying eggs.


Strawberries

For those who don't know, I put in a 300-plant strawberry patch this spring in order to sell strawberries at a roadside stand next year. This income will hopefully replace the need for farmers markets. Not much is going on with the strawberry patch. We set up a sprinkler system earlier in the month that can be easily moved around to wherever it's needed. Ideally I'd have put in drip irrigation, but for the amount of plants we have I don't think it would make sense financially. Plus the patch is not established yet, and it would be a pain to till/weed around the hoses.

Besides watering once a week or so, I've also been tilling between the rows and weeding between individual plants. Actually, Hubs has been tilling and I have been weeding. We till once every 3-4 weeks (it takes about 30 minutes) and I weed after everything has been tilled. The first weeding sessions didn't take all too long because the plants were smaller. I could use a hoe for most of the weeds, and then just hand weed right up close to the strawberry plants. Now that the plants are bigger and sending out runners, the hoe is counter-productive and almost everything must be done by hand. After the last tilling, it took me between 5-10 hours (a week's worth of afternoons) to weed the whole patch.
Picture
​There are a few empty spots in the patch where plants died. I am going to fill in these spots with strawberry plants from my old garden patch, which I'll probably till and reseed with a cover crop this fall.


Other Garden-Related Items

This year I tried to use some of my garden space to save money on hobby farm expenses. I grew a patch of mangel beets for animal fodder, and also grew some new herbs to use in soaps and other products to sell. As far as I can tell, both the herbs and beets were a success. The seed packets (all of which were from Baker Creek Heirloom Seeds) only cost a few dollars and paid for themselves in the first year. I am saving seed from the calendula so I won't have to buy it again.


Book of the Month: The Bio-Integrated Farm
I read one farm-related book this month on permaculture; The Bio-Integrated Farm (affiliate link) by Shawn Jadrnicek. I was almost surprised to see it available through the interloan system already, since it was just published in March of last year. Borrowing from the library was a good frugal move because the book costs $25.00- used- on Amazon. Unfortunately I had to return the information-packed book before I finished it, but nonetheless I picked up a few great ideas for my chickens in particular. A lot of the information on ponds and greenhouses was fascinating to read about, but far beyond my budget and mechanical ability to implement.
​

Summer Goals

There are a few more things on my hobby farm to-do list before the summer is over. I'd like to use up all of my freezer fat to make soap and also butcher those two roosters. In the garden department, I'd like to till my old strawberry patch and move some of my old herbs (sage, 2016 lavender plant and thyme) into raised beds. Lastly, I'd like to make some revisions to my farmers market book (affiliate link) and re-release it.


Profit & Loss

Expenses:
Shelled corn- $22.00
Layer mash- $22.00
Total expenses: $44.00

Income: 
Books- $10.80
Eggs- $27.00 
Babysitting- $25.00
Total income: $62.80

Net profit: $18.80
Year-to-date net profit: $137.69


So, I cheated on income this month. Instead of doing a farmers market, I just threw in some babysitting money and pretended that was "farm" income. It was a lot easier than actually doing a farmers market. 

My original plan this year was to do one day of market per month in order to support the hobby farm. Ideally, I would net $40.00 each time and this would more than pay for farm expenses. However, my June market was a complete bust, and I actually lost money after working 10+ hours. It was very discouraging and made me re-think doing any more markets this year. In addition, there are some big changes coming for us in October and I decided it would be wise to spend my free time preparing for those instead of earning a few more dollars for the homestead.

I thought I would be drastically behind this month without the babysitting subsidy, but before the month was over I sold several dozen more eggs than anticipated. In addition, I received some royalties from my farmers market book (which is the one I count toward "farm income"). So in the end, I would have *almost* broke even without the babysitting money. But I left it in there because an $18.00 net profit looks good on the books. :)

That's about it for this month! Hope you guys had a great July.
-Bethany
0 Comments

Frugal Accomplishments This Week

3/6/2017

1 Comment

 
Picture
One of the cherry branches I pruned and brought inside has started to bloom!
Wow- spring is just around the corner! I've got little seedlings and things growing all over the place, and it makes me so happy. There's just something exciting about new growth after cold, dull winters. Here are some frugal things I did last week:​

1. Line dried two loads of laundry.

2. Shopping: we went to Kroger this week and spent $11.83. You can watch my grocery haul on Youtube!!
We also went to Walmart and did a non-frugal trip (I promise it just started out with carrots and mayo) that included brand-name barbeque sauce, gelatin powder (which is like $1.00 per oz... what?!) and chipotle pepper powder. The only chipotle pepper they had, by the way, for $5.00. It was for a recipe. And I was hungry for cookies, so we bought some $2.50 cookies. At the checkout, I had forgotten to put something in my cart. So I ran back and got it. By the time I got back up to the checkout counter, Hubs had scanned a candy bar for himself. LOL! I can't blame him, though, because my cookies were more expensive. So that trip was another $20.00+.

3. Used a 10% off coupon at TSC to buy goat feed, a flower bulb, and something that Hubs wanted. I got three bags of feed, which will last at least 6 months. I decided to buy it all at once, since I had the coupon anyway. 

I also found a narcissus bulb-forcing kit (after Christmas sale!) for $2.70. It came with the pot, dirt, and bulb. I planted the bulb in its pot right away. Even if the bulb does not bloom this spring, I'm hopeful that it will flower next year. I am always looking for flowers to grow indoors during the winter months.
Picture
​4. Started herb seeds. I used little pot-pellets that we got at Menards; I think each pot cost between $0.10-$0.20. I was just curious to see if they worked. Anyhow, one of the herb seeds is already beginning to sprout!! I also transferred some lavender seedlings into an egg carton to grow in individual cells.
Picture
Lavender seedlings: If a plant is valued at $3.00 retail, this egg carton should yield a $36.00 value!
Last year I was not careful about watching my herb seedlings, watering them, etc. and so I lost most of them by the time I transferred all of the seedlings into my garden. This year I am not starting many seeds indoors, and so I have been watching my herb seedlings like a hawk.

5. 
Made cheese with a bit of milk that was about to expire. It made a little bowlful that we had with spaghetti for lunch. Waste not, want not!
Picture
​6. Listed some stuff on Ebay. I am hoping to have sales to report next week!

7. Made sugar-free no bake cookies. They were SOOOO good. Even Hubs thought they were decent. The recipe was basically identical to the sugar one, except instead of butter it used coconut oil, and instead of sugar I used honey and Truvia (stevia). I think it would be cheaper and just as healthy to use butter, so I am going to try that before posting a recipe. I thought the honey/Truvia blend worked well. There was only a slight hint of stevia aftertaste that I noticed. I don't think Hubs would have noticed either, had I not told him. 
Picture
8. Uploaded some Youtube videos. One of my blog goals this year was to do some "real" Youtube videos in order to get my message to a new audience. I have uploaded videos before, but mostly just so I could have video clips on my blog.

I spent one day this week, therefore, learning how to edit videos from my phone to make them 'tube worthy. First I tried downloading an editing app (that didn't work), then I tried editing them on my phone before uploading. Finally, I found that the easiest thing to do is take the video on your phone, and then do the editing on the computer (Youtube Editor) after the clip has uploaded to Youtube. I found which fonts I like the best for titles and also figured out how to add music, links, and stuff like that. It was a long day, but time well spent.

Right now I have this week's haul on my channel, plus a clip on pantry shopping vs. grocery list shopping, and a clip on how I use my grocery store comparison chart. If you're interested, subscribe to my channel! If all goes well, I will be uploading at least one video every week.

And that's all, folks! Til next time,
-Bethany
1 Comment

How to Make $10.00 flowers look like $40.00

11/19/2016

0 Comments

 
Picture
Good afternoon everyone! I hope you are having a great weekend. Today I'm going to share a few tips I learned as a floral design student. These tips will help make a $10.00 or $15.00 Walmart bouquet look like it cost a lot more... just in time for Thanksgiving. :)

Supplies and Tools

First off, you'll need some flowers. You will also use floral foam for this project. Most people just re-cut their cheap flowers and pop them in a vase. This looks okay (I mean, how can flowers look bad?) but it won't look professional. Professional-looking vase arrangements are much harder to do than foam arrangements. In addition to the block of foam to fit your container, you will also need an outer decorative container AND an inner waterproof container. I am using a basket-style outer container and a clean reused cottage cheese container for the inside.

When I worked at a flower shop, I learned that customers got an $8.00 discount for bringing in their own vase or container. If you are buying a professional flower arrangement at retail, a good portion of the price has to do with the container.
Picture
Picture
Tools I used for this arrangement were sturdy floral scissors, a pocket knife, and a roll of floral tape (this is sticky green tape- not the stretchy floral tape). You can use electrical tape or even a tiny bit of duct tape to replace the green floral tape.

I also used leaf shine and "crowning glory", which is a spray-on flower preservative/shine to make my arrangement last longer. Both of those things are optional, but to make your arrangement look better.

Directions

1. Cut your block of floral foam to fit the inner container. You will need to use the water-sucking foam, and not regular styrofoam.

Drop the block of foam in a container of water. Let the water soak up naturally. This may take some time, and you will want to shove the block down underneath the water to make it go faster. However, this will leave dry spots in the middle of your foam, where the flowers will need water the most. If the block has stopped "drinking" water, you can gently turn it on its side to expose dry parts to water.

Save the little bits and pieces of foam, and put them in the water, too. After you've put the large wet block of foam in your waterproof inner container, fill the nooks and crannies with those little bits and pieces.
Picture
Picture
2. Next it is time to prepare the greenery. Greenery is the difference between a cheap bouquet of flowers and a real arrangement.

When buying houseplants, I carefully choose plants that can double as a source of greenery for floral arrangements. One of these houseplants is a "corn plant" that I bought at Walmart. Leaves of the corn plant are very similar to the aspidistera leaves used in real flower shops.

Below is a technique I learned when working at the flower shop. It commonly used in bridal bouquets or edging around arrangements, as well as providing fullness.
Picture
Picture
The other greenery I used for this project was orange branches. I started an orange tree from seed when I was a teenager. I have been waiting almost a decade for actual oranges, but all I get is greenery. Oh well- at least it's good for something!

Use the greenery to provide a "base" for your arrangement. I put six stems into my foam below. You want to provide decent coverage, but not too much because you will need places to poke the flowers in.

After adding the greenery, I sprayed it with leaf shine.
Picture
Picture
3. Add flowers. There really is no formula for doing this, especially if you are working with a cheap bouquet of flowers. Typically I like to work in groups of threes, but you can see that the bouquet came with four different colors of flowers. Sometimes the flowers come broken or the stems are too short. You just gotta deal with it!!

The bouquet flowers will need to be prepared. This could be a whole post in itself. I should have taken pictures of this step but I forgot to. :( Basically, you will want to strip the leaves 2" below the stem of the bottom-most flower on the branch. For this arrangement, I cut off the bottom three or four flowers (and their stems) from every branch to use as individual flowers for the bottom arrangement.

Always leave 2" of stem to poke into the foam. This will ensure that your flowers have water to drink.

You will want a focal point for your arrangement. My focal point is where the grasses shoot out on the right side (see below). These are artificial grasses that I saved from a store-bought arrangement.

I filled in the holes with single-flower stems, ornamental grasses, and a cute ceramic turkey (mounted on a stick).
Picture
Picture
The only way to get good at floral design is to practice often. When I was a student, I made at least one arrangement every week, and a wide variety of them. You can buy some books or DVDs to help you out, but in the end there is no recipe for a perfect arrangement. You will have to feel it out. Most of the time I think my designs look terrible because I know where every gap and stray flower and lopsided part is. However, most people will not notice these small imperfections.

4. Set the arrangement in its final decorative container.
Picture
Picture
And there you have it! A quite decent looking centerpiece for the kitchen table. You will need to replenish the water supply every few days. I use a syringe in order to avoid dumping water all over the table.

With practice (and with more tools and flowers to work with), your designs will start to look better and better. My designs aren't as nice as those from our local flower shop, but I think they are just as good as the local grocery store designs.

Additional tips:

1. Check out some library books about flower design. You can also watch free video tutorials on Youtube. More time consuming ways to learn include having a friend teach you, taking a class, or working at a flower shop (for free if you have to).

2. Invest in some supplies. Floral tape, water-soaking foam, a good pair of shears or knife, and perhaps even floral glue.

3. Use flowers and greenery that are free. Even city-dwellers can keep a houseplant around for greenery. You can also grow flowers in your garden or clip ornamental plants or tree branches around your house.

4. Dissect garage sale or purchased arrangements and salvage the supplies. Hubs buys me flowers once or twice a year, and I always save the containers and little ornamental bits to reuse. 

5. Buy discount flowers. At our local Kroger, sometimes they will discount bouquets that are starting to go limp. However, many flowers in the bouquet are still good and will last another week if they are taken care of. With a little creativity and greenery, those $5.00 flowers can look like $30.00.

6. Buy live plants when they are past their prime. Kroger and Walmart mark down orchids when there aren't many blooms left. After Christmas amaryllis bulbs go on sale, and in the spring you can find forced, potted tulip and hyacinth bulbs on sale after they have dropped their flowers. In late winter sometimes you can find houseplants on sale as well. Baby these discount plants for a year or so, and you will bring them back to life. Then next season, you will have plenty of free design material!

Til next time,
-Bethany
0 Comments

Summer Garden Update 2016

8/12/2016

0 Comments

 
Picture
I think it's more than time I did a summer update here... if I waited much longer, it would be my fall update!

Currently Harvesting... Not Too Much

In the last few weeks, I've slowly been harvesting green beans, broccoli, summer squash and peppers.

Though the garden is twice as big as it was last year, 25% of it is flowers, and 25% is pumpkins/squash/sweet corn. The pumpkins and squash are not ready yet, and the sweet corn was a total bummer. I didn't water it enough earlier this summer, and then the raccoons got what was left.

My bed of carrots produced exactly two carrots, and the lettuce bed has gone to seed.

In the next month or so, I'll start harvesting tomatoes and peppers, which are two of my major crops. I would like to get another crop of carrots in, but we'll see if that happens.

Out of my one row of kale, two or three plants spouted. Those that did sprout are doing well.
Picture
Herbs: Holding Steady

Out of the three lavender plants I started this spring, one has survived and is doing well. It took FOREVER to get established, though. I've come to realize that lavender plants started from seed will require a year to just get started. Right now my home-grown lavender plant is about 2/3 the size of the lavender plant that I bought. 

In addition to lavender, my rosemary plant is holding steady and there is a very small patch of thyme out there, as well. The mints I transplanted this spring absolutely took off in growth. Next year I will plant an entire bed of mints instead of just a few square feet. That will be my "tea garden".

Flowers: A Big Disappointment

As I mentioned before, I planted 1/4th of my garden in flowers: sweet peas, delphiniums, glads, freesias, pumpkin-on-a-stick, sunflowers, and many others. The "many others" did not even come up, probably because weeds choked them out. The sunflowers and glads did decently well. However, between the frost and bugs, only a small percentage of the pumpkin-on-a-stick and delphinium plants survived to maturity. None of the freesias even came up, which was a disappointment because they were rather expensive. After babying them for months, the sweet peas are finally starting to flower and they are beautiful. But like the other flowers, only a few plants are left.
​
It looks like my pumpkin-on-a-stick plants have overcome the bugs at last. I was wondering if I'd have more than a few stems to use, but it looks like most of my row will produce some stalks. I look forward to to using them in flower arrangements (or selling at the farmers market!) this fall.

Mistakes & Changes for Next Year

1. Planted too early. I planted many things in mid-late April. Most of them did not actually GROW until May, when it warmed up. I decided that next year I'll wait until May 1st to plant anything. This means that I'll start my transplants a month later.

2. Tomato & pepper transplants died. Something happened to almost all of my tomato seedlings, to where I planted them in the raised and then they withered and died. About 3/4 of my pepper plants froze. So I ended up purchasing tomato plants. They were not all that expensive, and have done very well. Next year I am going to buy at least tomato plants, possibly pepper plants as well, and focus my seed starting efforts on flowers and herbs, which are more expensive to buy.

3. Not enough watering. In June we experienced a small drought, which permanently stunted my corn. I didn't start watering the entire garden (I was just using a watering can on certain plants) until after that, because I had procrastinated putting a splitter on the hose and hooking up my own sprinkler. Next year the sprinkler/watering system will be all ready to go.

4. Too many weeds in the row garden. I knew that would happen, because... row garden. The tiller and I don't get along. I did have Hubs till once or twice, but the tiller tilled under all of my mulch (primary weed defense) and I did not have enough mulch to put any more on. So tilling is really not an option if I want a weed-free garden. Next year if I do a row garden, I will put mulch between the plants and plastic between the rows.

5. Bug infestations. I had major problems with striped cucumber beetles, blister beetles, rose beetles and grasshoppers. I'm not sure how to take care of the grasshoppers, except perhaps fencing in the garden and throwing a duck or chicken in there. However, I found some traps and did some hand-picking of the bugs (much easier when there are no weeds, which was problem number 1) and for the most part we pulled through.

6. Raccoon infestations. So the coons got my corn... or whatever there was of it. Only thing I can think of to stop that is fencing in the garden or trapping the coons.

7. Low germination rate for herbs. I mistakenly transplanted individual thyme and oregano seedlings, and later realized that the thyme plants you buy are actually clumps of plants, not one plant like lavender or rosemary. Speaking of those two herbs, I probably had three or four of each germinate, but only a single plant (lavender) survived to maturity. Next year I will do some research on germinating those two herbs (especially lavender) and also basil (only one plant survived to maturity).

8. Mulched the strawberries with straw. That was a disaster. Weeds all over the place! Next year I am just going to use grass like I do for everything else.

Some things I think we did right this year were 1) utilizing more raised beds. They were half of the garden, but only 10% of the work. 2) Weed whacked between the raised beds. It took 15 minutes every 3-4 weeks, and looked great compared to bare dirt or even mulch. 3) Adding flowers. Even though the flowers don't feed us and I didn't have enough to sell at the farmer's market, they kept me interested in the garden and were beautiful to look at. I think growing flowers (especially from seed) for vase arrangements can stretch your home decorating budget a long way.

Til next time,
-Bethany
0 Comments

Spring 2016 Garden Update

6/8/2016

1 Comment

 
I guess it's not really Spring anymore... which is why I've finally gotten around to posting a garden update.
Picture
Raised beds, and row garden to the left.
This year I doubled the size of my garden, back to the way it was in 2014. However, this time around half of the garden is planted in raised beds. This is going to help immensely.

Row Garden & Raised Beds
I also did a row garden this year, for flowers, pumpkins and sweet corn. I'm a little nervous about the row garden because o 1) I don't like to use the tiller, so 2) I have to hand weed or mulch a lot. The problem is that I don't have time to do that much weeding, and I cannot collect grass clippings fast enough to mulch the entire thing. I am only mulching the actual rows of vegetables, not the paths in between. We are tilling the paths (but only periodically, when Hubs has the time). However, when we till the paths, we end up tilling most of our mulch into the ground and thus every time we till, I am going to have to re-mulch the entire thing. And there is not enough mulch for that.

So, I have a feeling that my "market garden" or "fodder garden" (extra pumpkins, squash, peas will go to the animals) as I call it, is going to get a lot weedier than my raised beds. Which, by the way, only have to be mulched ONCE during the whole season, and never tilled. We've decided that instead of mulching the paths or laying down plastic, we'll just weed whack in between the beds. It still looks nice and clean that way.​
Picture
(Top to bottom) pepper bed, "carrot" bed with no carrots, and salad bed. I will be growing tomato plants vertically on the left (north) side of each bed.
I am thinking of doing long, rectangular raised beds for my row crops in the coming years, and hopefully in time my entire garden will be only raised beds. It is just the initial start-up investment of building and filling the beds (free for us, but it does take some time) that forces me to do a row garden. In the next five years I want EVERYTHING- vegetables, fruits, herbs, flowers, market & fodder crops- planted in raised beds.

Seed Starting Update
Earlier this year I started seeds. Last year went pretty well in the gardening department, so I thought I had everything figured out. Silly me! I transplanted most of my seedlings outdoors in the middle of May, and life happened. I mean, MICHIGAN happened and we had a whole week of cold weather, including at least one frost. A lot of my seedlings died at this point.


1. Forced tulip bulbs- sprouted and grew leaves, but no flowers. :(

2. Chili peppers- out of 15 seedlings, I have four plants left in the raised bed.

3. Basil seeds- both plants died in the frost (even though I covered one of them).

4. Echinacea seeds- not a single seed ever germinated, even after four months.

5. Rosemary seeds- one or two seeds germinated, but both failed to grow after I transplanted them into the egg carton planters.

6. Lavender seeds- I bought two different packets of lavender, and four or five seeds germinated. Of these, only one plant survived. I ended up buying a $3.00 lavender plant at the farmers market to accompany my baby plant.

​7. Passionflower seeds- not a single one of these sprouted.

8. Radishes- I only had a few seeds, planted them in a raised bed and they did pretty well.

9. Peas- I'm guessing about 20% of my peas germinated.

10. Onions- about 30-40% of my little sets came up.

11. Lettuce- I planted some in a raised bed, but I shouldn't have. It didn't grow very well, and I have volunteer lettuce from last year coming up like weeds.

12. Fennel, dill, cilantro and chamomile- these all successfully self-seeded from last year.

13. Carrots- I planted some seeds in a raised bed, with not a single germination from what I'm aware of.

14. Broccoli- started these seeds inside and planted them in a raised bed with mulch. About half the plants died, but the rest are doing well.
​
Picture
Top to bottom: broccoli bed, green bean bed, and pepper bed with some volunteer dill plants.

15. Watermelon seeds- I started these indoors, but some died from overwatering. The transplants died after the frost.

16. Cantelope seeds- like the watermelon, I also started these indoors. And likewise, they died during the frost.

17. Bell pepper seeds- I started these seeds in an actual plastic "greenhouse" that I bought at Walmart. The idea was that I wouldn't have to transplant the seedlings into individual containers. The seeds sprouted great, but I don't think the containers were big enough for the plants to thrive. Between frost and not enough  watering (my raised beds weren't mulched well with newspaper, plus I had to add some regular dirt), only about 25% of my seedlings survived.

18. Pumpkin-on-a-stick seeds- these were easy enough to sprout and did well in the egg carton planters. I transplanted them into the garden in mid-May. I covered all of the plants during the frost, but they failed to really grow at all until we had warmer weather at the end of May. Last week I found cucumber beetles eating and laying eggs on the plants, so I stripped all of the eggs and smashed the bugs. So far they haven't come back.

19. Tomato seeds- the tomatoes did about as well as my peppers. Lost all but 25%. I ended up buying new pepper and tomato plants (see below). 

​20. Pumpkins- I planted pumpkin seeds directly in my garden at the end of May. Almost all of them germinated and got really big. However, I'm now in a war with the squash bugs and cucumber bugs, because I made the mistake of planting where other cucurbits grew last year.

You can see some of my attempts at pest control below. I've found that it works best to hand pick the bugs early in the morning, when they are still sluggish. I check under the shingles, and oftentimes there are several bugs there that I can just scrape into my bowl of yellow water to die. The yellow water trap works best during the day when they are flying around.

Picture
The bugs like hiding under shingles.
Picture
Homemade bug trap: water with a little dish soap + yellow food coloring and a Q-tip dipped in clove essential oil.
21. Acorn squash- also germinated but is currently being decimated by bugs.

22. Green beans- I planted one raised bed full of green bean seeds. Most of the store-bought seeds sprouted, but my saved bean seeds only produced a few plants.

23. Cucumbers- I planted cucumbers on one side of my lettuce bed. They are doing well- no sign of bugs yet.

24. Straightneck squash- I planted two hills. One hill germinated.

25. Amaranth- I planted this several weeks ago. Right now I can just see the tiniest little seedlings coming up.

26. Sweet corn- pre-sprouted the seeds indoors, and then planted in the garden. I'm guessing about 60-70% of the planted corn came up.

27. Thyme & Oregano- both of these herbs germinated GREAT! Unfortunately the oregano and almost all of my thyme died after the frost.

28. Other stuff: in March I went on a spending spree and bought a bunch of flower seeds and bulbs. Some of
the flowers have come up and some haven't. I started some delphinium seeds indoors, and now the plants are doing okay out in the garden. Sunflowers are coming up nicely, glads are starting to pop up, and I've got some sweet peas on the way as well.
Picture
Strawberry raised beds, plus extra strawberry plants put in between. This fall we will put a raised bed in the middle to make three.
29. Fruit: I've been trying hard to keep the raspberries and strawberries free from thistles and weeds. I noticed that the Japanese beetles lay eggs on the thistles, which may be why the bugs decimated my raspberry patch last year. This year I made sure to get ALL the thistles from the raspberry patch, and thin out smaller raspberry plants that were just taking up space (both in the raspberry row AND the strawberry rows!). These small plants I used to make tree hay for my goats this winter.

The strawberries are starting to ripen. I am hoping they will last long enough to sell both this week and next week at the farmers market. 
Picture
Changes for Next Spring

Seed Starting:
1. Go back to my original seed starting method, transplanting seedlings to plastic cups (more room for roots to grow).
2. Grow herbs (oregano & thyme) in clumps (not single seedlings), in larger pots.
3. Use cuttings to propagate hard-to-germinate plants.

Raised Beds:
4. Make sure all raised beds have newspaper unless they are going to be direct-seeded (plan this out in the fall).
5. Wait to transplant/plant until the end of May. This will mean starting my seeds about a month later than I did this year.
6. Make sure to use viable seeds.
7. Possibly purchase tomato and pepper plants. I like this idea because the plants I bought were only $0.40 each. A bonus? My $3.00 bought two different varieties instead of one. This is great because I still haven't found a variety of tomato that I really like. If you think about it, there is no point in paying $3-4 for a pack of seeds if fewer than ten plants survive anyway. 

Row Garden:
8. Plant cucurbits later in the season, and rotate to a different spot in the garden. 
9. Start checking for bugs right away.
10. Start sprinkler earlier.

Whew! I think that's it. 

​Til next time,
-Bethany
1 Comment

ROI of Growing Herbal Tea

5/20/2016

1 Comment

 
Picture
Hello friends and homemakers! Today's topic is growing your own herbal tea. Herbal teas are some of the easiest things to grow, especially if they are perennial plants and come back year after year. In fact, you probably have some herbal teas already growing in your backyard, disguised as weeds or trees.

Potential Savings
I drink primarily herbal tea, or green/black tea & herbal tea blends. No coffee for me! Because of this, I tend to buy a fair amount of tea. In fact, I would probably say I drink enough tea to equal one bag every day, for the entire year. 

One of my favorite teas (Kroger Private Selection brand) costs $2.48 per box of 20 bags. That equals out to $0.12 per 2.0 g. bag of tea. A box contains 40g. (1.43 oz) of tea.

$0.12 per day x 365 days = $43.80 per year savings.

Return On Investment
As I mentioned before, if you know what to look for, you can potentially find herbal tea in your own backyard. You can also get a free transplant from a friend, or you can buy a small plant from a nursery. For our intents and purposes, I'll say that the plant or packet of seeds costs $2.00. So, that is your investment.

$41.80 return - ($43.80 - $2.00 investment) = 2090% return on investment

Hourly Wage
Collecting and preserving herbal tea is fairly straightforward. I go out there with a pair of scissors, or pick the leaves/stalks with my bare hands. Then I bring it inside and lay everything out on a cookie sheet. (Depending on the plant, I'll strip the leaves from the stalks either before or after drying.) Then I put the sheet in my gas oven overnight (the pilot light provides enough heat... I don't turn the oven on at all). When the leaves are crispy to the touch- and this may take up to two days- then I strip the leaves off of the stems and put them in an airtight container- usually a mason-type jar or recycled plastic container. Lastly, I label the contents.

Herbs commonly used for herbal tea: peppermint, spearmint, chamomile, raspberry leaf, nettles, pineapple weed, lemon balm. If you'd like to re-create some of your favorite teas, just save the ingredients list on the back of the box for reference. Unfortunately, many herbal teas have things like "natural flavors"... for example "peach flavor" or "pomegranate flavor" that you can't make at home. But there are some other ingredients that you can find at the store or make.

Common additions to herbal tea: stevia, hibiscus, dried ginger, dried orange & lemon peel. Whenever I have an orange (not very often) I try to save the zest. You can do this by taking a sharp paring knife and carefully removing the colored part of the rind... not the white pithy stuff! Dry the peel as you would herbal tea (in the oven) and break it into pieces before adding to loose leaf tea. Stevia is a sweetener that you can buy or grow in the garden. Hibiscus is very often used to add fruity flavor to teas. You can get hibiscus flowers in bulk, or buy tea bags with hibiscus in them.

I use a teapot with infusing insert to make herbal tea for Hubs and I. If I'm only making tea for myself, I just use a small tea ball infuser. You can also buy "press and brew" disposable tea bags, but I think that is too much bother for a $0.12 bag of tea. Plus it is a lot of waste. Brewing loose leaf tea allows you to use the old tea leaves for compost.

I figure it takes me about three minutes to prepare 2.0 grams of tea (as much as there is in a tea bag). Therefore: 

$0.12 per 3-minute increment x 20 (increments per hour) = $2.40 per hour 

Conclusion
​What I like about this "investment" (that is, planting a tea garden) is the high potential for savings. Tea for one person alone has the potential to save $0.84 per week. In a family with three or four tea drinkers, this little project could save over a hundred dollars per year. If you are gardener or forager anyway, why not grow some herbal tea?

Of course, the downside of this project is the "hourly wage". It's below my $4.00/hr. standard. However, some teas take far less time to prepare. This will increase the hourly wage substantially. For example, spearmint leaves are a lot less labor-intensive to prepare than peppermint leaves, which are smaller. Drying a whole stem of raspberry leaves and stripping them with a gloved hand is a lot easier than cutting tiny chamomile flower heads with a pair of scissors. So, some teas are better to grow at home than others.

Do you enjoy herbal tea? Have any tips or tricks for the rest of us?
1 Comment

Growing & Using Chili Peppers

2/24/2016

0 Comments

 
Picture
One of my experiments last year was growing chili peppers. I found that it was relatively easy. I started some old pepper seeds (probably 5+ years old) using this method, and then planted the starts in my garden. The seeds took a while to germinate and a while to grow, so this year I'm starting them a little early, in February.

After putting them in the ground, the pepper plants needed little else besides the occasional weeding and watering. After the peppers turned red, I picked them and strung them on a piece of thread to dry. Make sure your drying area is well-ventilated and warm. 

Preserving & Processing
After the peppers are dry, you can pulverize them in a food processer. This year I will be using my Vitamix Dry container to make the chili powder.
PictureReady to be ground up.

To process, I crack off the top of each pepper and pulverize it. Below is what a food-processer ground chili powder looks like. Nowadays I process dried herbs with a Vitamix blender dry container. You could probably use a mortar and pestle as well.
Picture
Don't forget to save some of those seeds to start indoors! I'll be starting mine in the next week or so, toward the end of February.

Happy chili-growing!
​-Bethany
0 Comments

Frugal Accomplishments This Week

2/22/2016

0 Comments

 
Picture
Bethany's Amaryllis Hospital
Frugal Accomplishments: Third Week of February
1. On Sunday we went to Tractor Supply Co. for some goat feed. All of their Christmas stuff, including Carhartt-type outerwear, was 50% off. There are still some great bargains there for any of you local people! I decided to buy two amaryllis kits at $2.50 each. After we left the store, I checked inside the boxes and one of the bulbs was completely rotted away. We went back and replaced it with a live bulb.

So now I have a little amaryllis rehab center in operation. After they flower, I'll put the plants outside. In August or September I'll stop watering them to encourage dormancy, and then after a few months I'll be able to plant them and have fresh flowers in the winter.

I love fresh flowers, but during the winter they can get expensive. Forcing bulbs is a fantastic way to get around the expense. Not only can you get cheap fresh flowers, but you can use them over and over and over again.

2. It was uncommonly warm this week, so I convinced Hubs to take a walk with me. We picked up over $9.00 worth of cans and bottles to recycle (that's five grocery bags full!).

3. Made laundry soap.

4. Sold four dozen eggs.

5. Made yogurt.

6. Cooked up a large ham and cut the rest into chunks to freeze for pizza toppings, soup add-ins, etc. I also rendered the fat for later use, and we'll have the broth this week with soup.

7. I didn't finish my apron, but I did work on it quite a bit. A majority of it is done, so I'll probably be able to finish it this week. I'll be putting on the pocket, some trim and buttons/buttonholes.
Picture
Figuring out pocket trim...
8. Watched orchid growing videos on Youtube. Orchids are another frugal flower choice, if you can get them to rebloom. Last Valentine's Day, Hubs bought me a phalaenopsis orchid as a gift. The plant did grow another stem of flower buds after the first one, but unfortunately the buds fell off before they opened. In addition to that, the window fell open onto the plant and broke one of the leaves off. My goal this year is to nurse the poor thing back to health and get it to flower.
Picture
Growing a flower spike.
Goals For This Week:
1. Finish apron.
2. Start chili pepper seeds and basil seeds.
3. Post ad for eggs on Craigslist.

Best wishes for an amazing week!
​-Bethany
0 Comments

Garden Schedule for 2016

2/4/2016

0 Comments

 
Picture
Seeds from Ebay- complete with a personal note from the seller!
It's that time of year again, when seed catalogs start flooding the mailbox, cabin fever starts setting in and we order way too many plants and seeds. This is will be my third year of having a functional vegetable garden, and boy have I learned a lot. Last year I tried my hand at starting seeds, which was much easier than I thought. In addition to starting seeds, I've been learning what does and doesn't work with saving seeds, as well. Using seeds instead of buying plants is what makes a garden so economical.

Winter Gardening

What I'm learning more and more about gardening is that it's almost a year-round activity in order to get the best results. I've begun to start seeds now, and it's only February. The trick is to have a plan and start early. Many seeds take two or three weeks just to germinate! The Passiflora (passionflower) seeds I bought last year take a full 30 days to germinate. For those of you who are gardeners, I thought I'd share my gardening schedule for this Spring. Some of you might read my list and say, "Wow, that is a lot of stuff to do." However, most of the work will be mixing seed starter with water, poking in some seeds and covering with glass or plastic. I might do this for an hour each week from February- mid April. In April and May when I start to plant, a majority of the soil will be already prepared in lasagna raised beds. I will just have to poke a few more seeds in the soil, and in May I will transplant things I've started indoors. After that I'll mulch all of the raised beds and from there most of the work will be done. At least that's the plan! :)
February:
1. Force tulip bulbs
2. Start chili pepper seeds
3. Start basil seeds
4. Start echinacea seeds
5. Start rosemary seeds
6. Start lavender seeds
​7. Start passionflower seeds
April:
1. Plant radishes in garden
2. Plant new garlic in garden
3. Plant snap peas in garden
4. Plant onions in garden
5. Plant lettuce in garden
6. Plant fennel, dill, cilantro and chamomile in garden
(these things might self-seed)
7. Plant carrots in garden
***********
​8. Plant broccoli starts in garden
9. Start watermelon seeds indoors
10. Start cantelope seeds indoors
11. Start cabbage seeds

March:
1. Start bell pepper seeds
2. Start pumpkin-on-a-stick seeds
3. Start tomato seeds
​4. Start broccoli seeds
May:
1. Plant butternut squash in garden
2. Plant pumpkin in garden
3. Plant spaghetti squash in garden
4. Plant acorn squash in garden
5. Plant green beans in garden
6. Plant cucumbers in garden
7. Plant straightneck squash in garden
8. Plant potatoes in garden
9. Plant amaranth in garden
10. Plant sweet corn in garden
************
11. Set potted plants outside
12. Pot passionflower and set outside
************
13. Transplant pumpkin-on-a-stick starts
14. Transplant herb starts
15. Transplant tomato starts
16. Transplant pepper starts
17. Transplant cabbage starts
18. Transplant cantelope starts
19. Transplant watermelon starts

Buying New Seeds
I learned a lot last year with my garden. My non-hybrid sweet corn did not turn out well, and I discovered that saving carrot seed is almost impossible because of cross-pollination with Queen Anne's Lace (wild carrot). I learned that Roma tomatoes are prone to blossom-end rot. Because of all this, I will be buying new tomato, carrot and sweet corn seeds this year. However, all of the other seeds are ones that I saved from the garden or kept from last year's seed packets.

Instead of buying carrot, tomato and sweet corn seeds from a seed catalog (Gurneys wanted $5 for a pack of seeds!!), I just bought them on Ebay from private sellers. Honestly, I've had wonderful results buying seeds directly from other gardeners. In addition to getting perfectly good seeds for less money, I feel a type of camaraderie with other seed-saving gardeners. It makes me feel good to support another individual.

If I like how the tomatoes turn out, I'll save those seeds next fall and not have to purchase tomato seeds again. Unfortunately it looks like carrots and sweet corn will be an annual purchase, but I don't mind. You still save a ton of money growing sweet corn and carrots.
Picture
Dwarf Lime Tree
My one big purchase this year was a dwarf lime tree that I bought for $21.00 on Ebay. I read a lot of good reviews of this certain variety, even from people in colder climates that bring the plant inside during the winter. It may or may not produce fruit, but I did read so many good reviews and it would be nice to grow some of my own citrus. I was a little uncertain about buying such an expensive plant on Ebay. It was shipped out right away (usually seed catalogs wait until the "proper planting time") and sat out in the cold mailbox for half a day. However, the plant was carefully wrapped (in cardboard and paper towels...) and three days later it hasn't lost its leaves yet. To my delight, the plant came with detailed instructions, both on the Dwarf Lime tree in particular, and another sheet for citrus trees in general. In addition to the planting instructions, the seller said to message him on Ebay if I ran into any problems. 

Later I was looking on Gurneys' website, and if you really want a bargain you can spend $50 on exotic plants, use their $25 gift certificate (for purchases over $50), and with shipping, be able to spend less than $15 on each plant. However, this year I only wanted to buy one exotic plant.

Less Work Than it Seems
One more thing I might add; it LOOKS like I am planting a ton of things in my garden, but I am not going to do "a row of each" like most gardeners would. I've discovered that we really only need one or two plants (about 3-5 seeds) each of things like squash, cucumber, and melons every year to produce enough for the two of us, plus some. My three hills of squash last year, for example, have provided enough for us to eat one squash per week through the month of March. Planting only a few seeds per year is how I can get away with 1) growing a lot of different plants, and 2) rarely buying seeds.

Anyone who has done a garden before knows that it is so easy to plant way more than you're capable of taking care of. In fact, most people plant a huge garden in the spring, and by the time August rolls around they have nothing but weeds to show for it. It's not because people are lazy- it's because doing a garden like that is simply unsustainable!!! I've found that using the square-foot gardening method, in conjunction with lasagna composting in raised beds, cuts down on SO MUCH work. You can read about how I did this in some of my previous garden updates. Growing all of my own plants (as opposed to buying them at a garden center or nursery) makes gardening almost free, and that small cost for a couple packets of seeds and seed starter can be easily offset by selling a few plants or some extra garden produce.

Wishing you all the best in your gardening efforts this year!
-Bethany 

P.S. I highly, highly recommend the book Square Foot Gardening by Mel Bartholemew. It covers a lot of different aspects of gardening and how to make gardening fun, easy, and NOT overwhelming.
0 Comments
<<Previous
    Picture

    Bethany

    Housewife, happy wife, and mama to one. :)

    Picture

    Picture
    The Housewife's Guide to Frugal Food
    How to Eat for $10.00
    ​per Week

    Picture
    The Housewife's Guide to Menu Planning
    A Weekly Menu to Save
    Time & Money
    Picture
    The Housewife's Guide to
    Frugal Fruits and Vegetables

    No Garden? No Problem!

    Watch Meals From the Bunker:

    Picture

    Check out my Youtube Channel!

    RSS Feed


    Picture
    Baby Girl's Birth Story
    Picture
    8 Cheap Ways to Eat Healthy
    Picture

    Categories

    All
    Animals
    Book Reviews
    Books
    Christmas
    Cleaning
    Clothing
    Cooking
    Couponing
    Education
    Ego
    Electricity
    Farmers Market
    Finance
    Foraging
    Frugal
    Frugal Accomplishments
    Frugality
    Garage Sales
    Gardening
    Gifts
    Grocery Budget
    Grocery Shopping
    Herbs
    History
    Hobby Farm
    Home Based Business
    Home-based Business
    Home Decorating
    Housekeeping
    Industry
    Languages
    Laundry
    Marriage
    Meal Planning
    Medicine
    Minimalist
    Network Marketing
    Organization
    Plants
    Product Reviews
    Quotes
    Recipes
    ROI
    Rv
    Sewing
    Simplicity
    Spanish
    Spending Report
    Travel

    Archives

    May 2021
    April 2021
    March 2021
    February 2021
    January 2021
    August 2020
    May 2020
    April 2020
    March 2020
    February 2020
    January 2020
    December 2019
    November 2019
    October 2019
    September 2019
    August 2019
    July 2019
    June 2019
    May 2019
    April 2019
    March 2019
    February 2019
    January 2019
    December 2018
    November 2018
    October 2018
    September 2018
    August 2018
    July 2018
    June 2018
    May 2018
    April 2018
    March 2018
    February 2018
    January 2018
    December 2017
    November 2017
    October 2017
    September 2017
    August 2017
    July 2017
    June 2017
    May 2017
    April 2017
    March 2017
    February 2017
    January 2017
    December 2016
    November 2016
    October 2016
    September 2016
    August 2016
    July 2016
    June 2016
    May 2016
    April 2016
    March 2016
    February 2016
    January 2016
    December 2015
    November 2015
    October 2015
    September 2015
    August 2015
    July 2015
    June 2015
    May 2015
    April 2015
    March 2015
    February 2015
    January 2015
    December 2014
    November 2014
    October 2014
    September 2014

    Full Disclosure & Disclaimer

    Picture
    Picture
    I get cash back for many online purchases including wedding gifts and Ebay stuff!

Powered by Create your own unique website with customizable templates.
Photos used under Creative Commons from dasWebweib, amanessinger, thewritingreader, diakosmein