the Renaissance Housewife
  • Home
  • Topics
    • Saving >
      • Kitchen >
        • Food >
          • Recipes
      • Bath & Laundry
      • Medicine Cabinet
      • Office
      • Electricity
      • Gardening
      • Foraging
      • Animals
      • Weekly F. A.'s
      • Printables & Downloads
    • Earning
    • Investing
  • Books
  • About
    • RH Recommends
    • Newsletter & Updates
    • Travel
    • Beta Readers
    • Legal Stuff

Basket Liners and... HONEY!!!

4/9/2019

0 Comments

 
Picture
​Well, I warned you all that we might get busy around here, and I'm excited to see the spring starting to show her face! Of course all Michiganders know that it takes two or three months for her to stop playing peekaboo and actually stick around (by which time you call it "summer", not spring), but we are excited nonetheless.

​
Basket Liners

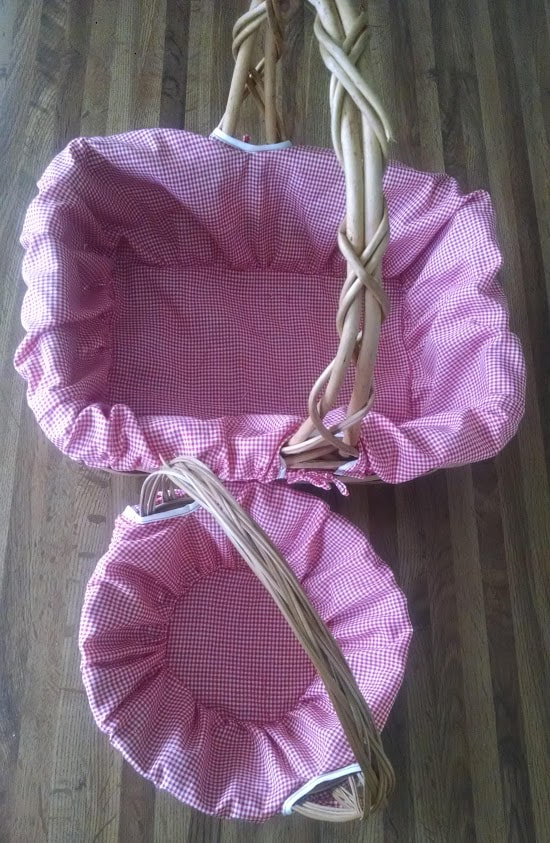
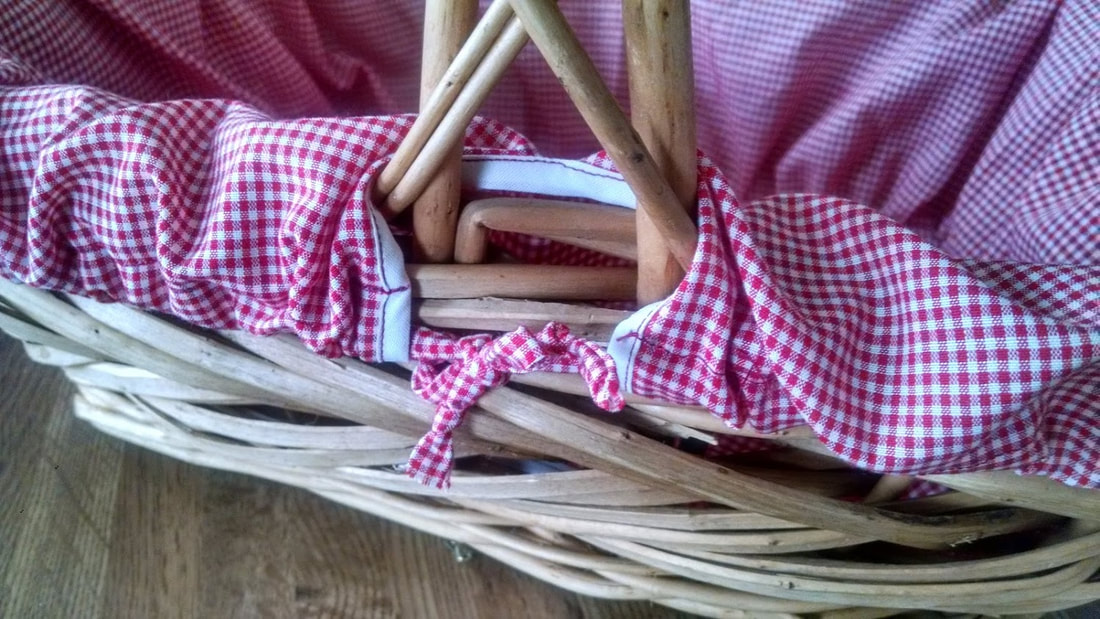
I made two basket liners in anticipation for our garden harvest. I used to think basket liners were tacky and outdated, but if you're actually using the basket, it makes cleanup so much easier. Instead of having random seeds and bits of dirt stuck in between the cracks, you just remove the liner, dump it out and throw the whole thing (the liner, that is... not the basket) in the washer.
Picture
​The big basket is for our regular everyday garden harvests; rhubarb, asparagus, lettuce, radishes, etc. The smaller basket is for herbs and to use as a backup harvest basket. 

It was more of a pain than I thought it would be to make the liners. I had to draft a pattern, finish the edges for durability, etc. Since the liners were custom made to fit the baskets, I probably won't be able to use them with other baskets (but I'll try). Before I invest more time into making basket liners, I'll make sure the baskets are sturdy and will last for years. Many of the baskets I have now are already on their last leg. So that's something to keep in mind if you, too, are thinking about making a liner for your harvest basket.

​
Honey Harvest

I'm not the best beekeeper. Actually, I'm a pretty rotten beekeeper, but it turns out that even rotten beekeepers have their rewards.

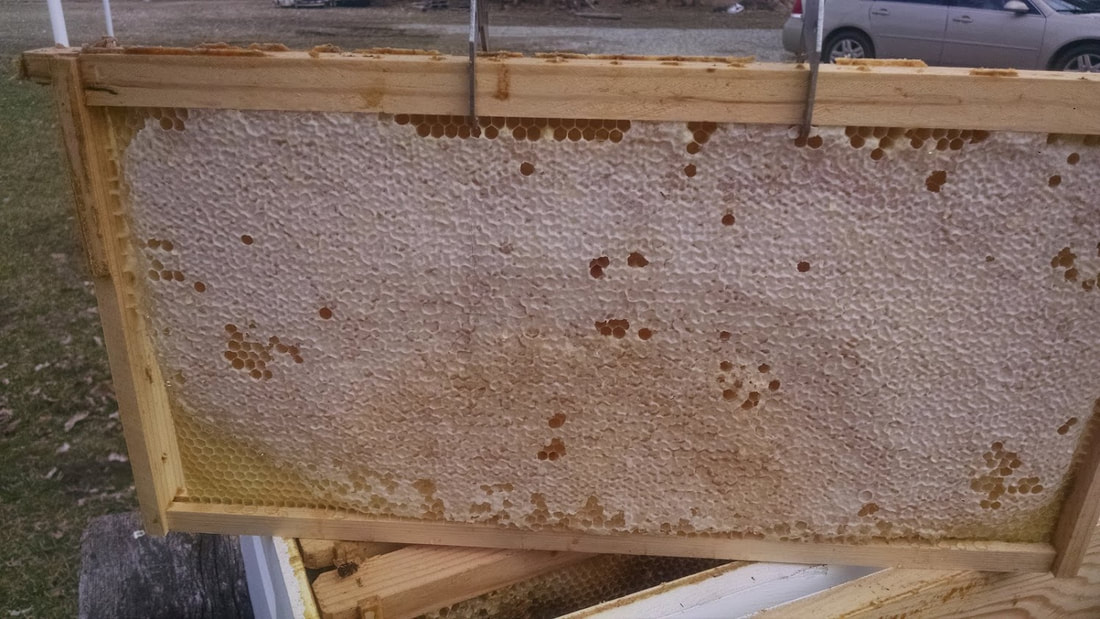
I cracked open the old hive on Saturday and this is what I found:
​If any of you can help diagnose the problem, that would be great! I contacted the people who I bought the bees through, and they suggested that the queen probably died. Obviously, all of the other bees died as well. But before they died—bless their hearts—they left me some honey.
Picture
I was able to harvest almost a whole gallon of honey!! I'm super excited about that, since one of my goals this year was to eat healthier (raw local honey is so good for you!). Not only that, but I wasn't expecting any harvest. Now I have honey AND beeswax to work with.

Even though beekeeping won't work for me this year, I plan on trying it again during a less busy season. I'll be keeping the equipment and hopefully reusing everything. Another bright point is that I found a free way to harvest the honey, without the use of an extractor. I used this tutorial. Hubs made the wood piece with some scrap lumber, and I made the bag out of cheesecloth that I already had.

Even though the value of my little harvest doesn't nearly cover the cost of equipment, it really encouraged me to keep on trying. Beekeeping is something I've wanted to do for years, and I was so happy to have the opportunity to try it out in 2018. Now that I know the ropes (or at least, a lot of what NOT to do), I hope next time will be more successful.

I think that's all for now!
-Bethany
0 Comments

ROI of Using Cloth Napkins

5/13/2016

3 Comments

 
Picture
Last week I was doing dishes and listening to a "frugal investments" video on Youtube. The lady claimed that her family saved SO much money by using cloth napkins instead of disposable ones. I smirked while wiping off a dish. I've done the math, and the paper napkins we buy (cheapest at Walmart) cost about $0.005 each- half a penny. Certainly there was no money to save using cloth napkins, right?

What is the Savings Potential?
We use about one napkin per person, per meal. Sometimes more, sometimes less, so it evens out. If we each use three disposable  napkins every day, for 365 days per year, we end up spending about $5.46 per person, per year on napkins.

Savings for a family of 2: $10.92
Family of 4: $21.84
Family of 6: $32.76
Family of 8: $43.68
Family of 10: $54.60

Because the savings are so small, there is no room for monetary investment in this project. Spending ANY money at all on new cloth napkins (or fabric to make them) will cancel out the potential savings. 

Making the Napkins
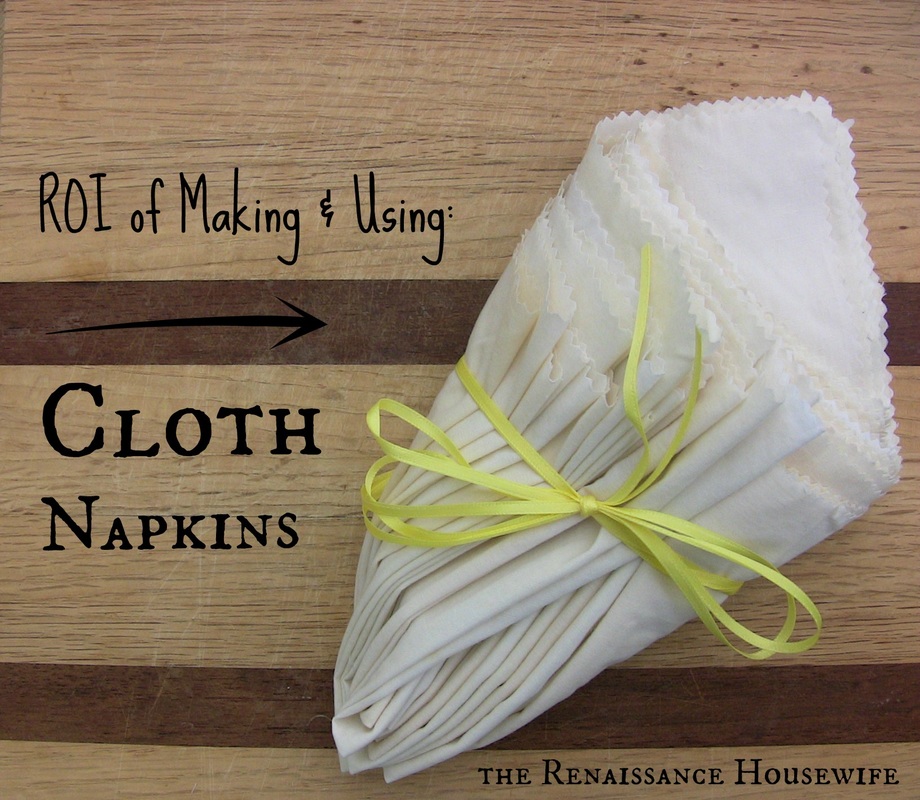
I chose a very easy way to make napkins- tearing an old bed sheet into paper napkin-sized squares, and then finishing the edges* with a pair of pinking shears. I found two free pillowcases at a garage sale to use for my napkins. It took me exactly 30 minutes to finish 12 napkins made from the pillowcases. I spent two minutes per napkin pinking the edges, and the other six minutes were spent dissembling the pillowcases and tearing them into squares.
Picture
I feel like a 4-day supply (12 napkins) would be sufficient for one person. This would give you enough time to launder the dirty napkins before you needed to use them again. I don't factor in the cost of laundering cloth napkins because they're so small, and if you are doing a load of laundry anyway, a couple of napkins are not going to cost more. Almost nobody is going to run a separate load of only cloth napkins. 

ROI & Hourly Wage 
It took me 30 minutes to make a one-person supply of cloth napkins. If I use my napkins instead of disposables for a year, I'll save $5.46. Therefore, an hour's worth of making cloth napkins (say, if I would have made some for Hubs at the same time), would yield a $10.92 savings; that is, a $10.92 hourly wage.

If we caculate the ROI based on your time investment (because there is no monetary investment), at a generic "housewife wage" of $4.00/hr., we find the following:

$4/hr. x 1 hr. = $4.00 investment
$10.92 savings - $4.00 investment = $6.92 return (173% ROI)

In My Opinion...
Is this project worth your time? If you look at the ROI and hourly wage only, it is. However, I'm not too keen on washing and folding 42 napkins each week for a savings of $0.21. I really think there are easier ways to earn/save that much every week (for example... recycling aluminum cans!). We'll probably use the napkins I already made, but for us the savings are too insignificant to completely stop buying paper napkins. Plus, we will still buy and use paper napkins for guests/cookouts/etc. 

I think this would be a good idea for larger families, however. Because there are more people eating but still only one or two adults earning an income, larger families will need to stretch that income farther than small families. Plus, making (and folding) cloth napkins is a nice project for kids. 

Ultimately, I don't think there is anything to LOSE by making and using cloth napkins. As I sometimes tell Hubs, "Every penny counts!" The question is just whether or not there is enough pennies to gain for it to be worth the hassle.

What do you think? Are cloth napkins in your future?

-Bethany

*I realize now that it would have been faster to just surge the edges of each napkin. However, my surger was broken and I know that most ladies don't have a serger sewing machine in the spare room. Pinking shears are available at Walmart, I think for around $10. And you can use them for more than just making napkins.
3 Comments

Frugal Accomplishments This Week

3/7/2016

2 Comments


Frugal Accomplishments- First Week of March

1. Made yogurt.

2. Sold four dozen eggs.

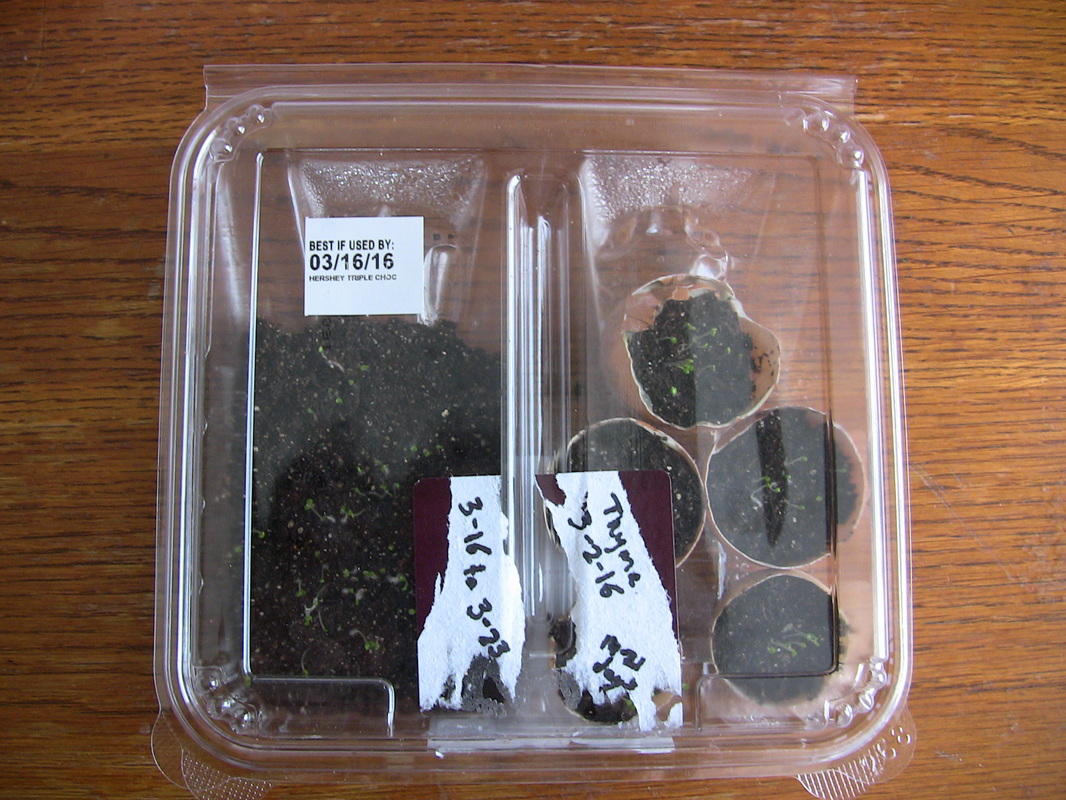
3. Made a mini-greenhouse with an old cookie container to spout thyme seeds in.
Picture
4. Started oregano seeds. Both my thyme and oregano seeds were SUPER fast to germinate... like, three or four days when it was supposed to take 1-2 weeks.

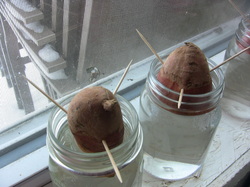
5. Started sweet potato slips with some sweet potatoes that were given to us. My mother-in-law does this every year and it seems to work great for her. I cut one potato in half and left the other two whole to see which sprouts better.
Picture
6. Started chili pepper seeds.

7. Transplanted some basil seedlings.

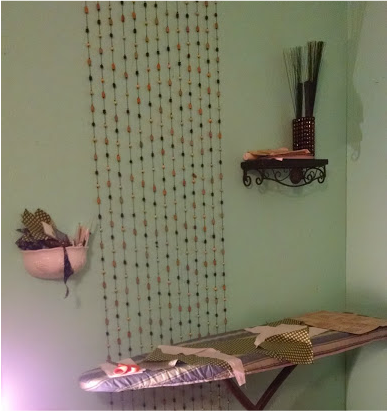
8. Reorganized sewing room. My sewing room is kind of a multi-purpose craft/storage room and there wasn't really enough space to walk around in there, let alone accomplish anything. Until recently I had been bringing my sewing machine and ironing board out to the kitchen every time I wanted to sew. Then a few weeks ago I had Hubs build me some shelving for storage (sleeping bags, Christmas decorations, extra canned food, air mattress... things we only use a couple times per year). Last week I moved some things around so that my ironing board had a permanent spot with some more shelving for miscellaneous items (hem gauge, pattern pieces, fabric scraps, shears, pin cushin, etc.). 

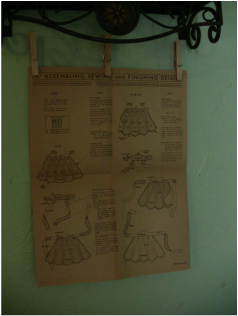
The last thing I did was nail some clothespins to the wall. This allows me to clip up the pattern instruction sheet and not have to continually get it out, put it back, fold, unfold.

My apologies for the dark pictures. I was just so excited about it I couldn't wait to take pictures!
Picture
Picture
This new arrangement has already helped immensely in my sewing. Everything is so much faster and streamlined, and I am going to save a ton of time not running back and forth from the hobby room to the kitchen when I sew, knocking things off the ironing board accidentally. 

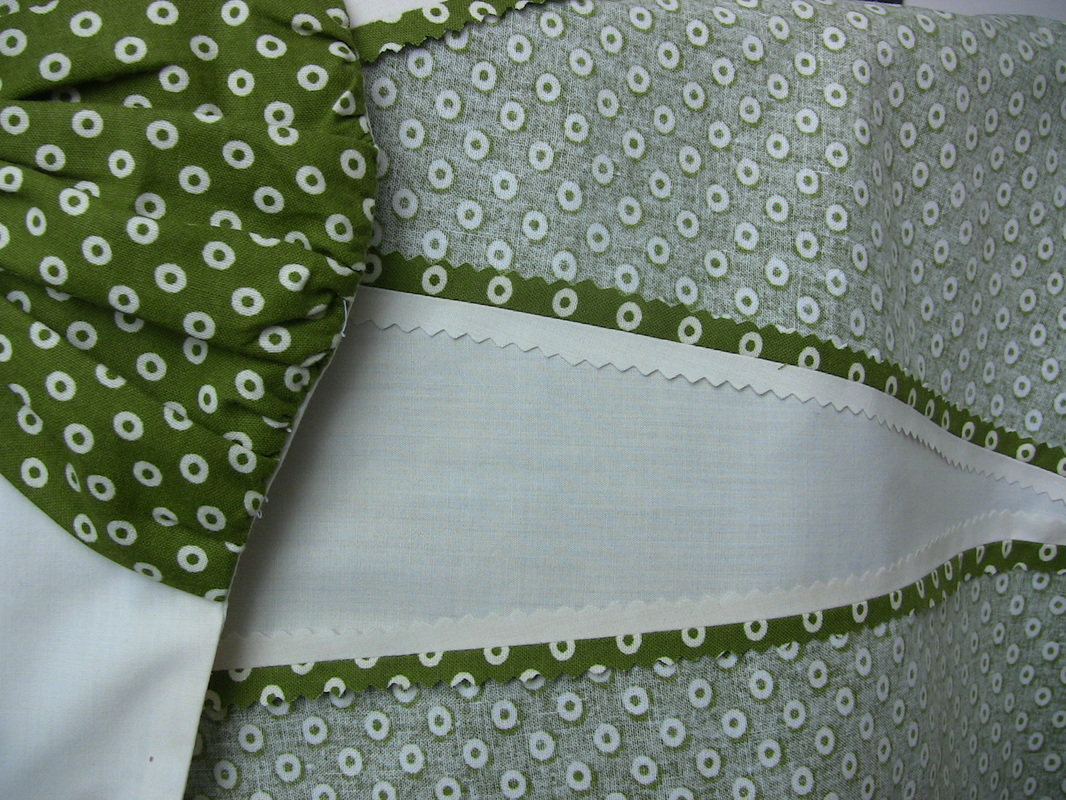
9. Worked on a new apron. I was almost able to complete this one, thanks to my new sewing set up and pre-cut pieces. This pattern is from the 1940s as well, though it is printed, unlike the last one. I'm trying to follow the authentic instructions and not deviate from the pattern as much as possible. This can be challenging when you are working with a random piece of fabric from a garage sale. I alternated white with the printed fabric, but still didn't have enough green to use for the waistband. Instead of an entirely white waistband then, I decided to make a kind of rosette in the center with the green fabric. I think it worked out well. I'm looking forward to doing a separate post on this apron in the future.
Picture
10. Made lip balm. I didn't get around to making any soap this week, but I was able to make 17 tubes of Peppermint Patty lip balm to sell with my soap. I still need to get some labels on these, and then they'll go into my Etsy shop.

11. Made homemade oven cleaner. In 2016, my hope is to gradually phase out most of my generic household cleaners and replace them with non-toxic homemade cleaners. It's something I've always wanted to do, but was just low on the priority list. One of the most expensive of these is oven cleaner. Not only was it expensive, but I found myself coughing and wheezing and gasping for breath whenever I got a whiff of it. That can't be good for a person! 

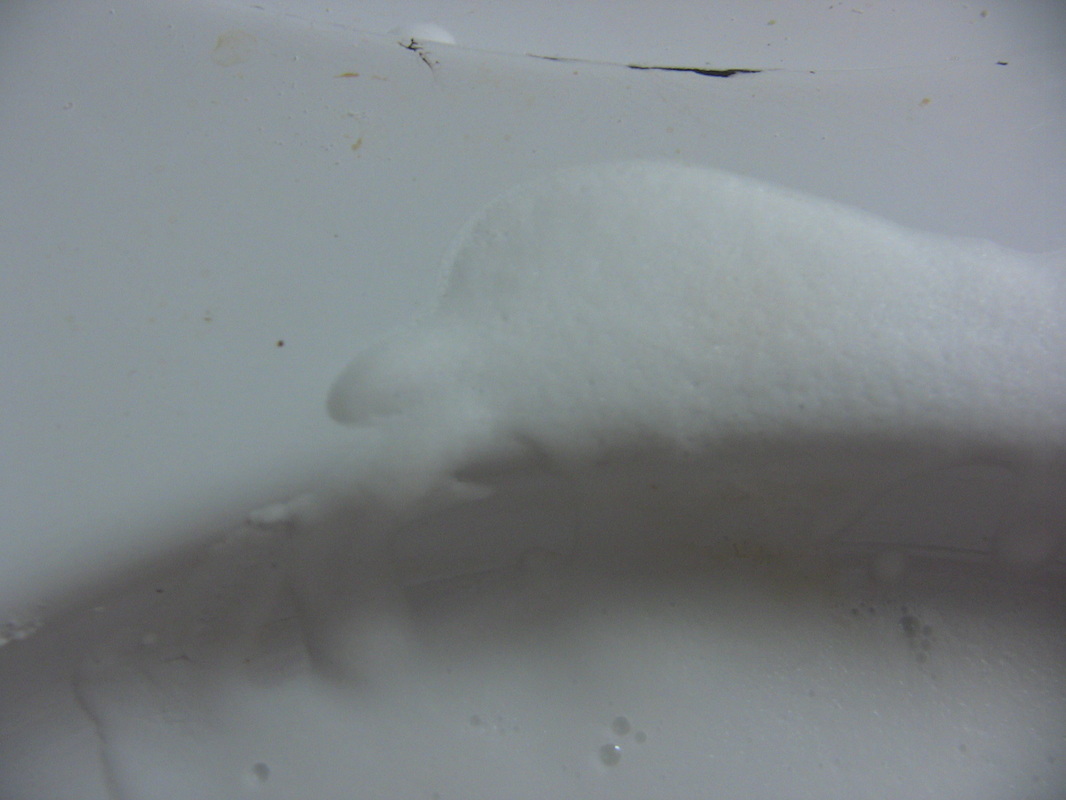
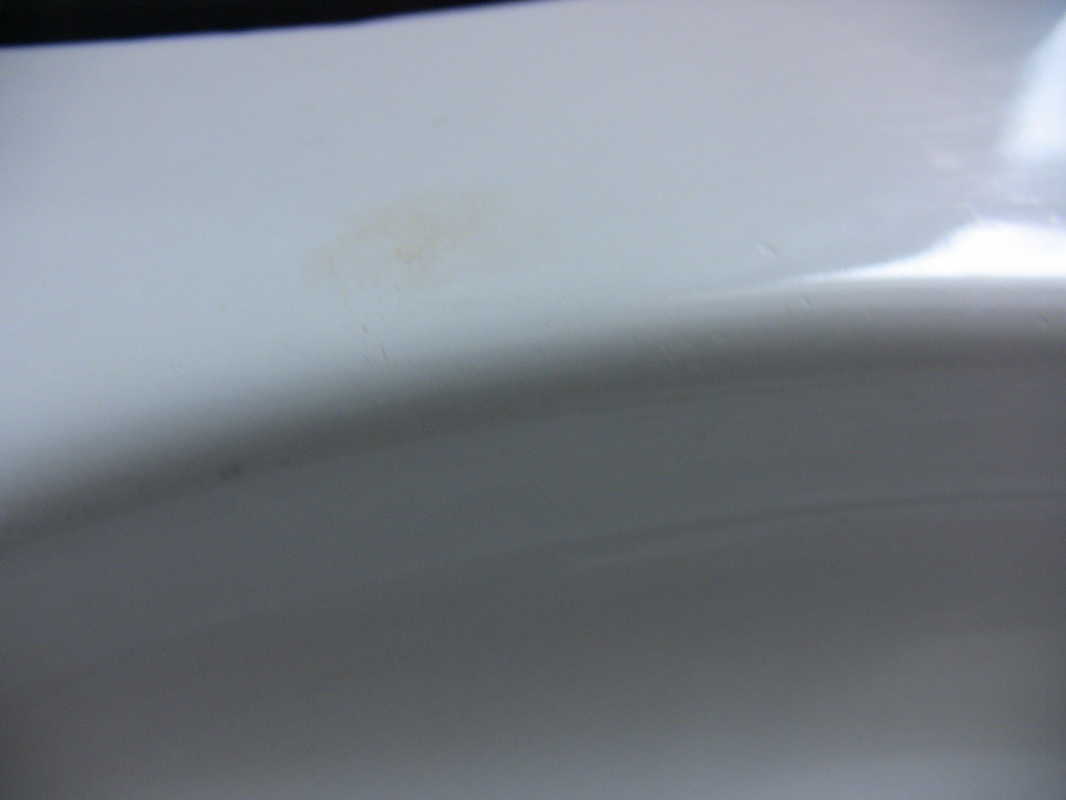
My new homemade oven cleaner was just equal parts baking soda and vinegar, with a few drops of dishwashing soap (I really like Ajax). The cleaner worked pretty well. The only thing I noticed was that some of the spots still had slight stains after I had scrubbed the baking soda/vinegar off.
Picture
Picture
12. Started some orange peels soaking in vinegar. After a few weeks the vinegar will take on the smell of the orange peel, and I'll have orange-scented vinegar to use in my homemade cleaning products. I like this idea because it is cheaper than using essential oil, and reusing something you would have just thrown away. After the peels are soaked, I'll strain them out and dump them in the chicken/compost pile.

Non-Frugal Stuff & Goals for Next Week

I will admit that we've done a bit of purchasing "stuff" lately, in the name of saving time.

Mop Bucket
We bought this "real" mop bucket for about $10.00 at Walmart. I LOVE it. Previously I'd been using a huge mixing bowl for mop water. Not only did I have to wash the thing with soap every time I used it, but it hardly fit in the sink and I had a hard time rinsing it without splashing water all over. The new bucket fits in the sink easily, AND I can just rinse it out because it never gets used for food.

The main reason why I hardly mopped is because I had no way to wring out the mop, which left the floor sopping wet and took forever to dry. Then I'd have to walk on it and the dirt from my feet/shoes/slippers would smear into the wet floor and get it all dirty again. Talk about frustrating! Now that I have the wringer bucket, the floor dries quickly. This purchase was SO worth the $10.

Mini Greenhouse
Another thing we bought at Walmart this week was one of these mini-greenhouses for starting seeds. Our greenhouse box had 72 cells for $5.00. I am going to try to use this for my tomato and pepper seeds. While my current seed starting method works fine, using the $5.00 greenhouse would eliminate the need to transplant seedlings. Last year during the transplanting process I got my varieties mixed up and some of the plants died. Hopefully using the greenhouse will fix these problems, and if I'm careful I can use the greenhouse again next year.

And FORGOT to Use My Coupon!
We stopped at TSC this week to get some salt/mineral blocks for the goats, and also some lice-killing powder. I like using tea tree oil, but the Pygoras have so much wool it is hard to use. The wethers also refuse to stand still for a daily treatment, so I've done nothing to get rid of their lice. Anyhow. I had a 10% entire order coupon to use on all of this stuff, and when we were almost home I realized that the coupon was still in my pocket. Bummer! 

Goals This Week
1. Make a batch of soap.
2. Make labels for lip balm.
3. Finish green apron.
4. Start pepper seeds.
​5. Start tomato seeds.
2 Comments

How to Hem Jeans

10/30/2015

2 Comments

 
Picture
Picture
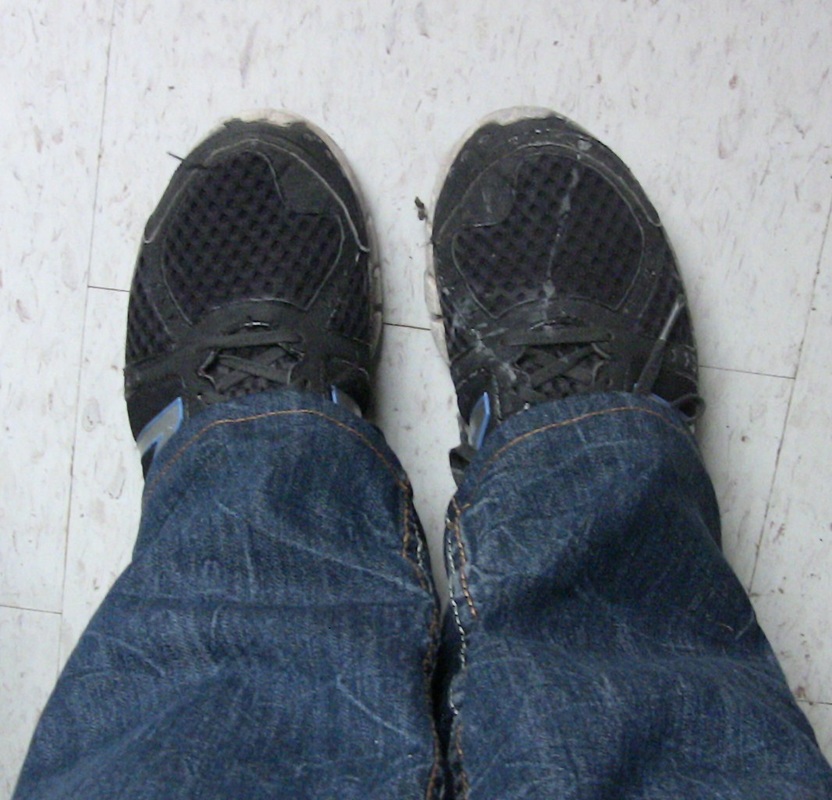
Before
Picture
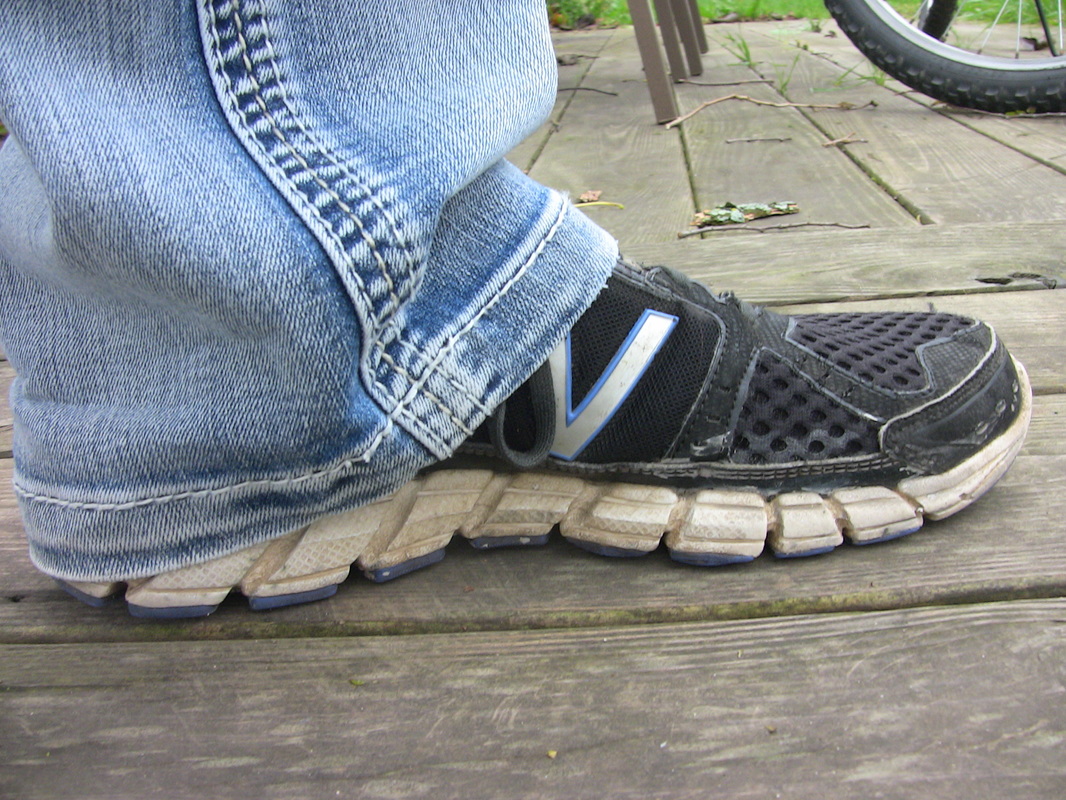
After
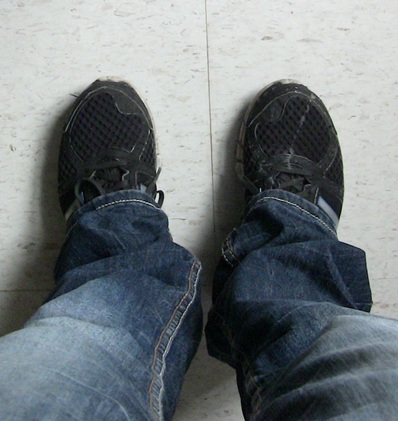
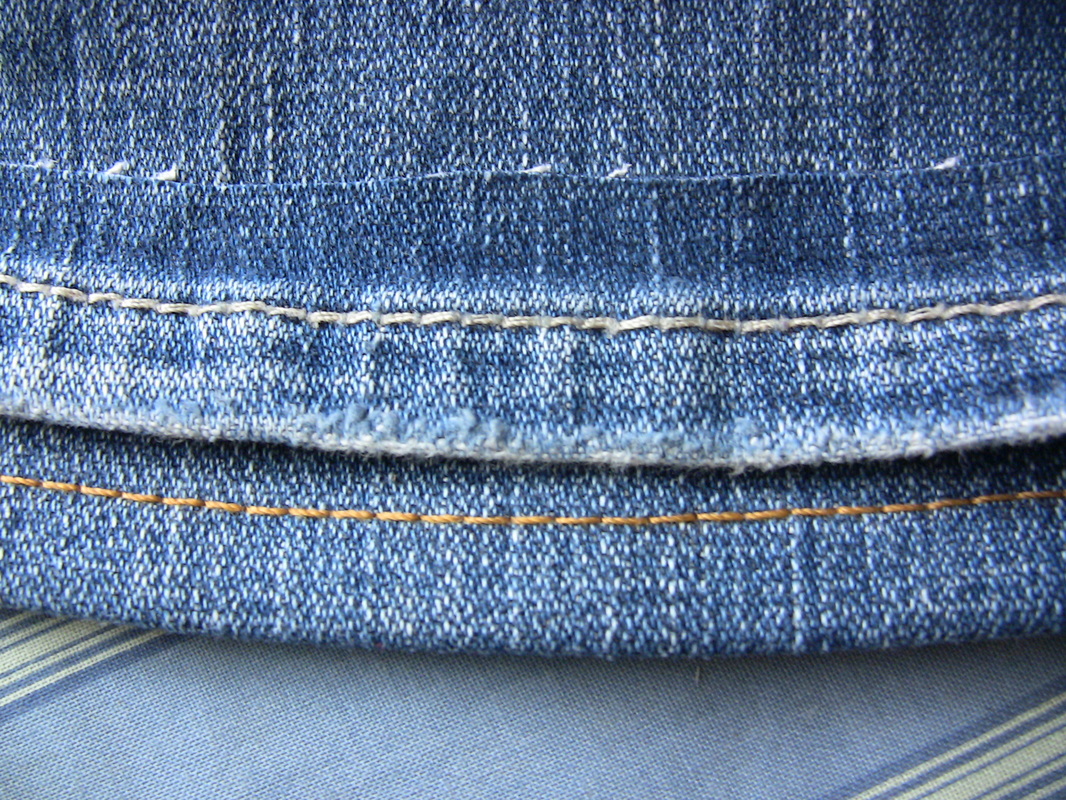
Do you ever get tired of stepping on your jeans? I do. I get tired of dragging a clump of threads behind my feet as I take each step, chewing up what is left of the back of my pant legs. Several weeks ago on a Sunday morning, I got tired of all this nonsense and chopped the bottoms off until they were only a half-inch longer than needed. Then I folded up the end and stitched along the bottom. It wasn't the best job ever, but at least I didn't have any raggy tag-alongs. Relief!

Up until recently, I would just flip up the bottoms of my too-long pants. I mean, that's cool, right? Maybe not, but they were NICE jeans and it wasn't like I was going to cut them up. Besides, they looked great when I wore heels or boots. The problem was: they were nice jeans. Before stepping on the hem for months started wearing them down to a mess of dirty threads.

Extending the Life of Jeans
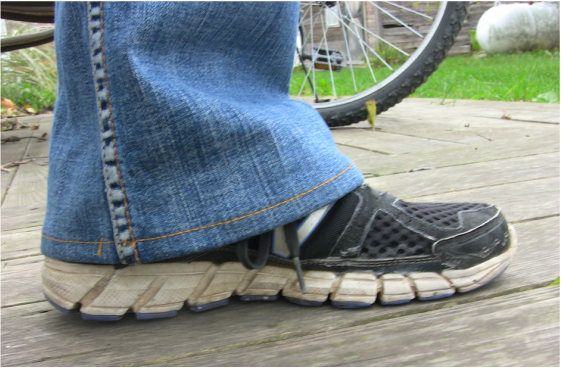
In addition to patching, hemming to the correct break point (that is, where to pant leg falls on your shoe) will extend the life and usefulness of any pair of jeans. 

Before you start cutting, it's important to know what shoes you normally wear with each pair of jeans. This will affect where your hemline should be. Longer hems are better with high heels and boots, but shorter hems work great with flip flops or ballet flats. Tennis shoes- what I wear with most jeans- are somewhere in between.

There are a million different "guides" out there to how long your jeans are supposed to be. I found that the best guides were actually from men's websites. Sites for women were all over the place in regards to hem advice, and most of it was based on unflattering fads like skinny jeans or ballet flats. I didn't see a single site that addressed wearing tennis shoes or anything else that is actually comfortable. Women's fashion is so fickle.

How to Hem
1. Determine the proper break for your jeans. You can do this by folding and pinning, and then looking at the hem in a mirror. In general, you want the hem to fall on the top of your shoe, but not be all bunched up. And you want to be able to walk around with stepping on your pants. Once you have found the right length, sit down. Are you flashing a bunch of ankle or sock? You don't want to look perfect when you're standing up and dorky when you sit down, because let's face it- most of our lives are spent sitting down anyway. 
Picture
This one is a little too long.
Picture
Folded under to desired hem length. Add 1" for hem, then cut.
After you determine where you want the hem to fall, add one inch* and cut off the extra. On this pair of pants, I only ended up cutting about an inch off each leg, even though I wanted the hem to be two inches shorter. It's important to leave some seam allowance! You can always cut more off, but you can't put it back on.
Picture
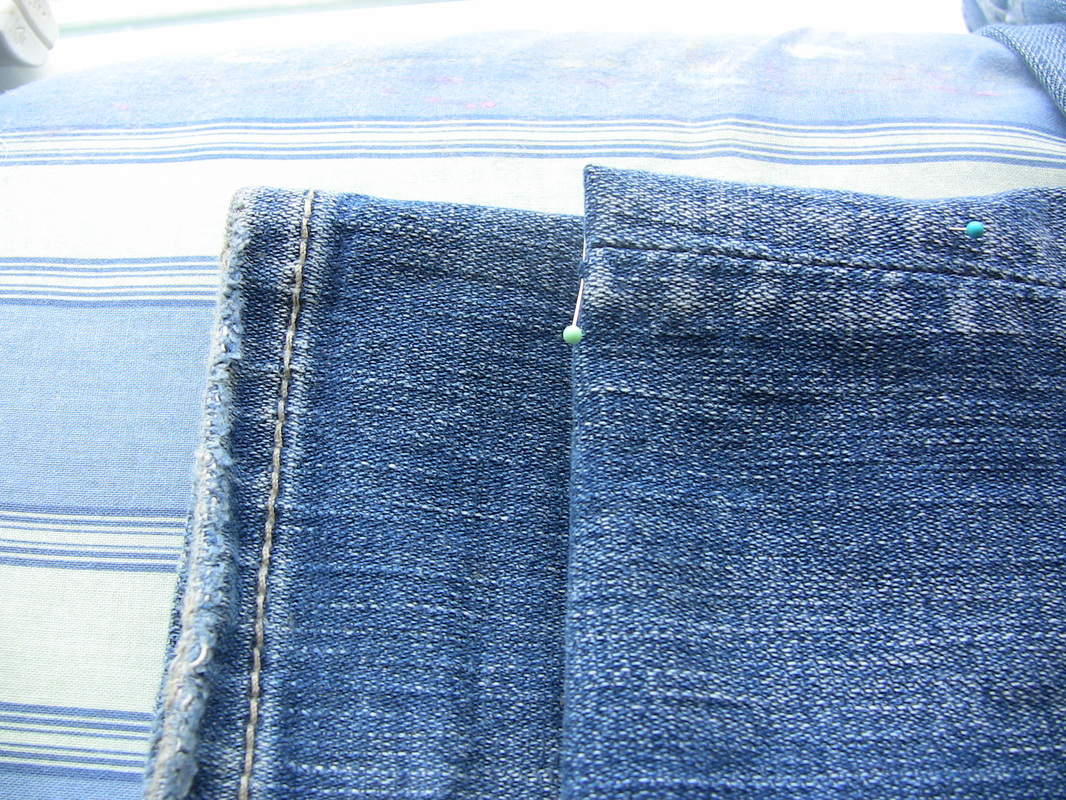
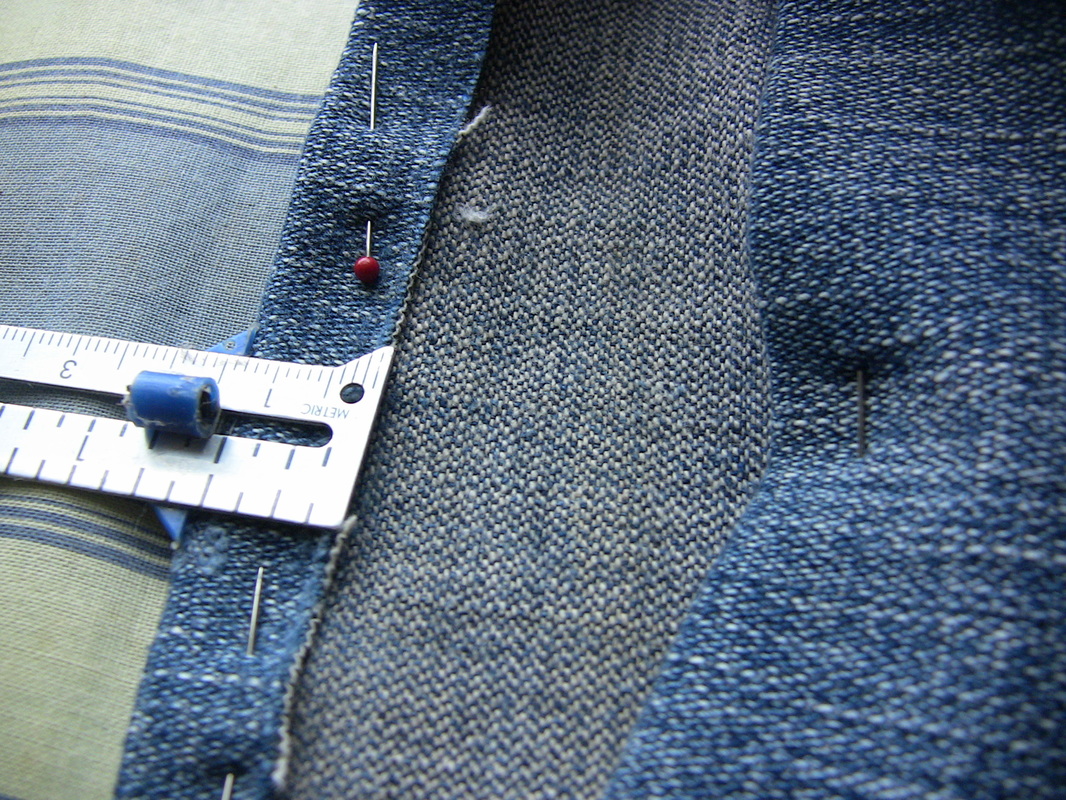
Fold the end under a half inch, and then pin it down. Use a hem gauge to keep checking for the right length. After you've pinned everything, iron it little by little. Take out a pin, iron that section, put the pin back. Take out another pin... you get the idea.
Picture
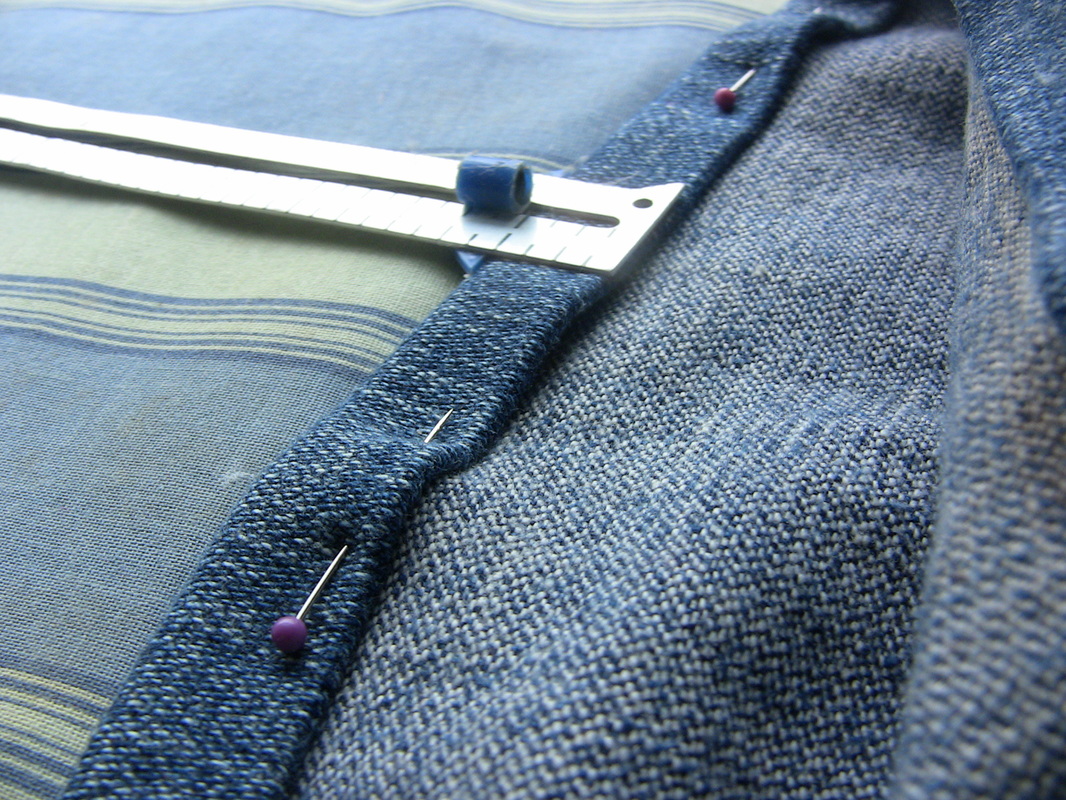
Now it's time to do it all over again. Fold the hem up another half inch; this hides any raw edges. Take out a pin, fold over another half inch, iron, and pin it back into place. Unpin, fold, iron, pin. Repeat until the whole leg is done. If you are working with flared jeans, you may have some issues with puckering and/or stretching. Here is a great tutorial for working with flared or tapered jeans. In fact, I am binge-reading her website like candy right now... you should too, after you finish reading this.
Picture
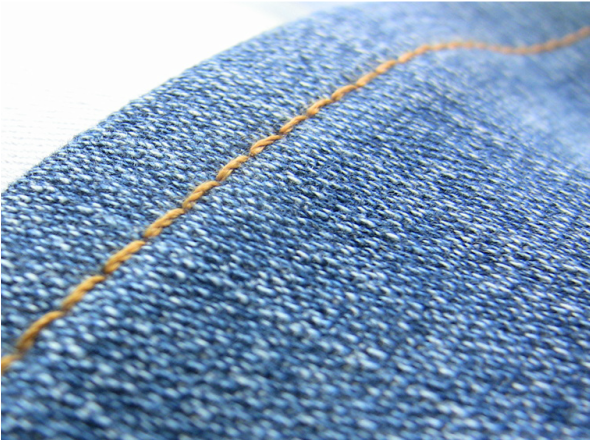
Load your bobbin and thread your sewing machine with orange (or another color) thread. I use "Dual Duty Plus" from Walmart, advertised as "extra strong for jeans". It's a little more expensive, so hemming is about the only thing I use it for.

Sew 3/8 inch from the bottom of the pants, all around each pant leg. You want the stitch length to be pretty long. You might have to slow down and gently work your way through thick side seams. Usually the inseam is the thickest. While you are sewing, try not to stretch the fabric. This can make the fabric bubble in and out.
Picture
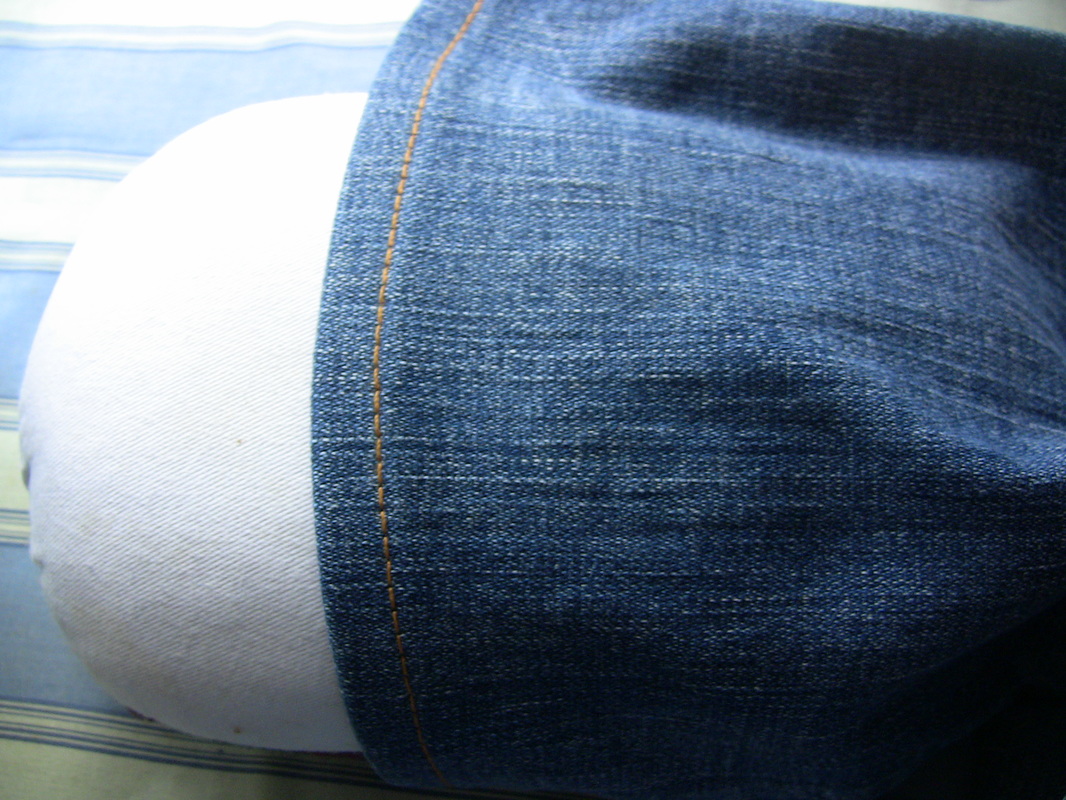
After you've finished sewing, iron the hem from top to bottom, with the grain line. If you iron the pant leg from left to right, it will skew the hem line. Ironing is very important. Here I'm using a round pressing ham to make it easier.
Picture
The new hem will be a little more stiff than the old one, and it won't be distressed. There are plenty of tutorials and Youtube videos that show how to distress jeans. I might do a tutorial on this when I get it figured out. :) 
Picture
Not to short, not too long!
I'm really looking forward to not stepping on the backs of my pant legs!

Do you find that pants are always too long or short on you? Have you had your pants hemmed before, or possibly hemmed them yourself? Tell me about it!

-Bethany
*This is just a standard length to add. Some jeans have wide hems (1" instead of 1/2"- this means you would have to add 1.5-2" past the break point marked with pins) and you can make the hem as wide or narrow as you'd like. One inch (a half inch for each time you fold up) is easy to remember, though.
2 Comments

 The Ebay Flip Project

10/26/2015

2 Comments

 
Picture
Hey peeps! Last week we ended the farmers market experiment, where I got a 70% return on my initial monetary investment, but ended up working for $1.54 per hour. In November I'll be trying my hand at a different venture; selling vintage sewing patterns. 

An Old Gig
I'll admit- I'm pretty excited about this new project because I've done it before. Unlike selling at a farmers market, I know what sells best in my Ebay niche and the best way to sell it. In the past, I've purchased patterns for $5 and resold them for $30. Not to brag, but that's a better return than many weeks at the farmers market.

Why Sewing Patterns?
There are several reasons why I like selling patterns as opposed to other vintage finds. 

1. I love them. The only reason I don't keep all of the patterns I find is because I will never have time to use them all. It makes me happy to offer some of these beautiful vintage patterns to the general public on Ebay. 

2. I know them. Having sewn for many years, I'm comfortable and familiar with using patterns. When I was still in high school, I used my very first vintage pattern and it was WAY different than I was used to! The pattern came pre-cut, and all of the markings were punched out with holes instead of printed. There was not a drop of ink on the whole pattern. This made it confusing at first, but later I got the hang of it. As I bought and used different eras of clothing patterns, I learned how to read, identify and take care of the pieces. 

3. They don't cost very much. If you buy them at garage sales and thrift stores, patterns seldom go for more than a dollar each. Antique stores charge a bit more, but you can still make money if you buy the right patterns. If you know what to look for, you can re-sell them for $5 and up.

4. They don't cost very much to ship. Because they are so light, I offer free shipping on any patterns I sell on Ebay. This often costs less than a dollar, and it attracts more buyers.

My Treasure Box
This Spring, I found an entire box of vintage patterns at a garage sale. Each pattern was selling for $0.25. I could feel my heart rate climb as I snatched up piece after piece. My hands were full when I found the gem-  a mid-century glove pattern. Forget this! I said to myself. I'm buying the whole box! After some haggling, the owner sold it to me for $6.00. I knew I could sell one pattern and recoup the cost of the entire box, so it was a great deal. At home I drooled over my finds, and then put them away until winter.

Well, winter is upon us. November is a great time to sell things on Ebay, because Christmas is coming but also because more people have time to work on sewing projects. I'm hoping to make a lot of money on this treasure box. Join me in the following weeks as I attempt to sell as many of these patterns as possible, for the highest price possible.

What will the ROI be on my $6.00 treasure box? Next Monday* we'll start selling.

-Bethany 
*All fellow Ebayers probably know that Monday isn't the best time to end an auction. This is true. I'll actually be scheduling my auctions to end on Sunday, so each Monday I'll be able to review what I listed and sold over the weekend. :)
2 Comments

I'm Not Afraid of Math Anymore

2/9/2015

0 Comments

 
Picture
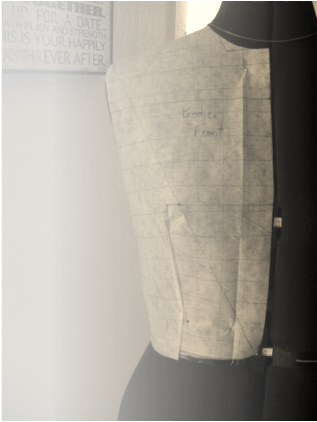
This past winter I conquered one of my math-related fears. Fitting sewing patterns had caused me many, many headaches in the past. It was something I thought I would never understand. But after Christmas I proved myself wrong and drafted my own pattern... entirely from measurements.

That's a lot of numbers! That's a lot of directions-following, a lot of steps and calculations and complications! That's not creative or artsy! I'm not that kind of person, and I hate math, so I shouldn't be able to do that. Or should I? 

The Old Me
One way I used to define myself was, "I'm not a math person." During my 10+ years of formal schooling, I loved the subjects of reading and writing, and despised the subject of math. It sometimes took hours for me to finish the problems correctly, though many of those hours were spent staring out the window wishing I were somewhere else. Algebra was the worst. By the time a test came along I had already forgotten the techniques I had learned in the weeks before. Math brought me no joy and no reward. It made me feel stupid. During these years I bought into the common polarizing lie that you are either an "art" person or a "math" person... and I was not a math person.

I am not the only lady out there who has told herself that. In fact, I know a girl who insisted that she had a "math disability". But I think it's a bad habit to shut ourselves off to potential skills. We should resist being boxed in by bad experiences and what society tells us. We need to tell ourselves the truth: I never had a reason to like math. I am afraid to try anything with numbers because of all the times I messed up in school.

A New Page
Now that I'm out of school, I'm learning that I really am a "numbers person". I love science and math in their practical applications. Math is not about memorizing methods and getting good test scores. Today math is about inches, ounces, kilometers, degrees ferenheit, and dollars. Math is tempering chocolate so it "snaps", planning a garden, using a chop saw or drafting a well-fit sewing pattern. My goodness, math is the difference between being rich or being broke.

What about you? Have you told yourself "I will never be able to do that; I am not that kind of person." We all have the ability to be math people or creative people, foodies or workaholics or people-persons or criminals to some degree. It's all in what we believe, largely influenced by what we hear from others and what we tell ourselves.  

So stop telling yourself you're not a math person.

Happy calculating!
-Bethany
0 Comments

Economics of Sewing

1/5/2015

2 Comments

 
Picture
Once upon a time, I was at the thrift store buying some vintage sewing patterns. The cashier asked me if I sewed, and then commented about how it was a dying skill that all of our grandmothers used to know. You know, back in the good old days.

Contrary to the cashier's assumption, there are many ladies today that still sew. However, I think sewing has become more of a "designer handbag" hobby rather than a frugal skill.

Do you think it is frugal to sew all of your own clothes? Think again. After buying the fabric at $3-$15 per yard, with several yards required for a dress, you're paying just as much, if not MORE, than you would at Walmart (or garage sale or thrift store) for a similar item. And that's not counting the hours you spent putting the garment together. If you figure in the initial cost of a sewing machine, miscellaneous notions and the time spent learning how to sew, the cost is even higher.

This is a distressing idea, and probably one reason why most potential sewers quit after a pair of pajama pants. Why spend time and money to make a sloppy-looking, ill--fitting piece of clothing? However, there is hope. After spending a lot of money on supplies and a lot of time sewing and learning how to sew, I've got some tips for you on how to make sewing pay off.

1. Get a sewing machine that is not something fancy. An old (possibly free) machine from the 1980s will be fine for beginners if it works properly.

2. Learn to sew with dolls. Really. (If you feel like you are too old for this, skip to #3.) I spent my tween and early teen years making dolls and doll clothes. I was able to make everything with sheets and scraps, and could make something with "fancy" (slippery, hard-to-work-with material) fabric and only buy 1/8 yard. I didn't realize it at the time, but I was learning to modify patterns and solidifying my skills with the sewing machine. Unlike my friends who had to buy expensive American Girl dolls and clothes, I was able to make anything I wanted for my dolls, for free! After the fun of playing with dolls had passed, I still made clothes because the fun of designing outfits was so addicting.

3. Learn to sew by taking apart old, free clothing. If you want to make skirts, find a skirt and take it apart, stitch by stitch, with a seam ripper. Then iron out all of the parts. The parts- what you will see on a pattern- look a lot different than the skirt when it has been put together. Take note of the hem (bottom of pants, skirt, or dress). How wide is it? How many times has it been folded under? What is the seam allowance for the piece of clothing? After you have taken it apart and ironed the pieces, save any buttons, zippers, elastic or other notions. Set aside the fabric for use in other projects. Better yet, try to put the whole thing back together.

By utilizing tips #1, #2 and #3, you will learn to sew and simultaneously build a supply of sewing notions and/or fabric for cheap (or even free!). At the learning stage, there is no reason to buy fabric. If you do find a need for large piece of fabric, an old bed sheet from a thrift store will work just fine until you are ready to make something wearable. Believe me, you probably will not want to wear your first creations in public (thus my mention of the dolls...).

4. Start with easy patterns. Princess line dresses, A-line skirts, or simple T-shirts will be easy but still flattering and wearable. If you are not going to wear your project, please don't spend money on fabric.

5. Use large garments to make small ones. When I made my wedding dress, I started with a dress from Goodwill that was several sizes too big. It had enough extra fabric for me to make an entirely new bodice.

6. If you want new fabric, buy online. Find what you want at Joann's or another fabric store, take note of what it is (satin, crepe, cotton, etc.) and find something similar and less expensive online. It is a bit of a gamble to buy fabric without touching or seeing it in person, but worth the savings if you aren't too picky.  

So now you know how to sew, and you've done it fairly cheaply. But how can sewing save you money?

7. Do alterations on ready-made clothing. Oftentimes, a piece of clothing would be perfect, if only it were shorter or had a panel in front, or didn't have a tear in the side. One of my best pair of jeans was picked out of a garage sale free-box... with no button in front. It took all of 10 minutes to make that otherwise perfect pair of name-brand jeans wearable again.

8. Make costumes. Costumes tend to cost WAY more than regular clothing. If you are involved in theatre, reenacting or halloween, there are definitely big bucks to be saved by sewing your own costumes.

9. Make formal wear. Another expensive, comparatively over-priced garment is the formal prom or bridal/bridesmaid dress. These kind of garments can be tricky to make with their slippery fabrics, but definitely doable. I would recommend taking apart a cheap (possibly outdated) dress to examine the insides. Often these dresses will have several layers of support (especially if strapless) including stiff net-like material and boning, in addition to the outside fashion fabric and inside lining.

10. Make custom-fit and styled couture garments for yourself. When you've reached a skill level in which you can do anything with a piece of fabric, then you can have every DIY Sewer's Dream of making all your own clothes. But usually this advanced level isn't reached until people are busting down your door, offering to pay big bucks for your sewing expertise.

Is sewing worth it? Not if you go to Joann Fabrics and try to recreate a Walmart skirt. But if you stick to alterations, costumes, and formal wear (and source your supplies wisely), sewing can be very useful and economical. Remember, the higher your skill level, the more it pays off. So be diligent in becoming more skilled.
2 Comments
    Picture

    Bethany

    Housewife, happy wife, and mama to one. :)

    Picture

    Picture
    The Housewife's Guide to Frugal Food
    How to Eat for $10.00
    ​per Week

    Picture
    The Housewife's Guide to Menu Planning
    A Weekly Menu to Save
    Time & Money
    Picture
    The Housewife's Guide to
    Frugal Fruits and Vegetables

    No Garden? No Problem!

    Watch Meals From the Bunker:

    Picture

    Check out my Youtube Channel!

    RSS Feed


    Picture
    Baby Girl's Birth Story
    Picture
    8 Cheap Ways to Eat Healthy
    Picture

    Categories

    All
    Animals
    Book Reviews
    Books
    Christmas
    Cleaning
    Clothing
    Cooking
    Couponing
    Education
    Ego
    Electricity
    Farmers Market
    Finance
    Foraging
    Frugal
    Frugal Accomplishments
    Frugality
    Garage Sales
    Gardening
    Gifts
    Grocery Budget
    Grocery Shopping
    Herbs
    History
    Hobby Farm
    Home Based Business
    Home-based Business
    Home Decorating
    Housekeeping
    Industry
    Languages
    Laundry
    Marriage
    Meal Planning
    Medicine
    Minimalist
    Network Marketing
    Organization
    Plants
    Product Reviews
    Quotes
    Recipes
    ROI
    Rv
    Sewing
    Simplicity
    Spanish
    Spending Report
    Travel

    Archives

    May 2021
    April 2021
    March 2021
    February 2021
    January 2021
    August 2020
    May 2020
    April 2020
    March 2020
    February 2020
    January 2020
    December 2019
    November 2019
    October 2019
    September 2019
    August 2019
    July 2019
    June 2019
    May 2019
    April 2019
    March 2019
    February 2019
    January 2019
    December 2018
    November 2018
    October 2018
    September 2018
    August 2018
    July 2018
    June 2018
    May 2018
    April 2018
    March 2018
    February 2018
    January 2018
    December 2017
    November 2017
    October 2017
    September 2017
    August 2017
    July 2017
    June 2017
    May 2017
    April 2017
    March 2017
    February 2017
    January 2017
    December 2016
    November 2016
    October 2016
    September 2016
    August 2016
    July 2016
    June 2016
    May 2016
    April 2016
    March 2016
    February 2016
    January 2016
    December 2015
    November 2015
    October 2015
    September 2015
    August 2015
    July 2015
    June 2015
    May 2015
    April 2015
    March 2015
    February 2015
    January 2015
    December 2014
    November 2014
    October 2014
    September 2014

    Full Disclosure & Disclaimer

    Picture
    Picture
    I get cash back for many online purchases including wedding gifts and Ebay stuff!

Powered by Create your own unique website with customizable templates.
Photos used under Creative Commons from dasWebweib, amanessinger, thewritingreader, diakosmein