the Renaissance Housewife
  • Home
  • Topics
    • Saving >
      • Kitchen >
        • Food >
          • Recipes
      • Bath & Laundry
      • Medicine Cabinet
      • Office
      • Electricity
      • Gardening
      • Foraging
      • Animals
      • Weekly F. A.'s
      • Printables & Downloads
    • Earning
    • Investing
  • Books
  • About
    • RH Recommends
    • Newsletter & Updates
    • Travel
    • Beta Readers
    • Legal Stuff

Bread Bowls... A Frugal Meal Idea

11/9/2016

0 Comments

 
Picture
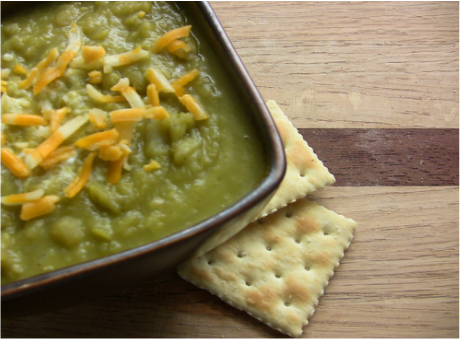
I don't know about you, but we've been eating a lot of soup lately. I love making soup because it's warm, tasty and inexpensive. Inexpensive, that is, unless you're a cracker fanatic like I am. I could crush a whole sleeve into one bowl of soup. Seriously.

Bread bowls are a fancy, creative, filling and not-so-expensive replacement for crackers. If you can make bread, you can make bread bowls. I'll let you find your favorite recipe. Personally I like to use a no-knead bread dough because artisan bread comes out so nice and crusty.

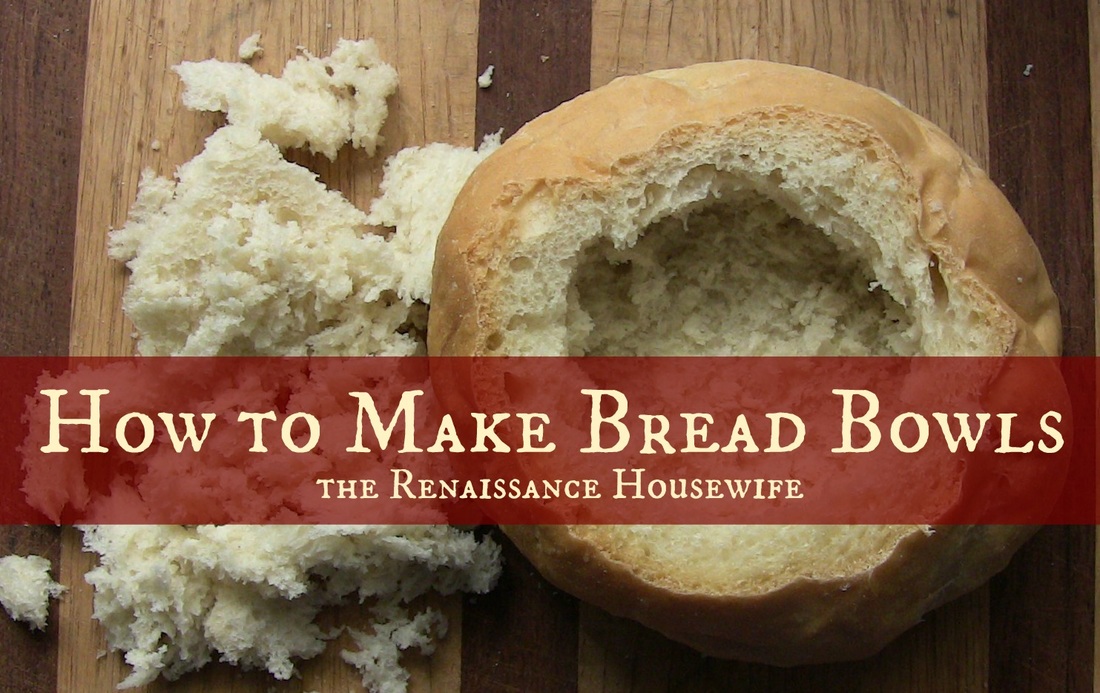
How to Make Bread Bowls

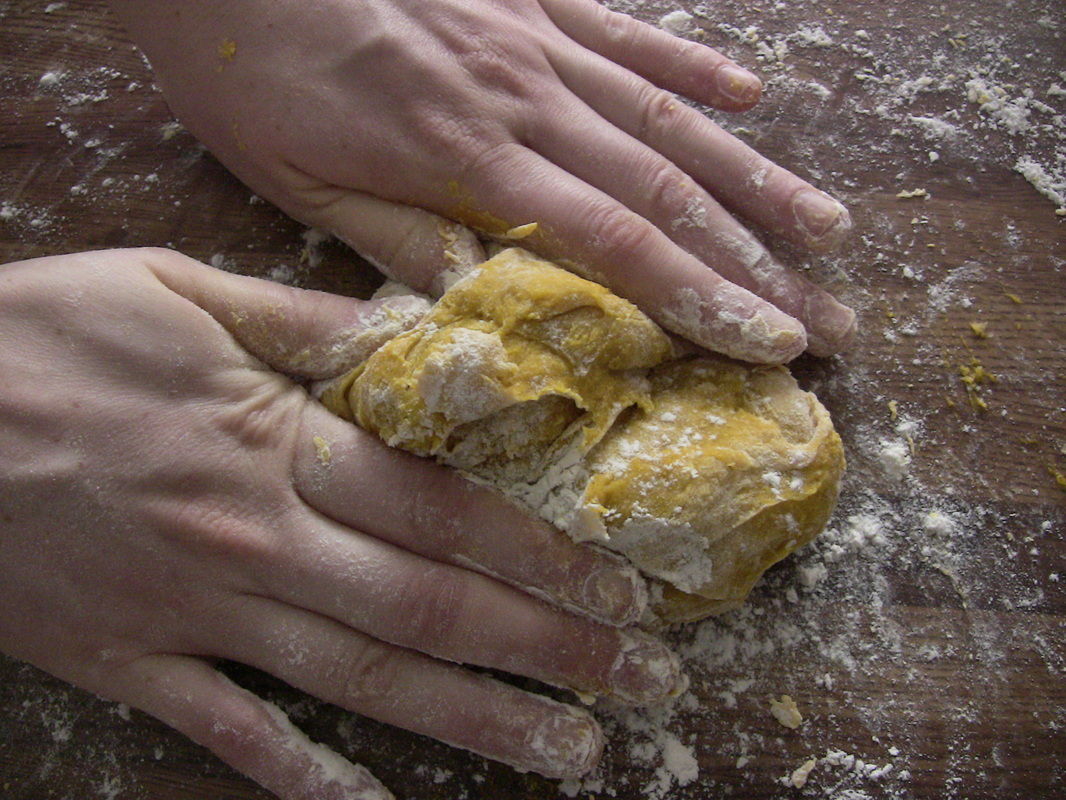
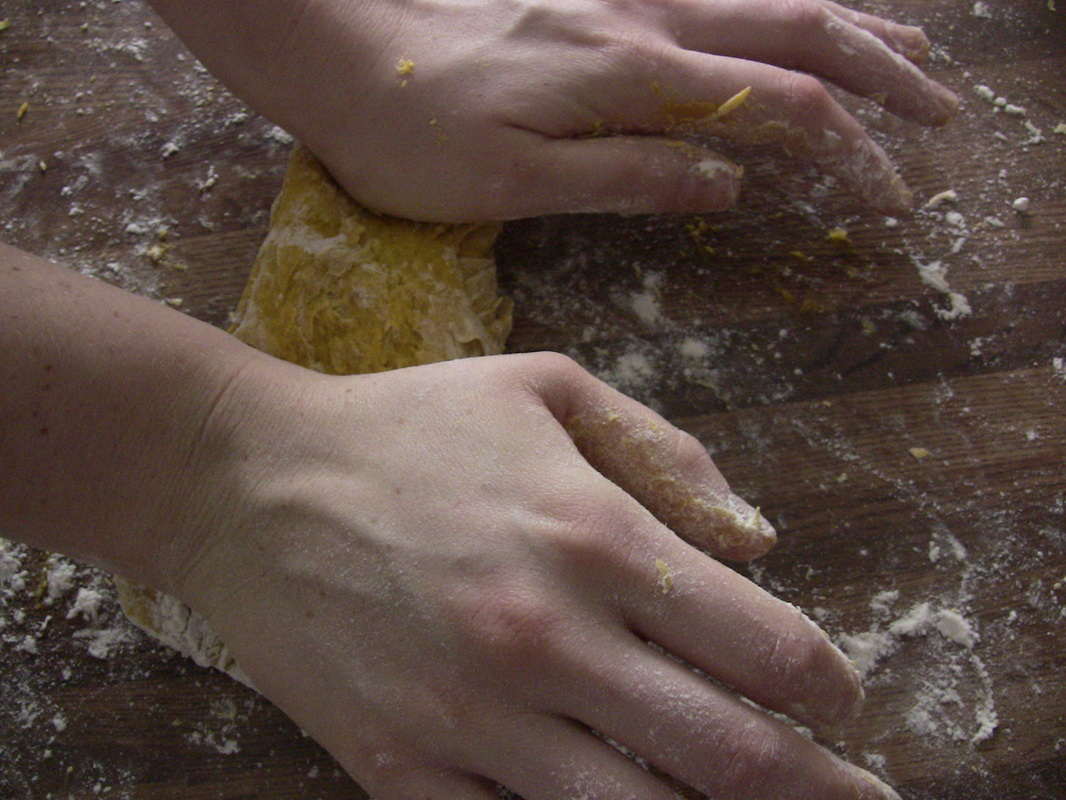
1. Shape your bread dough as if you were going to make dinner rolls, but place them 3 inches apart so that the rolls will bake separately. This will give your bowls good, hard sides. If the rolls smoosh together while they are baking, the sides won't be sturdy enough to hold soup.

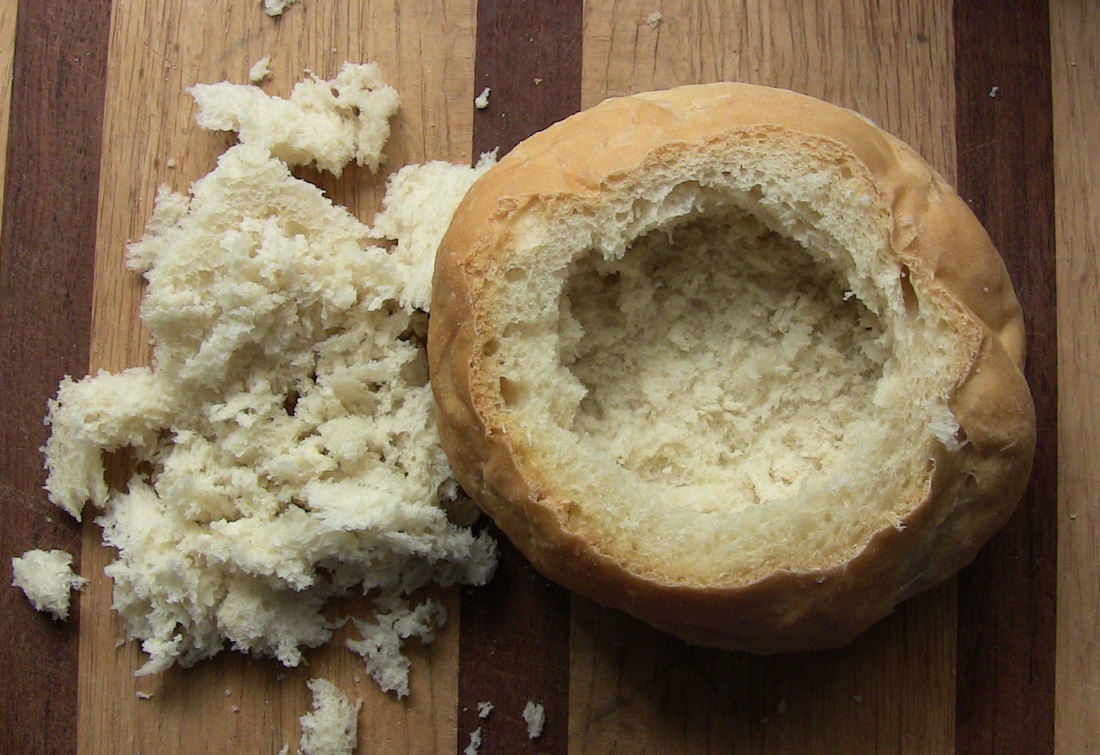
One of my first mistakes was making the bowls too big. The bowl you see in the photos is far too large. The size of a normal dinner roll should be perfect.

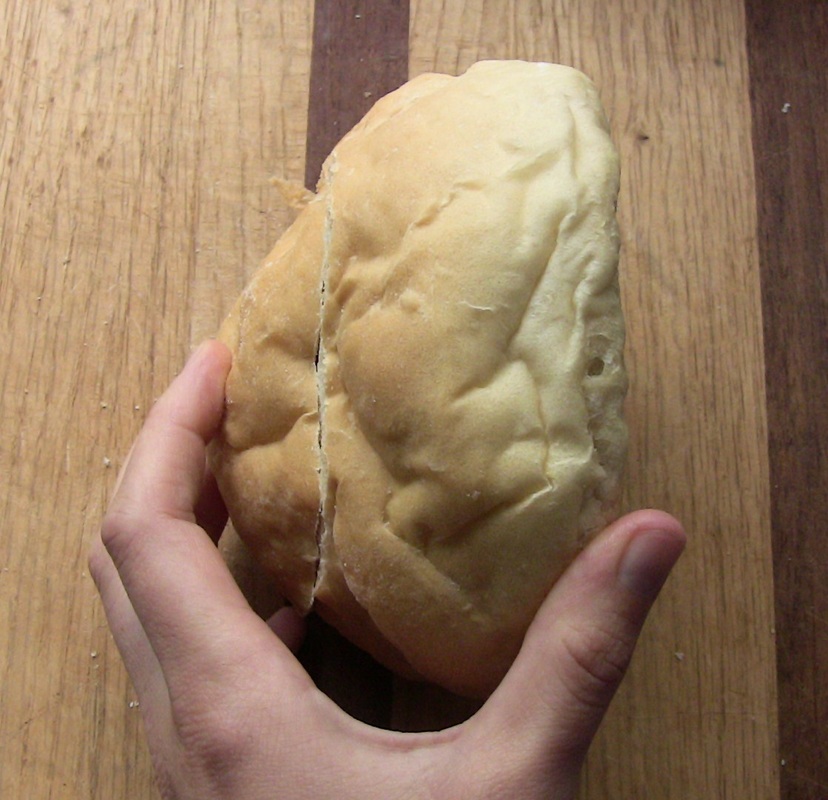
2. Cut the very top of the roll off, as if you were about to carve a pumpkin.
Picture
Picture
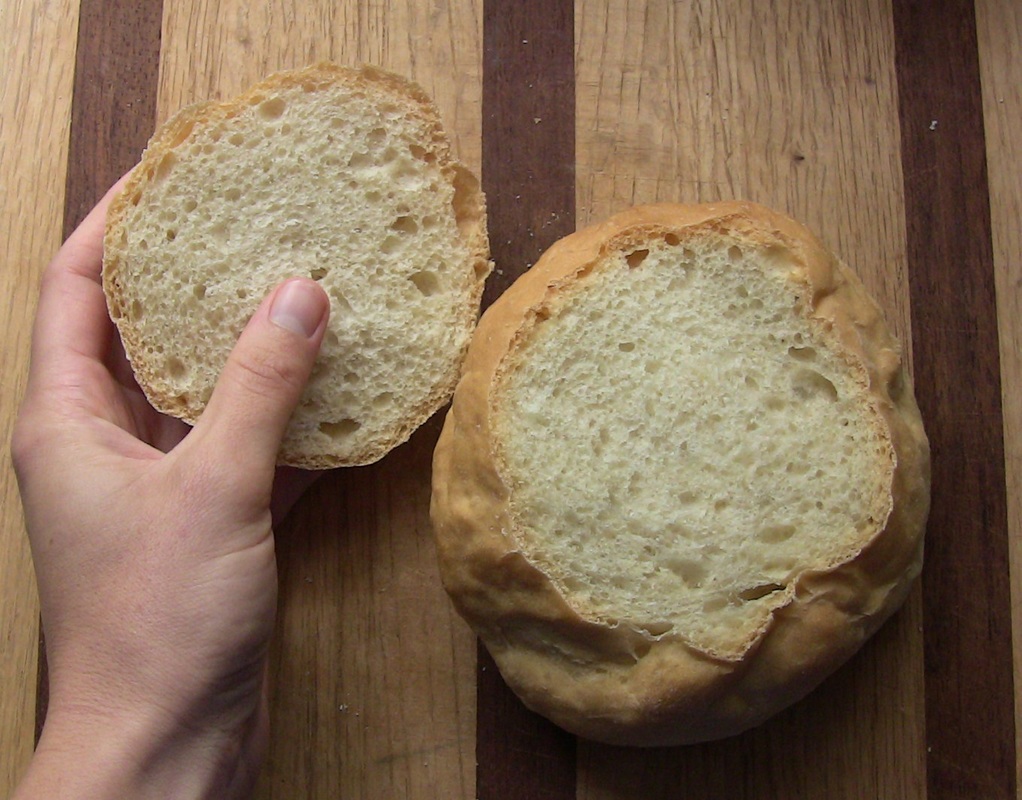
3. Dig out the insides of the bread roll (again, as if you were carving a pumpkin!).
Picture
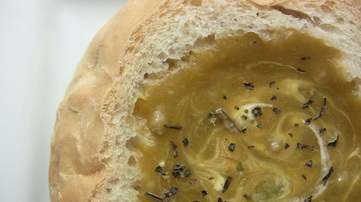
And there you have it! A bread bowl ready to be filled with soup. Though they will work with any soup, I've found that bread bowls are more helpful to thin, watery soups that need more substance. Not only does the bread enhance the soup, but the soup soaks into the dry bread and makes it taste SO good when the soup is gone.
Picture
Some Tips:

1. You can save the bread bowl insides. These can be used for croutons or bread crumbs in recipes. You can also put them back into the soup, like crackers.

2. Because there are only two of us, I like to make a big batch of bread bowls and then freeze all but two. Then whenever we have soup, I pull out two of the bowls and we eat them little by little that way.

Til next time,
-Bethany
0 Comments

ROI of Making Yogurt

6/10/2016

0 Comments

 
Picture
Making your own yogurt is a great way to stretch those food dollars. It doesn't take special tools or skills, plus it is something healthy that you can make every week. Making yogurt is as easy as stirring and boiling water. You can read my tutorial here. 

Finding The Savings
How much money is there to be saved by making yogurt? As always, it depends on how much yogurt you go through, as well as how much you pay for milk. We tend to use about two quarts of yogurt per week, and the milk is free because I get it from my goat. At Walmart, I would pay about $2.67 per quart.

($2.67 x 2 qts = $5.34) - $0.58 (cost for a small container of yogurt to use as "starter culture) = $4.76 weekly savings for Bethany

Let's say I make theoretically make yogurt 50 weeks out of the year (exclude two weeks for vacation).

$4.76 x 50 = $238.00 yearly savings for Bethany

For the People Without Goats
I know that most people don't have access to free milk, so in that case is making yogurt still economical? Let's do the math.

$0.58 starter + ($2.00/gal. divided by 2 = $1.00) = $1.58 (divided by 2 qts. = $0.79/qt.)

$2.67 (store bought qt.) - $0.79 (homemade quart) =  $1.88 potential savings for every quart.

So, depending on how much yogurt your family goes through, you could be saving:

1 quart = $1.88/wk ($94.00/yr)
2 quarts = $3.76/wk ($188.00/yr)
3 quarts = $5.64/wk ($282.00/yr)
4 quarts = $7.52/wk ($376.00/yr)
5 quarts = $9.40/wk ($470.00/yr)
6 quarts = $11.28/wk ($564.00/yr)

Hourly Wage
It takes about 15 minutes of actual hands-on work to make yogurt. As I said before, that work involves heating milk, stirring in yogurt starter, and dumping the mixture into a yogurt container to incubate. If you don't have a yogurt maker, you will have to use the "mason jars-in-a-cooler-with-hot-water" method, which may take 30 minutes.

Hourly wage with yogurt maker (2 quarts): $3.76 x 4 (15 minute increments) = $15.04
Hourly wage without yogurt maker (2 quarts): $3.76 x 2 (30 minute increments) = $7. 52

However, keep in mind that it takes just as long to heat and cool a whole gallon of milk as it does to do a half-gallon, if you are using mason jars. With this in mind:

Hourly wage without yogurt maker (4 quarts):  $7.52 x 3 (30 minute increments) = $15.04

ROI of Making Yogurt
In my case, I got my yogurt maker and milk for free, so the only "investment" is the $0.58 yogurt starter.

$5.31 worth of yogurt = 915% ROI for Bethany

For everyone else making four quarts per week without a yogurt maker:

$0.79/qt. x 4 qts = $3.16 investment
$10.68 worth of yogurt = 338% ROI

Some Side Notes: One serving of flavored yogurt from the store contains more sugar than a chocolate chip cookie. I'm not kidding! However, this is to our advantage if we use store bought yogurt as a starter culture. I find that those 18 grams of sugar spread out over two quarts of yogurt gives just enough sweetness so that I can eat my homemade yogurt without adding sugar or honey or maple syrup. This too, saves money.

Some of you may be wondering how to use up a whole gallon of yogurt every week. Some people use yogurt to soak fresh-ground flours and grains with. We eat it for breakfast with granola or in smoothies. Yogurt can also be used as a condiment or in dips and dressings. Last night I used it as a spread on Greek-style lamb sandwiches. Speaking of Greek, you can make your own Greek yogurt by using a cheesecloth to strain out the whey. Greek yogurt can be strained even longer to make a kind of "yogurt cheese", which can be used to replace cream cheese in recipes.

Lastly, the price of milk fluctuates all the time. This is important to keep track of. If milk is $3.00 per gallon, your cost to make yogurt is going to be $1.00 per quart. If you can buy yogurt for $2.00/qt., or on sale for even cheaper, it may not be worth your time to make it. At the time of this writing, I believe it is still very much worth your time. But circumstances change, so keep an eye out. I've always wondered why Amy Dacyczyn (author of The Tightwad Gazette) recommended powdered milk when it is actually cheaper to buy real milk. Recently, while reading her books, I discovered that her cost per gallon of milk in the early 1990s was $2.19-$2.59. Earlier this year- 25 years later- you could get a gallon of milk for $1.89. Crazy!!!
​
******

Til next time,
-Bethany
0 Comments

ROI of Buying a Pressure Canner

5/27/2016

0 Comments

 
Picture
Just this week, we brought home a road-kill deer. Between the tenderloins and one ham, we were able to harvest 14 lbs. of meat. For free! Even with limited freezer space, I was still able to keep it. Thanks to... our handy-dandy pressure canner. :)

I LOVE LOVE LOVE the pressure canner. It allows me to make cheap bulk dried beans into ready-to-eat canned beans. It also allows us to keep far more meat in food storage than we would be able to, otherwise. I'm not a huge fan of pressure canning vegetables*, but that option is open as well.

Note: I didn't include the cost of canning jars, rings and lids in this analysis. I assume that if you're ready to attempt pressure canning, you've been water bath canning and already have a stockpile of jars/supplies.

Potential Savings:

Canned meat: The main cost savings with canned meat has to do with energy; you don't have to run a second freezer to store all of your stockpiled bargain/free meat. A vague (and probably too conservative) guess at energy costs for our old freezer is $6.00 per month.

Therefore, our yearly savings for canning meat = $72.00 per freezer of meat. 

A bonus of canning meat is that it comes out of the jar already cooked. This energy savings cancels out the energy cost of pressure canning.

Another bonus? If you pressure can bone-in meat (I use free chicken), your jar will have gelatin-rich broth in it, as well as the meat. This is perfect for making soup with. A lot of people mess around with either 1) making broth every week in a crockpot, or 2) making a ginormous pot once a month and freezing it in quart-size freezer bags. If you are one of these people, not only do you have a more crowded freezer, but you've also got to pay for all of those plastic bags and deal with any that bust open. If you freeze broth in glass jars, no doubt you've lost some due to breakage (caused by the expanding liquid). All this can be avoided if you making bone broth by pressure canning.

Canned beans: let's say an average can of navy beans costs $1.00 and holds two cups of cooked beans.

I buy my beans in bulk for $0.79/lb. One pound of dry beans= 2 1/3 cup. There is only 2/3 cup of dried beans in a can of store-bought beans, which means that my home-canned beans only cost about $0.23 per can. Add $0.05 per jar for a canning lid (I use mine at least twice before throwing them away), and the home canned beans cost $0.28 per can, for a cost savings of $0.72 per can.

If we used one pint jar ("can") of beans per week, the yearly savings for canned beans = $37.44. The more beans you eat, the more savings. But I'm just doing calculations for the two of us.

A beany bonus: some people cook a ton of beans in the crock pot, and then freeze them in plastic bags. In addition to using up freezer space and wasting plastic baggies, frozen beans have to be thawed before you can use them. Canned beans only have to be soaked and canned, and then they are ready to eat... forever. No freezer burn. No cooking, no freezing, no thawing, no re-washing plastic freezer bags.

Total yearly canned meat & beans savings: $109.44


Investing in a Pressure Canner & ROI
I bought our pressure canner from Walmart with some leftover wedding money. It is a Presto 16-quart aluminum pressure canner, and still costs only $69.97. As you can see, it will pay itself off in less than a year.

ROI after 1 year of use: $109.44 savings - $69.97 investment = $39.47 NET savings = 56% ROI
After 2 years: $148.91 net savings = 213% ROI
After 3 years: $258.35 = 369% ROI
After 4 years: $367.79 = 525% ROI
After 5 years: $477.23 = 682% ROI

It's hard to determine the exact ROI on this one, because it really depends how much and how long you use the pressure canner. A large family who cans for many years will save THOUSANDS of dollars by purchasing a pressure canner. But even a small family like ours will save enough in just one year to justify the cost. In my opinion, everyone should buy and learn how to use a pressure canner.

Last Words
What are you missing out on by not having or using a pressure canner? It may cause you to turn down fantastic deals because you don't have enough freezer space or can't eat a large amount of ___ before it goes bad. Pressure canning makes it possible to buy in bulk, even for a small family like ours. Instead of paying $2.00/lb. for chicken, I can pay $0.50/lb at Gordons. Health nuts can grow their own chickens. My point though, is that learning how to use a pressure canner will open up SO many more areas of saving. You will save more money on food by buying in bulk, you'll save $$ by not using disposable 2- or 3- use freezer bags, you'll save energy by not using the freezer, and you'll spend less time cooking and cleaning up after cooking. It's a win, win, win. 

We have one refrigerator/freezer combo, and one upright chest freezer to store all of the fruits & veggies that I grow, plus meats and farmers market ingredients. I use pressure canning as my "overflow" method for dealing with meats that don't fit in the freezer. Our freezer space is precious, and I really don't have the time or space to be freezing beans, broth, leftovers, crock-pot meals etc., so pressure canning is the perfect solution for those things. Unlike plastic baggies, canning jars are easy to wash and can be used for years- possibly a lifetime, if you're careful.

One of my goals in life is to save time, space, money and energy. Pressure canning does all of these things, and in some cases, produces a superior product to that which is frozen (tough meats come out of the jar tender, with no gristle). Sometimes I wonder if people would even bother freezing meat and beans if they knew how easy and cheap it was to can them.

-Bethany

*I'm not a fan of pressure canning veggies, because the high temperatures produced during pressure canning can destroy vitamins. Minerals, on the other hand, will stay intact regardless of heat (to the best of my knowledge). Therefore, I freeze any produce with high vitamin content, and can things like meat & beans. 
0 Comments

2-for-1 Meals

3/18/2016

1 Comment

 
Picture
Some chickens I processed. This is enough work already.
When it comes to work, I'm a hard worker. But only when I have to be.
​
In my Pizza Night meal planning book, there are 14 lunch/dinner meals that take 30 minutes or less to prepare. This is a decent time frame, but it doesn't account for cleanup time. Instead of taking 30 minutes of preparation and 30 minutes of cleanup (I don't have a dishwasher), using the following method I can cut preparation down to 30-45 minutes and cleanup down to 30 minutes for both meals. Instead of two hours of meal-related work per day, I can cut it down to an hour or so. That is like eliminating HALF of the work!

The Problem With Make-ahead Freezer Meals
Before I talk about 2-for-1 meals, let me tell you why I don't do crock pot freezer meals, or "dump dinners". I adore this idea. Healthy, yummy food and hardly any work! However, there are a few things with our lifestyle that make freezer meals not practical.

1. Not enough freezer space. Our freezer is already full of meat and homegrown vegetables during the winter, and during the summer I use it for farmers market ingredients.

2. A waste of plastic bags. I don't like the thought of going through so many plastic bags to save time, nor do I like the idea of washing those plastic bags. After a couple uses, the bags get holes punched in them anyway.

3. Not efficient for canned or frozen food. At this point, almost all of our produce and meat comes from the freezer or pantry. It wouldn't make sense for me to open three bags of frozen veg and four cans of meat/sauce, mix it all together, freeze it, and then have to thaw it again.

In fact, I tried making my own frozen stir-fry mix, but with the different seasonality of vegetables it wasn't worth my time to freeze the snap peas and take them out several months later to mix with other vegetables when they were ripe. Now I just keep large bags or each vegetable (sliced peppers, cauliflower chunks, peas, broccoli, etc.) and throw in a handful of each for a stir fry. It's less wasteful AND allows me to make a different stir fry mix every time. 

The Solution: 2-for-1 Meals
One solution I've come up with is a 2-for-1 meal. In short, I do a whole day's cooking at one time. Typically this is around 11:00 am. I'll do a lunch that is either on the stove top or baked in the oven, and at the same time I'll put something in the crock pot for dinner, or if it is an oven-baked dish I'll prepare it and put it in the fridge until an hour or so before dinner. 

For example, if I'm having ham/potato soup for lunch and roast/vegetables for dinner, I can peel and cut all of the potatoes and onions at one time. This means I'm only washing the cutting board and knife once, only wiping the counter once, and only dealing with vegetable scraps once. It also means I have a bigger chunk of time in the afternoon to do things I enjoy.

With some extra planning, you can do a 3-for-1 meal by cooking enough meat/veg in the crock pot for the next day's lunch. For example, using leftover chicken meat for sandwiches.

I don't do this every day, but it's definitely a useful tool, especially for gardeners/homesteaders. We do enough work with freezing and canning already!

Adapting Meal Plans
In order to implement the 2-for-1 idea, I've started to rearrange and adapt some of the Pizza Night meals. I'm also looking at a few seasonal meals/dishes to try, for when the garden produce starts coming in. After two years we're getting tired of some of the old standbys, and we now have different ingredients (like lamb roast!) to incorporate into the menu. Plus, with all of this new-found freedom from cooking, what better to do with my free time than cook new meals?!

Have you done batch cooking before? What are some of your tips or maybe things that didn't work for you?

1 Comment

Corn Meal Mush / Polenta

3/3/2016

1 Comment

 
Picture
Corn meal mush is exactly like cream of wheat, except it's corn instead of wheat. Which is great for all of you gluten-free people! I make this as a hot cereal because it is so much cheaper ($0.15 for a bowl). The recipe below makes two 1-cup servings.

Corn Meal Mush

Ingredients:
1 cup corn meal
1 cup water
1/4 tsp. salt
Milk
Honey, maple syrup or sugar to taste

Instructions:
Put all ingredients in a small sauce pan and stir, bringing to a boil. After the cereal cooks for 30 seconds to a minute, it will be done. When it is hard to stir and there are blobs of cereal flying up in your face, it is probably done. Serve with a little milk and sweetener of your choice.

Sometimes corn meal mush is also called "polenta".

You can also let the corn meal mush solidify in the refrigerator, slice it up, and fry it in bacon grease or other animal fat to be used as a side dish.
1 Comment

Split Pea Soup

3/3/2016

0 Comments

 
Picture
Split pea soup is one of my go-to meals. It barely slides into my "under $1" list; the split peas alone cost $0.44, the onion $0.33. If spices cost $0.03, you have $0.20 left to spend on cheese ($0.04/tsp.), crackers ($0.01 each) and meat. You can read my note about meat below. Hardcore frugalistas can grow their own onions ($0.03 each) or use 1 TB onion powder*** (about the same price), which would easily bring the meal to under $1.00. 

Split Pea Soup

Ingredients:
1 small onion, diced
6 c. broth or water*
1 1/2 cups dried peas
1 c. cooked ham or bacon**
3 bay leaves
1 1/2 tsp. salt
1 tsp. italian seasoning
1/4 tsp. pepper

Instructions:
Put onions, water, dried peas and bay leaves in the pot to boil together until the peas are done; about 30-45 minutes. Make sure you use a big enough pot and/or keep the lid off; otherwise it will boil over. Turn down the heat when the peas are soft and add spices and meat. Serve with cheese and saltine crackers.

*I wouldn't recommend cooking the peas in broth unless you are doing it purely for flavor, because boiling breaks down the gelatin. However, sometimes I will cook the peas in 4-5 cups of water and add additional broth when they are almost done cooking.

**You can omit or reduce the meat if you don't have it on hand. Often times I only put a handful of bacon bits or ham shreds in, not the full amount. The peas have lots of protein, so meat is mostly for flavor. When I don't have any meat, I try to add a spoonful of bacon grease for flavor.

***Using onion powder lessens the nutritional value of the meal (essentially no veggies...). But I've done it in a pinch. If you are like me and haven't reached the point of growing your own onions yet, you can always use onion powder and then serve free garden veggies that you DO grow as a side dish.
0 Comments

Chili Recipe: Under $1

3/3/2016

0 Comments

 
Picture
Chili is another meal that is extremely cheap to make if you have a garden and can find free or inexpensive meat. For this recipe I use home canned dry beans ($0.15 per pint), venison chunk meat ($0.00-$0.30/half pound), homemade taco seasoning ($0.10?), home canned tomato juice and/or hominy or sweet corn from the garden. The green onions are grown on my windowsill, or I use dried chives from the garden. Store bought crackers, sour cream and cheese for garnish are the majority cost for this meal.

Chili

Ingredients:
1 pint canned chunk meat (10 cents)
1 pint home-canned dry beans (10 cents)
2-3 TB homemade taco seasoning
Handful of chopped green onions or chives (use 1-2 TB if dried)
Salt to taste
1-2 cups hominy or frozen sweet corn
1 quart tomato juice
Saltines, sour cream and cheese for garnish

Instructions:
Dump meat into cooking pot. Use a fork to pull apart any large chunks or pieces that are sticking together. Add canned beans and corn/hominy. Add tomato juice and turn heat to High. Lastly, add taco seasoning, green onions and salt to taste. Cook until everything is hot. Serve with saltines, sour cream and shredded cheese.

0 Comments

How to Make Taco Seasoning

3/3/2016

0 Comments

 
Picture
Every couple months I mix up a big batch of this stuff. I use it in most of my Mexican dishes.

Taco Seasoning

Ingredients:
2 TB cornstarch
2 TB onion powder
2 TB garlic powder
4 TB chili powder
2 tsp. red cayenne pepper
2 TB cumin
1 TB oregano
2 TB salt
2 TB paprika 

Instructions: Mix everything together in a bowl, and store in an airtight container.
0 Comments

How to Make Truffles

2/11/2016

0 Comments

 
Picture
Hello, peeps! In honor of Valentine's Day, I thought I'd post a recipe on how to make chocolate truffles. These are actually pretty simple to make, and fun to try different flavor combinations with. There are three different recipes I use depending on whether I have milk chocolate, dark chocolate or white chocolate chips. These recipes are adopted and simplified from the excellent book, Making Artisan Chocolates, by Andrew Garrison Shotts. The ingredients differ, but the general instructions to each recipe remain the same.

How to make truffles

Dark Chocolate Truffles
Ingredients:
4.25 oz. dark or semi-sweet chocolate chips
1/2 cup heavy cream
2 tsp. light corn syrup
​1 TB salted butter
Optional flavoring (pepper, coriander, curry, mint)
Milk Chocolate Truffles
​Ingredients:
6 oz. milk chocolate chips
1/3 cup heavy cream
1 1/2 TB salted butter
​Optional flavoring (cinnamon, cloves, ginger, nutmeg, mint)
White Chocolate Truffles
​Ingredients:
6.5 oz white chocolate chips
1/3 cup minus 1 tsp heavy cream
1 TB salted butter
​Optional flavoring (cardamom, cinnamon, nutmeg, white pepper)
Instructions:
Cut butter up into 1/4"-1/2" cubes and set aside to let soften a bit. Measure chips and pour into a bowl. A cereal bowl is usually big enough.
Picture
Heat the cream and any flavoring ingredients (I've used tea bags, mint leaves, even hibiscus flowers) to a rolling boil. I used a few saffron threads in the picture below. It doesn't really matter how much flavoring you put in if you are going to remove it from the cream after boiling anyway, though more leaves will create a stronger flavor. If you are going to add pepper or some other powdered spice, however, I would say less is more. You can always add more powdered spice to the finished ganache if it isn't strong enough.
Picture
Once the cream has reached a rolling boil, remove flavoring ingredients and immediately pour the cream over the chocolate chips. Let it sit for two minutes, stirring occasionally. The hardest part about making truffles is getting all of the chips to melt before the cream cools down.
Picture
When the chips and cream have cooled to 95 degrees F, add the butter. If the mixture has cooled below 95 degrees by the time two minutes is up, gently reheat it on the stove back up to 95 degrees. Then add the butter.
Picture
Quickly stir the butter in with a fork until it is thoroughly melted and mixed. This is called an "emulsion". If the butter isn't thoroughly mixed in, it will separate and the ganache will break. When the butter is mixed in, the ganache should be silky and smooth. 
Picture
Picture
After the butter is mixed in, you will have to let the ganache sit until it is hard enough to roll into a ball. Books and recipes that I've tried suggest that this takes a couple hours, but for me it usually takes a whole day. I let the ganache sit covered overnight, and then the next afternoon I can roll it into balls and dip into cocoa powder, melted chocolate, crushed nuts or other toppings. For the pictures I used peanut butter powder because the color matched, but I don't recommend a white chocolate/peanut butter flavor combination. :p
Picture
The total cost for a batch of truffles is about $2.75. If you make 20 truffles, it leaves the cost per truffle at about $0.15. This is pretty reasonable compared to store bought truffles. More than that though, I think truffle-making is a fun and frugal way to celebrate Valentine's Day or any other special day. It is so much fun to create personalized flavors. Truffle ganache can also be used in filled chocolates or for cake decorating. It's a great recipe to have on hand and makes a good gift for someone special in your life. :)

Happy truffle making!
​-Bethany
0 Comments

How to Make Egg Noodles

1/6/2016

0 Comments

 
Picture
Hi everyone! Today I'm going to introduce you to making noodles. Far from being an essential skill, I would say that it is more something fun you can do with a group of people. Noodle making takes a lot of time, and if you are buying eggs to make noodles, it's not necessarily a frugal activity.

I see noodle making kind of like cheese making. If you get a lot of free milk, cheese is a great way to preserve it. Similarily, making noodles is a good way to preserve a bunch of eggs. Last week I happened to have a bunch of eggs AND a sister to help me! We enjoyed accomplishing something together and getting a bunch of noodles at the end.

The other time noodle making makes sense financially is when you are making specialty noodles. Like specialty cheeses, specialty or gourmet noodles are worth making yourself. I've noticed that lasagna noodles tend to cost more than other pasta, so last week we decided to try making some lasagna noodles. It worked! Our noodles didn't have fancy frilled edges, but I always thought the frills were annoying to work around anyway.
Picture
 AEgg Noodles

Ingredients: 
Egg yolks
Flour (I just use a 25lb. bag of white flour from Walmart. It is the easiest to work with.)
Salt

Instructions:
Separate egg yolks and whites. Use as many eggs as you have. The whites can be saved and used to make angel food cake, merangue, or more healthier foods like omlets or gluten-free/paleo recipes that call for egg whites only. Add 1 pinch of salt per two egg yolks. I had several dozen egg yolks, so I just put a teaspoon of salt in.

Picture
Stir flour into egg yolks. I just dump and stir, dump and stir. Soon the dough will be too thick to stir by hand, but too sticky to use for noodles. I refrigerated my sticky dough overnight to let the gluten develop.
Picture
Picture
The next step is the time-consuming part. Put a handful of flour on your working surface. Grab another handful of sticky dough and work the flour into it gradually by dipping in flour, folding, dipping in flour again and folding again. The purpose of this is to get the dough stiff enough to run through the noodle maker without having it stick all over. But you don't want it too stiff, otherwise you won't be able to get the sheet of dough thin enough to run through the machine. It's a fine line between too sticky and too stiff.
Picture
Working in the flour.
When you're done working flour into the lump, roll it into a log shape and flatten with your hands. This will make a "sheet" of dough to run through the rolling machine. Try to get it as flat as possible.
Picture
Picture
First time through the roller.
Using the roller setting on your noodle maker, run your sheet of dough through each setting, widest to narrowest, until you have a thin sheet. As the roller thins each sheet, they will become longer and have to be cut in half.

In between settings, you should flour the noodle sheet on each side. This prevents it from sticking to the roller. When we made noodles last week, my sister ran the roller on one side of the counter and I cut and floured noodle sheets on the other side of the counter. Instead of doing one sheet at a time from start to finish, we did 10 sheets at a time. Setting #1 for 10 sheets, cut and flour, #2 for the sheets, cut and flour, #3, etc.
Picture
After the noodle sheets are as thin as possible (without tearing), it's time to run them through the cutter setting on your noodle maker. My noodle maker is a vintage hand-crank model made in Italy. It cuts angel hair-sized noodles and fettuccine noodles. You can also buy noodle attachments for Kitchen Aid mixers, but I chose a hand-crank machine because it allows you to run the roller backward if your dough starts to stick, AND you can better control the speed. I'm very happy with mine so far, though if I had to buy another one I would choose a wider one to do more noodles faster.
Picture
Picture
After the noodles have been cut, you can air dry them on noodle racks (a lot of work), or you can just dry them in well-distributed piles on a large flat surface. I cover our kitchen table and coffee table with old sheets to keep things clean. If the noodles are thin enough, I usually have my tables back within a day or so. :) I store the dried noodles in plastic twist-tie bags in the pantry.

Have you ever made noodles? Would you do it again?
0 Comments
<<Previous
    Picture

    Bethany

    Housewife, happy wife, and mama to one. :)

    Picture

    Picture
    The Housewife's Guide to Frugal Food
    How to Eat for $10.00
    ​per Week

    Picture
    The Housewife's Guide to Menu Planning
    A Weekly Menu to Save
    Time & Money
    Picture
    The Housewife's Guide to
    Frugal Fruits and Vegetables

    No Garden? No Problem!

    Watch Meals From the Bunker:

    Picture

    Check out my Youtube Channel!

    RSS Feed


    Picture
    Baby Girl's Birth Story
    Picture
    8 Cheap Ways to Eat Healthy
    Picture

    Categories

    All
    Animals
    Book Reviews
    Books
    Christmas
    Cleaning
    Clothing
    Cooking
    Couponing
    Education
    Ego
    Electricity
    Farmers Market
    Finance
    Foraging
    Frugal
    Frugal Accomplishments
    Frugality
    Garage Sales
    Gardening
    Gifts
    Grocery Budget
    Grocery Shopping
    Herbs
    History
    Hobby Farm
    Home Based Business
    Home-based Business
    Home Decorating
    Housekeeping
    Industry
    Languages
    Laundry
    Marriage
    Meal Planning
    Medicine
    Minimalist
    Network Marketing
    Organization
    Plants
    Product Reviews
    Quotes
    Recipes
    ROI
    Rv
    Sewing
    Simplicity
    Spanish
    Spending Report
    Travel

    Archives

    May 2021
    April 2021
    March 2021
    February 2021
    January 2021
    August 2020
    May 2020
    April 2020
    March 2020
    February 2020
    January 2020
    December 2019
    November 2019
    October 2019
    September 2019
    August 2019
    July 2019
    June 2019
    May 2019
    April 2019
    March 2019
    February 2019
    January 2019
    December 2018
    November 2018
    October 2018
    September 2018
    August 2018
    July 2018
    June 2018
    May 2018
    April 2018
    March 2018
    February 2018
    January 2018
    December 2017
    November 2017
    October 2017
    September 2017
    August 2017
    July 2017
    June 2017
    May 2017
    April 2017
    March 2017
    February 2017
    January 2017
    December 2016
    November 2016
    October 2016
    September 2016
    August 2016
    July 2016
    June 2016
    May 2016
    April 2016
    March 2016
    February 2016
    January 2016
    December 2015
    November 2015
    October 2015
    September 2015
    August 2015
    July 2015
    June 2015
    May 2015
    April 2015
    March 2015
    February 2015
    January 2015
    December 2014
    November 2014
    October 2014
    September 2014

    Full Disclosure & Disclaimer

    Picture
    Picture
    I get cash back for many online purchases including wedding gifts and Ebay stuff!

Powered by Create your own unique website with customizable templates.
Photos used under Creative Commons from dasWebweib, amanessinger, thewritingreader, diakosmein