the Renaissance Housewife
  • Home
  • Topics
    • Saving >
      • Kitchen >
        • Food >
          • Recipes
      • Bath & Laundry
      • Medicine Cabinet
      • Office
      • Electricity
      • Gardening
      • Foraging
      • Animals
      • Weekly F. A.'s
      • Printables & Downloads
    • Earning
    • Investing
  • Books
  • About
    • RH Recommends
    • Newsletter & Updates
    • Travel
    • Beta Readers
    • Legal Stuff

How to Make Pasties

1/1/2016

0 Comments

 
Picture
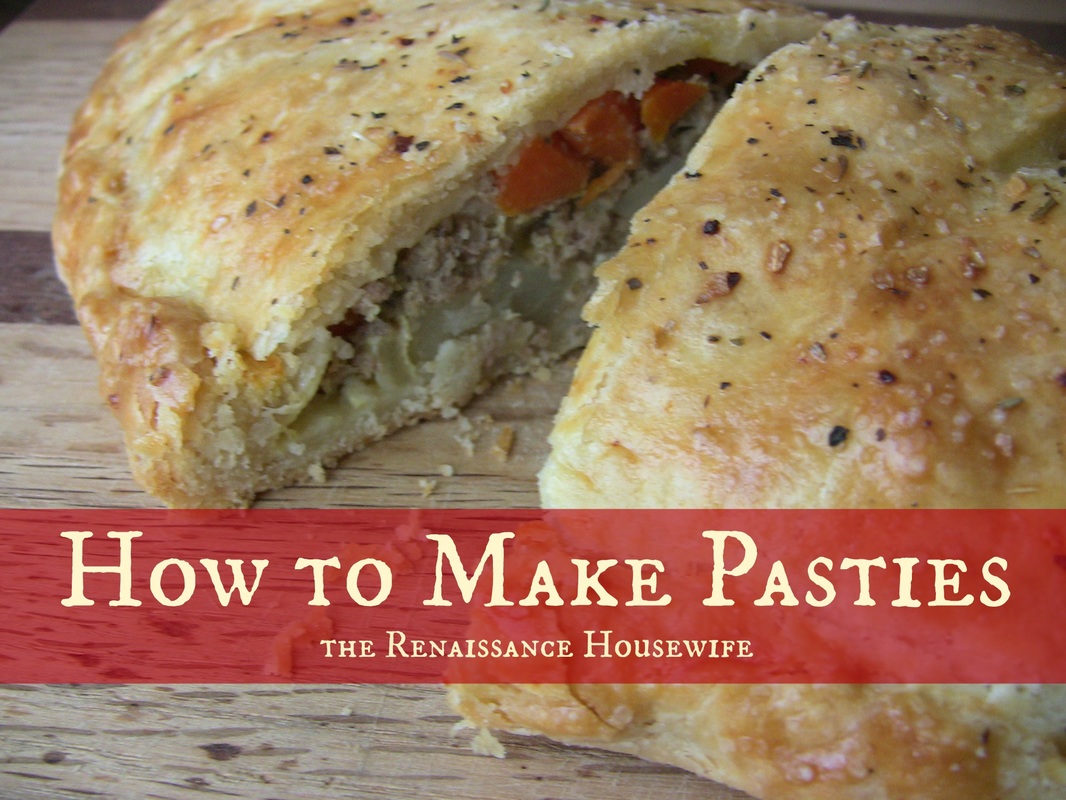
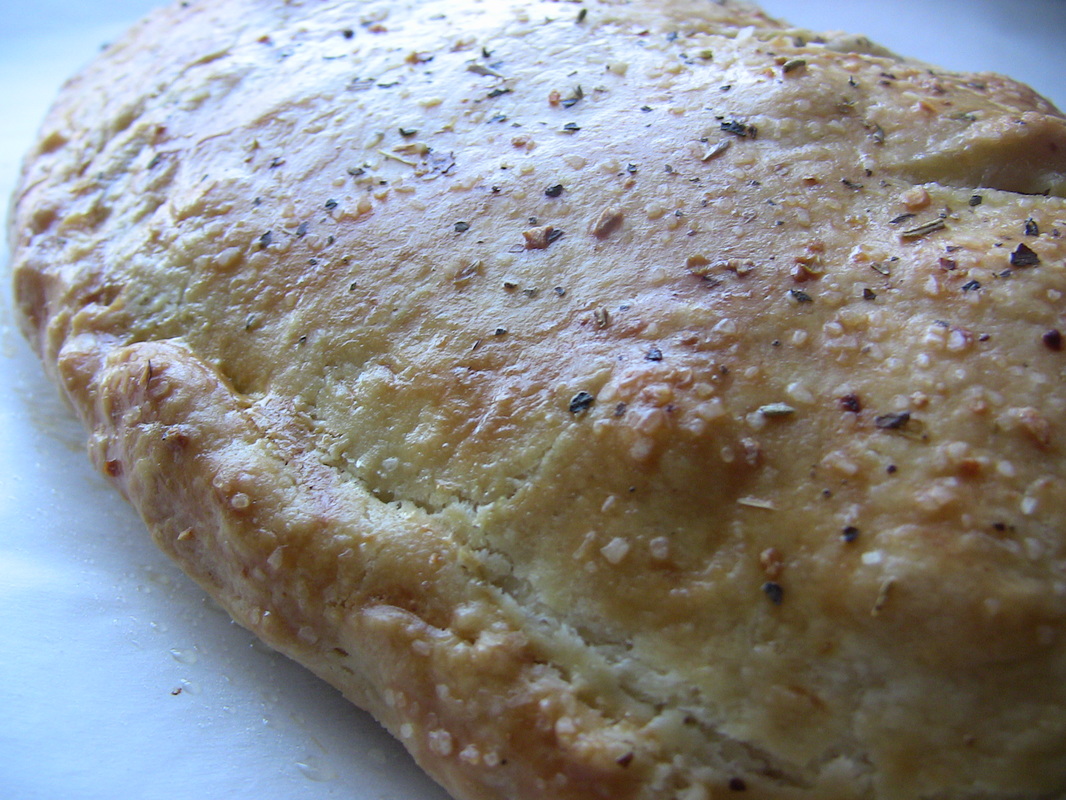
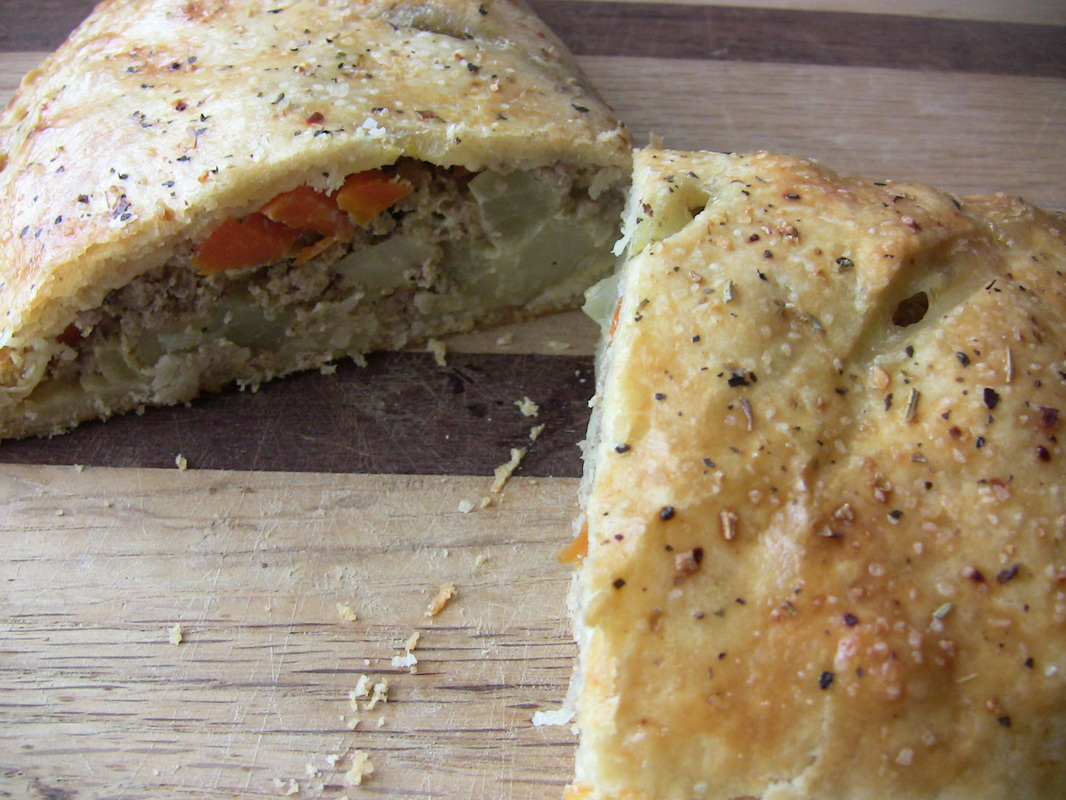
I recently rediscovered an old Michigan favorite- pasties! A pasty is just an individual meat and vegetable pie. It's perfect for lunch on-the-go, frugal and relatively simple to make with frozen pie dough.

Remember back in November when we butchered our lamb? Well, we've discovered that ground lamb does NOT replace ground beef. It tastes awful in spaghetti, chili and other recipes I normally make. However, the lamb works perfectly in these pasties. After farmers market and Thanksgiving, I had a lot of small pie dough balls in the freezer, too well-worked for pies but still good to use for these pasties, plus the recipe uses several eggs (which we have in abundance now, thanks to tripling the size of our hobby farm).

Pasty Recipe


Ingredients:
1 carrot, diced
1 large potato, in 1/2" cubes 
1 egg
3 oz. ground lamb
1/2 tsp. salt
Dash of pepper
*****
1 lump (size of a small lime) of frozen pie dough, thawed
1 egg + water for egg wash
Spices to sprinkle on top

These ingredients make one serving size. You can double or triple the amount of these ingredients for more or bigger pasties.

Instructions:
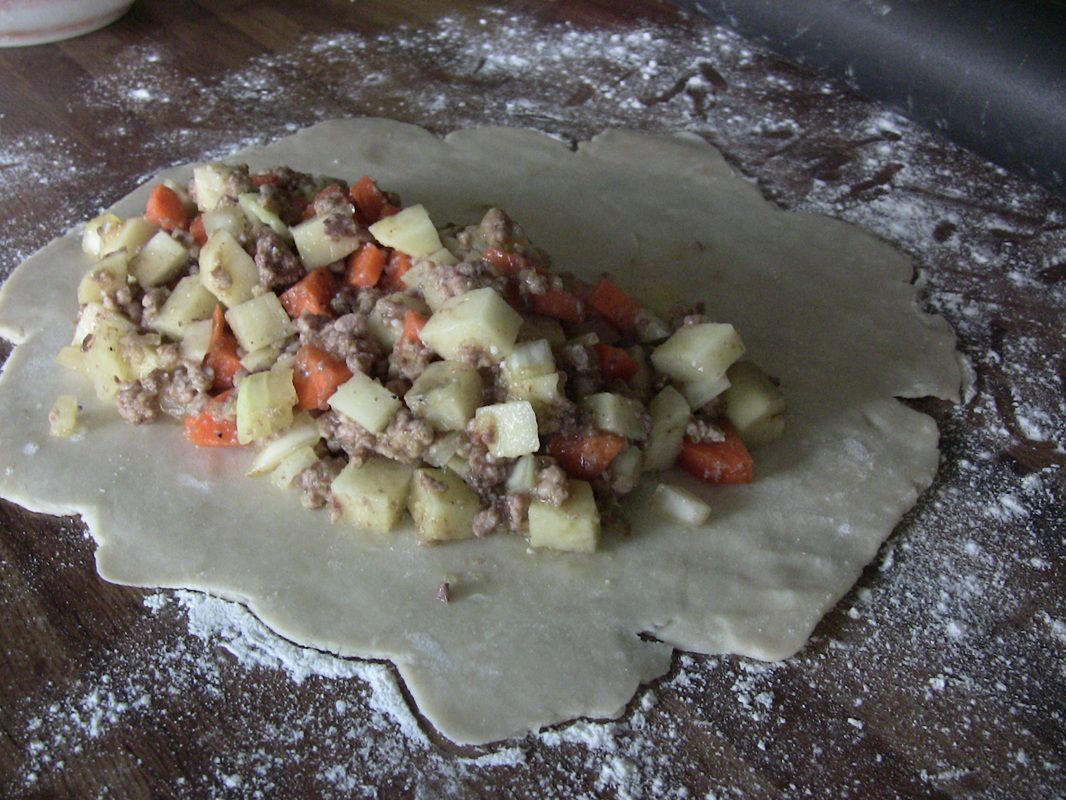
Preheat oven to 350 degrees F and line a cookie sheet with parchment paper. Mix first six ingredients together in a bowl. Roll pie dough out into a disk shape, then spoon veggie mixture onto dough circle.
Picture
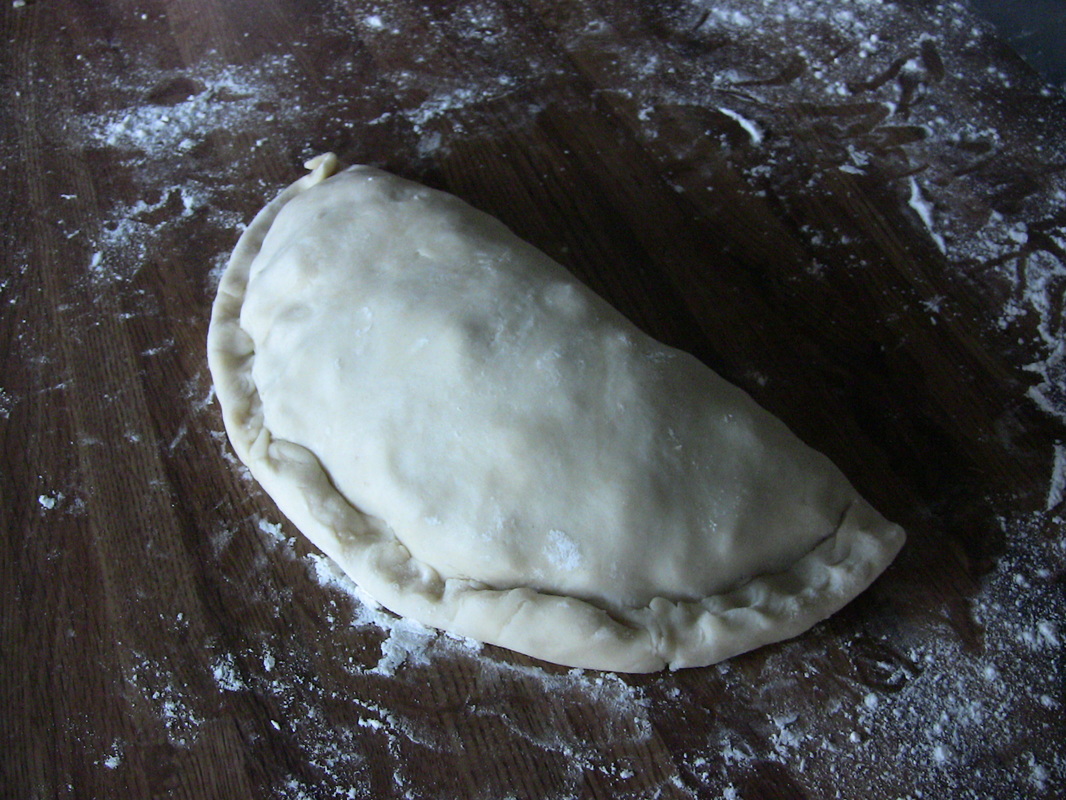
Fold the dough over in half to cover the vegetables. Press around the edges to seal. A little moisture on the inside edge helps seal the dough, but I forget to do that and it still works for me.
Picture
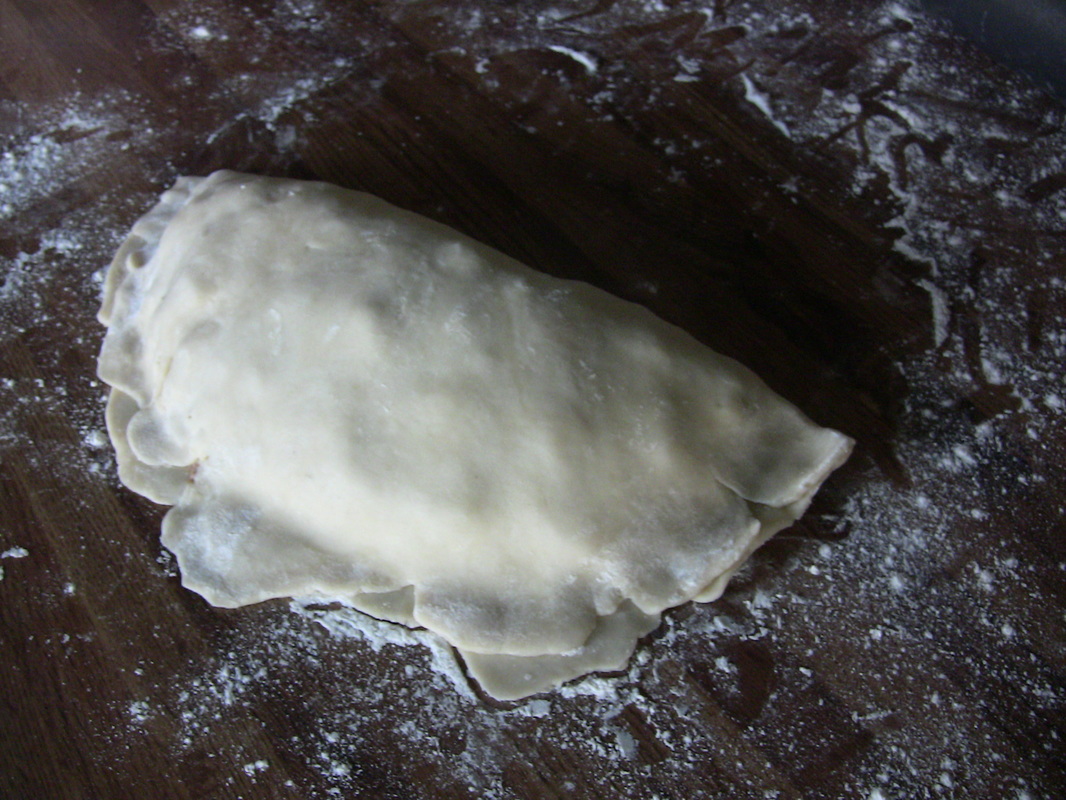
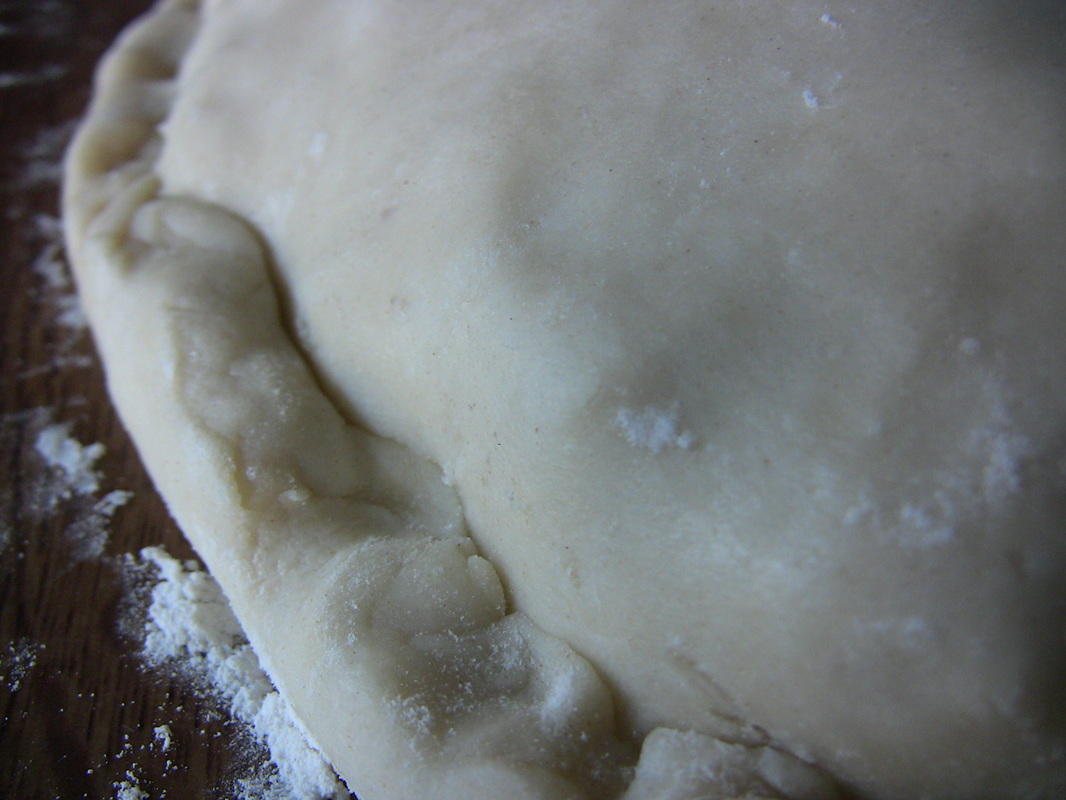
Fold over the edges. You can trim the edges if this makes it easier for you, but I normally don't. It leaves more pie crust to eat!
Picture
If you have trouble keeping the edges folded, again, dip your fingertip in water and moisten under the fold. Then press down really hard. It should stay folded.
Picture
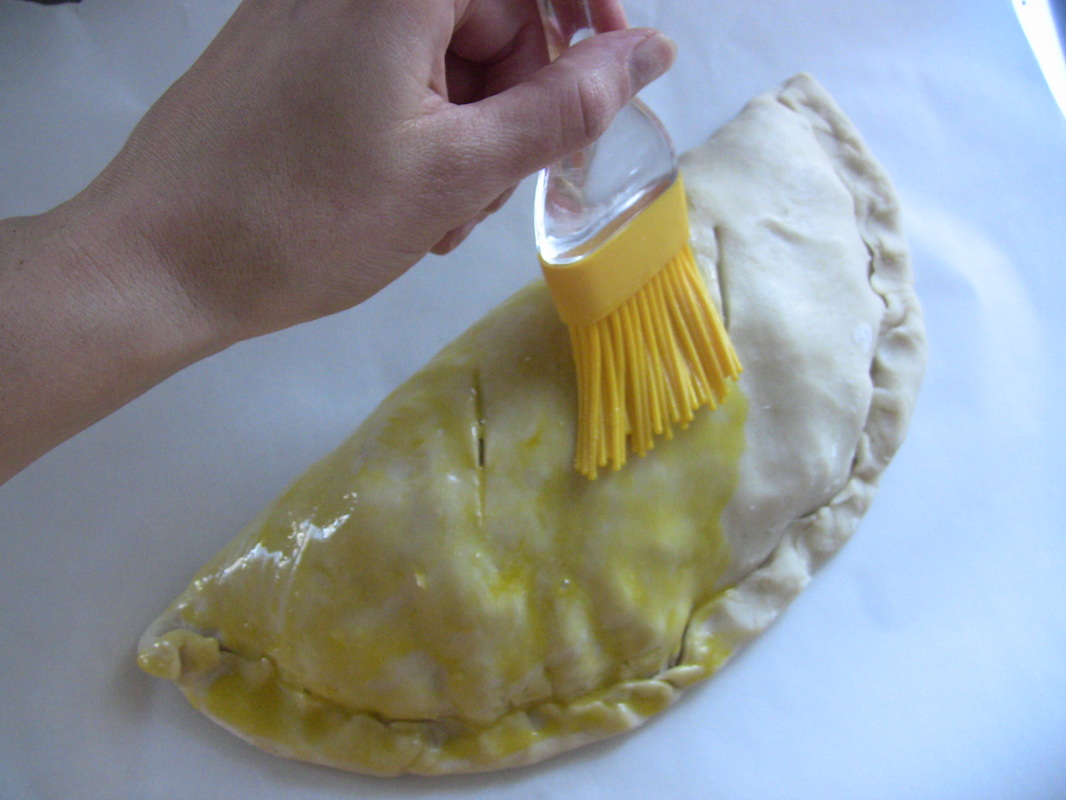
Transfer the pasty to the cookie sheet. Use a knife to make 2-3 slits in the top of the pasty for ventilation. Mix egg and some water to make an egg wash, then brush on the pie.
Picture
Before it goes in the oven, I like to sprinkle salt, italian or pizza seasoning and possibly garlic and onion powder on top of the pasty for decoration and flavor. 
Picture
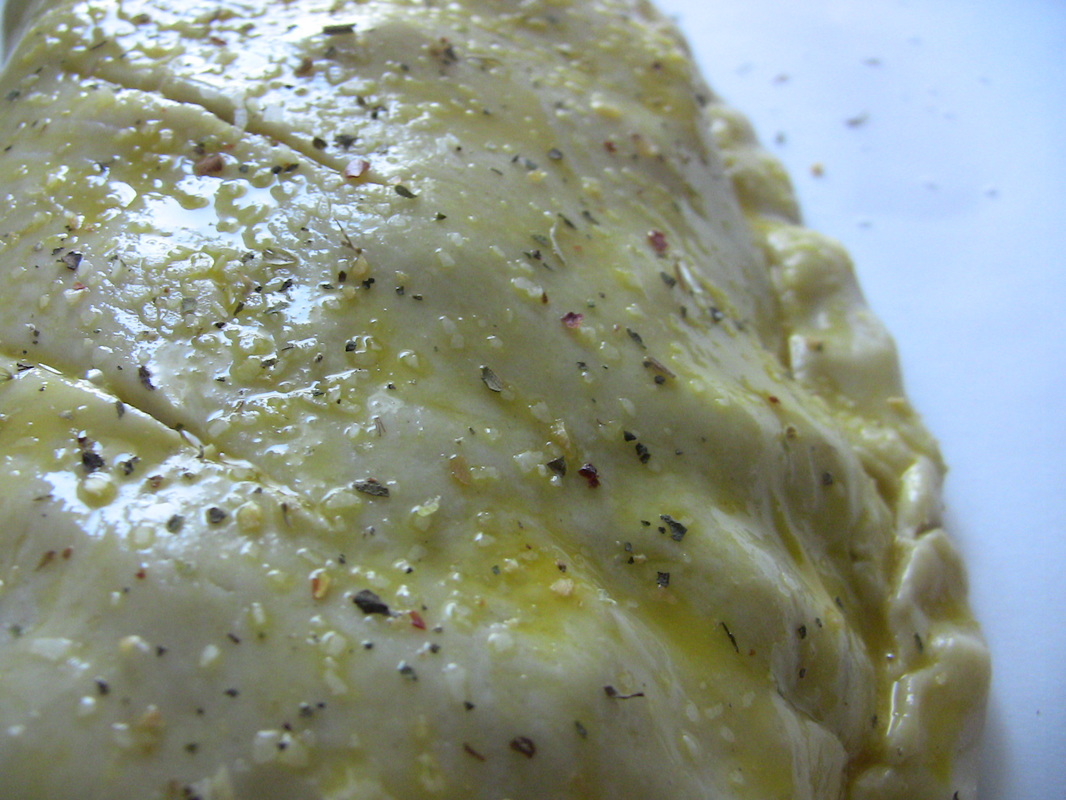
Bake for about an hour.
Picture
If you will be taking these on a trip (or sending them with your husband when goes to work on a job site!), they can be made and stored in the fridge for a couple days, or cooked, frozen and reheated for 20 minutes at 300 degrees F when ready to eat.
Picture
What I like about this recipe is that most of the ingredients can be produced at home or locally. This means they will probably be healthier and inexpensive. You can use whatever meat you have, whatever vegetables you have and whatever spices you have. I love the flexibility of this meal.

The last reason I posted this is for the lack of "portable" meals in my meal plan. Being able to pack a lunch means being able to skip eating out and thus save time and money. This is NOT something I'm good at, so as you can imagine I was excited to rediscover this convenient old favorite.
0 Comments

Canning: Frugal or Not?

9/4/2015

0 Comments

 
Picture
I love canning! It allows you to stretch out the natural season of (free!) fruits and vegetables. But in the hustle and bustle of harvest season, it is easy to just keep buying jars and lids and keep canning everything in sight. Today I thought I'd do a cost analysis on different canning methods and a few tips and tricks to keep canning truly frugal.

Is it a Good Deal to Can Food?
Before canning anything, one must ask several questions. Why do I want to keep this food for an extended period of time? Does it lose nutritional value or flavor during the process? Could I get the same item, already canned, for a better price on sale at the grocery store?

The easiest thing to do when trying to answer these questions is 1) first decided what is good and what is not good to can, and then 2) make a price list with each food or food category. When the price of tomatoes or meat or fruit drops below X dollars per pound, THEN you stock up and freeze/can/dry it. Here is my personal price list.

Highest price I will pay for most foods:
Produce: Free
Beans/Grains: $0.70/lb.
Meat: $1.00/lb.

I'm not locked in to such a price list, but it helps me determine whether I should stock up or not. The other day we found chicken thighs for $0.39 per pound. We didn't have a lot of freezer room left, but I bought two 10 lb. bags anyway. It took about an hour to skin the legs and divide the drumsticks and thighs, then I was able to can 10-15 lbs and freeze the rest in reusable plastic freezer boxes. As for produce, I have a garden and orchard on the property, so there is no reason for me to buy fruits and vegetables to put up for the winter.

Freezing vs. Canning
Frozen food deteriorates faster and costs more money the longer you keep it in the freezer. Having a freezer is like having a storage unit for food; the rent you pay ends up in your electric bill. Canned food can be stored almost anywhere, no electricity needed. 

However, freezing does preserve more of the nutritional value of fruits and vegetables. Water bath canning destroys some vitamins, and pressure canning destroys a lot more vitamins. Because of this, I choose to freeze vitamin-rich, low-acidity foods (that would require pressure canning): peppers, green beans, peas, herbs, sweet corn and some fruits. 

Neither type of canning destroys minerals, however, so I don't have an issue with canning meats. In fact, pressure canning draws minerals out of bones that are canned, so it is my favorite way to make gelatinous broth. While the texture and flavor comes out a bit different, canned meat is tender and wonderful for casseroles, tacos, soups and other one-pot meals. Things I like pressure canning: meat, beans, grains (like hominy).

Cost of Jars
So now you've got a garden full of nearly-free produce. Still, consider the cost of each jar:
Brand New Jar (with ring and lid): $0.71 - $0.11 lid = $0.60 per glass jar

It is entirely possible to get jars for free or cheaper than $0.60, but I frequently see people trying to sell used jars at garage sales for $1.00 each. In addition to being more expensive, sometimes used jars have chips or cracks that can prevent a good seal. Because of this, it is prudent to watch the price closely if you plan on paying for used jars.

Wide Mouth vs. Small Mouth
Honestly I prefer canning with wide mouth jars- they're easier to clean and easier to get the food in and out of. But both wide mouth jars and wide mouth lids are more expensive. Wide mouth jars cost $0.91 each as opposed to $0.71 per small mouth jar. Wide mouth lids cost twice as much as small mouth lids- something you should keep in mind when thinking long-term. Lids can only be used once, so you will have to buy new ones every year. Small mouth lids cost $0.11 each; wide mouth lids are $0.21 each. If you end up canning 100 jars of food every season, you could save $10 per year by simply using small mouth jars instead of wide mouth. They are more difficult to clean, but a jar brush will help a lot with that. I only use wide mouth jars for meat, which can be hard to get in and out of a small mouth jar.

Quarts, Pints, or Half-Pints?
Even though there are only two of us, I still prefer to use quart jars to do some of my canning, even with things like salsa. If I'm canning a gallon of applesauce, I can use 4 quarts, 8 pints, or 16 half-pints. The cost of lids would then be $0.44, $0.88, or $1.76 respectively. If I use 16 jars instead of four, not only am I buying more lids but also washing twice as many jars. To me it makes more sense to open a quart jar and then plan several meals with that ingredient, as opposed to using two jars for two meals.

However, if I don't follow my well-planned menu, I could end up with a bunch of half-jars of food rotting in the refrigerator. For this reason, I still can with pints even though it technically costs a little more.

Water Bath or Pressure Canner?
Water bath canning is definitely easier for beginners. It also processes the food at a lower temperature, thus preserving more vitamins. Unfortunately with water bath canning, you can only preserve acidic fruits/vegetables like strawberries, pineapple, peaches, pears and tomatoes. You cannot can most vegetables, meat, beans or starches with a water bath canner.

Pressure canning opens up a whole new world of food preservation for the homemaker. After I got married I bought a big scary pressure canner. My first few attempts were less than successful, but after a while I got the hang of it. I use my pressure canner mostly for beans, grains (like hominy) and meat. Pressure canning cooks the meat and draws out the gelatin. All of the fat rises to the top of the jar, so I don't have to pick it off the meat. The meat and broth are all ready to go if I want to make soup. 

Gas or Electric?
I won't go into specifics about gas vs. electric (because it's not like we're going to switch out stovetops for canning season). But it's important to remember energy costs when canning.

Is the Food Even Worth Canning??
Last year I canned probably seven quarts of summer squash. I also froze several gallon bags of summer squash, and put summer squash in most of my frozen stir fry mixes. Needless to say, I never actually used the canned summer squash. In addition to cooking out the vitamins, pressure canning had cooked the squash (overripe by the time I picked it) to an icky, limp texture. It didn't even make good squash soup. Instead of spending $2.00 on lids and several hours preserving the squash, I should have just thrown it away.

Likewise, I don't spend any time or money canning jam. Apart from the tooth-rotting factor, it simply doesn't ever get used at our house. I have several jars of jams and jellies from when and before we got married that sit unused in the pantry, because we rarely have toast in our meal plan and that is the only thing you use jam for. I also made six or seven pints of relish last year; none of which have been opened. We are still working on a gifted jar of relish from one of Hubs' customers. Guess what you use relish for? Hamburgers and hot dogs, which we hardly ever eat. And tartar sauce, but we never have fish. So make sure you will actually USE and enjoy what you are going to can.

The Bottom Line
If you figure in the cost of a lid ($0.11) and the cost of a new jar and ring divided by ten years of use ($0.06) plus a few cents thrown in for electricity or propane, each jar of canned food costs $0.20. Hubs and I go through 3-5 jars of canned food per week, which averages out to $41.60 in yearly canning costs ($62.40 if using wide mouth jars). And that's just meat, beans and salsa for two people. Hard-core canners and those with larger families would probably spend at least $100-$200. So as you can see, "free" garden produce isn't really free after canning, and if you are buying something on sale, you need to factor in the cost of preservation for what you can't eat right away. If you are able to buy a can of beans for $0.10, you are probably better off buying it than trying to buy dried beans and can them at home. 

Happy frugal canning!
-Bethany
0 Comments

Making Apple Chips

8/21/2015

1 Comment

 
Picture
Last time we talked about making applesauce. Another thing I enjoy making (and eating!) is apple chips. Apple chips (aka dried apples) are great for taking on trips because they require no special packaging (canning/freezing) and you can eat them with your fingers. Unlike trail mix, apple chips have no added sugar/ingredients and are practically free. Plus they are so, so yummy.

Apple Chips

Ingredients:
Apples

Instructions: 
1. Cut the apples into quarters and remove any rotten, bruised or wormy parts.
Picture
2. Using a mandolin slicer*, cut the quarters into slices.
Picture
Picture
3. Set the slices on a dehydrator tray and dehydrate for 12-24 hours. Store in an airtight container.

*I use a mandolin slicer because it makes each slice the same size. This means that all of your apple chips are done drying at the same time. When I lived at home I just used a knife to cut up the chips, but some were thicker than others so I ended up running the dehydrator longer than necessary. You could use any kind of slicer or even a knife for this job.

As with my applesauce, I don't bother trying to keep the apple slices white or remove the skins. Skinning and slicing would be easy if you had a peeler/slicer/corer, but then it would be hard to cut out wormy parts. For my apples, a mandolin slicer works the best.

Do you like apple chips? Have you ever made them before? Leave a comment!

-Bethany
1 Comment

Easy Applesauce

8/19/2015

0 Comments

 
Picture
Hey everyone! I've spent the last couple weeks up to my ears in apples, so I thought I'd share some of my favorite uses for apples this week. Today I'll be giving an easy way to make applesauce.

I normally don't buy fruit at the store, because we have so much growing on our property already. My apples, however, aren't sprayed at all. This means that I have to go through the apples and cut out rotten, bruised or wormy parts. I find that this is easiest to do by cutting each apple into quarters and then cutting out the seeds while I'm at it.

Most applesauce recipes require the use of a food mill, where you press the apples through a sieve and save the mashed up fruit (but discard the core, stem and seeds). When I lived at home, we would bake whole or halved apples in the oven for a couple hours, then run them through a Kitchen Aid food mill attachment. The food mill separated seeds, peels, and other parts from the sauce. It was fun to collect the applesauce and watch the "poop" (skins, seeds, cores) be pushed out the end, but it was a bit time-consuming to keep pushing apples through.

My method uses a crockpot and Vitamix blender to speed things up (and keep the house cool!). I don't bother peeling the apples because the skin gives the applesauce a nice pink color and adds nutrition. If you use a blender, it will chop up the skin so fine that you won't even notice it. I also don't bother using lemon juice or water to keep the apples from turning brown, because it will be pink anyway from the skins.

Easy Homemade Applesauce

Ingredients:
Apples
Cinnamon, honey or brown sugar (optional)

Directions:
1. Cut the apples into quarters, removing the seeds and any rotten, bruised or wormy parts.
2. Put the apple quarters in a crock pot on high for a few hours or on low overnight.
3. When the apples are cooked, put them into a blender 4 cups at a time, and blend until you get the consistency you want. If you want to, add optional ingredients at this time.
Picture
Apples ready to be cooked.
Picture
Cooked apples.
Picture
In the blender.
4. Pour applesauce into clean sterilized jars, leaving 1/2" head space. Put on sterilized lids and rings.
5. Process in a water bath canner (20 minutes for pints, 25 minutes for quarts).  

And that's all there is to it! For the most economical canning, use small mouth quart-size jars. Because the apples are free, I end up paying $0.15-$0.20 per quart of applesauce. Not bad, if you ask me. Adding honey or cinnamon will cost a few more pennies per quart, but it tastes SO good- almost like dessert.

What is your favorite thing to do with apples? What is your favorite way to make applesauce? Leave a comment below!

-Bethany
0 Comments

8 Cheap Ways To Eat Healthy

7/7/2015

3 Comments

 
Picture
In this article, I've skipped the most obvious ways to save money like buying in bulk, gardening, canning, and shopping sales. I know many people who do all of the above because they want to save money, but then go spend thousands of dollars on health foods. I'm not anti-health food, and some may read this article and think I'm a cheapskate for not investing in (spending a lot of money on) the health of my family, but that's okay with me. 

Trim & Healthy... if you buy the right stuff.

Several months ago, I finished reading "Trim Healthy Mama". This is the latest and greatest diet book written for Christian/homeschooling moms and their daughters. The diet is based on "superfoods"- er, super-expensive foods- that are full of nutrition and that help speed up metabolism. The book also focuses on stabilizing blood sugar and separating fats from carbs. 

What I liked about THM is that it eliminated junk food and most carbs, which in many cases are junk anyway. What I didn't like about THM is the regular use of artificial "foods" like fat-free cheese and whey protien powder... all stuff that you have to buy. THM also relies on the use of expensive superfoods like chia seeds and coconut oil, along with expensive substitute "flours" and "milks". Kudos to the authors for including a section in the book on how to cut costs and still stay on the plan, but is this even possible with so many expensive ingredients?

With any diet plan, there are methods and principles. My theory is to follow the principles, but fit the methods to your own situation. This takes some creative thinking at times. It also takes some cooking skills and knowledge. Before designing your own methods, you must realize that every diet book and plan out there is trying to make money. Most of them have specialized products that you can only buy from their website, and guess what? You will stay fat & sick unless you buy these products that are an integral part of the plan! So be wary of marketing. More than likely there are alternative ways to be paleo/gluten-free/low-fat/high-fat without buying a load of expensive health foods. I'm inspired by the diet of Native Americans, who lived entirely on what I have growing in my own figurative back yard. Deer, rabbit, maple syrup, cattails, sumac, and so much more. Certainly they managed to live and thrive without coconut oil or almond flour. Acorn flour, anyone?? Eh, there must not be any profit in acorns.

My "Plan"
I try to follow a diet with mostly homegrown/made un-processed foods. Ideally this diet has as little sugar and as many nutrients as possible. Believe it or not, a relatively Nourishing Traditions/THM/Paleo/Gluten-free/over all healthy diet can be followed on as little as $15 per person, per week, using the following guidelines. I'm not a purist and love McDonalds as much as anyone, but this is what I generally try to do for normal meal-planning and groceries.

#1: Stop Baking
I mean it. Just stop making meals that include bread. That way if you're gluten-free (BTW, how did we manage to live thousands of years on bread and now discover that 75% of the population has a "gluten sensitivity"?? Could it be the almond milk/flour companies pushing their agenda?), you don't have to buy specialty flours. This will cut out many, many carbs for most people (donuts, cake, cookies, pastries, sweet breads, white breads), if you are on the low carb diet. It will also cut out jam, peanut butter, and other fattening/expensive condiments. Baking sweet dessert-type items also uses a lot of butter, which is crazy expensive. I do buy or make tortillas for our sandwich-style meals, which can also be used for pizza. During the winter I do make pizza crust once a week, but that is about the extent of my baking.

#2: Stop Making Dessert
How are we going to survive without dessert? My husband complains about me never making dessert, but only when I mention the fact. 99% of the time he doesn't realize what he's missing because I cook good meals. Does this means that we never have dessert? By no means! Between church, potlucks, weekends away and now baking for the farmers market, we have plenty of dessert. It's just that I don't make cookies a part of my weekly meal plan. At $3-$5 per batch, that's up to $260 per year on only ONE baked good. If you're trying to follow a special diet plan, I'll guarantee that dessert is where you'll spend all the money. Honey, not to mention cane sugar, maple syrup, stevia, exylitol and other "healthy" sweeteners are very expensive, especially when you are using several cups' worth in one sitting. If you must have dessert, make it fruit-based. Actually, fruit all by itself makes a wonderful dessert, if you stop using it as a snack (see #8).

#3: Stop Using So Much Butter
Hubs and I use no more than a stick of butter per week on non-farmers market food. This is because I don't do any baking and use free animal fat (chicken, bacon grease) to fry things in. 

#4: Stop Using Nuts
And this includes peanut butter. Some groups claim that unsoaked nuts cause cavities anyway. Hubs likes almonds on his granola, but other than that I don't cook with nuts. Also not baking (see above) nearly eliminates my need for nuts. I know that trail mixes are popular snack foods, but apart from being unhealthy (M&Ms and pretzels?!) nuts and dried fruit are crazy expensive compared to more nutritious snacks like yogurt, carrot sticks, or even fruit smoothies (see below).

#5: Utilize Wild Edibles
Instead of buying kale for smoothies, walk outside and grab a handful of lambsquarter leaves or other wild green. Not only are these greens available April-October, but they are absolutely 100% free and are chock full of nutrients just like kale is. Greens, fruit, and herbs (for tea and medicinal use) can be found in abundance in the great outdoors. If you live in town, ask a friend or relative if you can "shop" on their country property. But even small yards in town will provide you with dandelions, plantain, chickweed, lambsquarter, and other nutritious "weeds". If your lawn isn't big enough for a garden, there is always room for a weed patch somewhere.

#6: Utilize Organ Meats and Chicken Feet
I know this is NOT popular, but that's why you can get organs and feet for so cheap. Nutritionally, they are a big bang for the buck. Organs can be ground up and added to sausage or other flavored meats, and feet can be prepared and made into gelatinous broth quite easy, for $0.15 per quart. Many people use the carcass for broth, but this pot-made cannot be canned like chicken-feet broth is. Find organs and feet at a butcher shop or find a chicken-butchering friend. Organs can sometimes be found at the grocery store.

#7: Drink Only Free Beverages
Most of the time this is water. It can also include milk if you have a goat or cow, herbal tea if you forage or garden, and possibly kombucha or other fermented drinks on special occasions. Kombucha costs something like $0.25 per quart to make. Only drinking free beverages completely eliminates soda, alcohol, milk, fake milk, juice and other expensive drinks. Most drinks that you pay for are horrible for teeth and waistline. Store-bought milk has had most of the beneficial enzymes cooked out of it anyway. At $3.75 per gallon, a glass of milk costs $0.47. Drinking two glasses per day, that's $171 per year... for one person. Imagine how much it would cost for a whole family! If you are going to buy milk, it is better used for making yogurt. 

#8: Only Eat Free Fruit
If you are getting free fruit, it means that you grew or foraged it yourself, or got it from a friend. This means the fruit was local, and possibly organically grown. Bonus points! Fruit is one of the more expensive parts of a diet. Most people consider fruit a "healthy" snack, but vegetables are better because they don't spike blood sugar or encourage cavities. Vegetables also contain plenty of vitamin C and other fruit-ish vitamins. Honestly, one can survive without much fruit. I use fruit for smoothies and dessert, but that is it. For our purposes, one strawberry patch can fill a year's fruit requirement, let alone all of the raspberries, mulberries, cherries, pears and apples that also grow on our property. I would rather sell the fruit (fresh or made into jam) and use that income to buy meat. If you can't find free fruit, only buy when prices drop below a certain price per pound- perhaps $0.50 per pound.

And don't be a sucker for the dried fruit in health stores. Dried fruit especially spikes blood sugar, and most of it has added sugar or sulpher in it for taste and shelf life. If you really want dried fruit, dry some from your garden. 

Less Spending = Better Health
The hardest thing here is letting go of the "poverty" mentality and the belief that you can never be healthy unless you have extra-virgin coconut oil every day, or use chia seeds on your organic oatmeal. Diet books and TV shows have duped us into thinking that we have to buy stuff in order to be healthy. When I go buy something from my favorite bulk food store, I literally feel healthy. I feel like I'm making a great investment in myself and my future progeny. Then the stuff gets hidden in the back of my cupboard and I never use it. But I still feel like I'm being healthy just for having it in my house. Isn't that crazy? Even if I never use the de-fatted peanut butter, xylitol, glucommanan powder, or almond flour, I've tricked myself into thinking it's an "investment", whereas a daily walk or bike ride can wait. Maybe I'll exercise after I'm done reading one more article about essential oils. Click, click, add to cart. $200 later.... time for a bike ride. Oh bummer, now it's raining. Time to read another article! It's too late to make a healthy dinner, so I might as well just have cookies.

Most people eat certain foods because they grew up eating that way, or because some health guru told them they would look like [insert celebrity here] if only they followed "the plan"- NOT because it is the least expensive, most healthy way to eat. It's important that you have some kind of meal plan, lest you end up eating $2 protein bars every afternoon because you don't want to cook anything for dinner. It doesn't have to be fancy. Take the protein bars off your grocery list and buy a dozen eggs instead. Boil them up at the start of the week. By default, you will end up eating the eggs instead of the protein bars. It will be better for you (no sugar, preservatives, or soybeans), and cheaper. Re-evaluate your eating habits and see if there are any other small changes to make. You could save hundreds of dollars (and maybe some teeth) per year by replacing a PB & J meal with a rice and beans meal. 

What are your tips & tricks to eating healthy without buying more stuff?

3 Comments

Kentucky Coffee Tree Beans

3/25/2015

3 Comments

 
Picture
I have never been great at identifying trees. However, last year I applied myself to study and added three or four new trees to my vocabulary. This one, the Kentucky Coffee Tree, was an easy identification.

Kentucky Coffee trees are relatively rare and grow in some of the mid-Eastern states of the US, including the lower half of Michigan. I have seen two so far- one on the side of the road and one used in town as an ornamental.

The bean pods of this tree are hard to mistake. Unlike the Honeylocust, Catalpa and other bean trees, the Kentucky Coffee Tree has short, stubby beans... not long dangling ones. In addition, this tree hardly has foliage for half the year. Its Latin name actually means "naked branch" because of this weird trait.
Picture
The pods have thick stems that hold them tight to the tree all winter. This makes them easy to identify in the spring!

After you've collected some pods, Break them open and collect the seeds. The inside has a sticky film, so the beans will probably need to be washed off. Afterward they can be slowly roasted (300 degrees for 3 hours) in the oven. This is important- you can't eat the un-roasted beans because they're poisonous! Some sources say the are poisonous in large quantities as well. But for our purposes we will not be consuming large quantities.

If you don't want to eat them, the beans make very nice beads! Polish, coat with a sealant and then drill a hole through the middle.

When the beans are roasted, it's time to grind! I don't have a real grinder, so I used my handy-dandy Vitamix dry container. 
Picture
The ground-up beans can be stored in an airtight container. Unscrew the lid for a wonderful aroma!!! If you pour boiling water over the grounds they produce a wonderful, albeit weak coffee-ish drink. I'm not a coffee drinker, but I did like this "coffee".

Happy grinding!
-Bethany
3 Comments

Making the Most of a Chicken

3/20/2015

0 Comments

 
Picture
Do you like eating chicken? Did you know that there are many ways to use a leftover whole chicken? Don't let any of it go to waste!

Often on the weekend I will cook a whole chicken in the crockpot. The chicken goes in, with a some onions, potatoes and carrots, along with some salt, poultry seasoning, and a quart or two of water. The chicken is cooked on high for a few hours until it is done. 

Before serving, I lift the chicken out of the crockpot and onto a plate. This makes it easier to cut and serve- no splashing fat and broth all over the place whilst trying to fish out a carrot or potato. Then I pour the broth into a jar, and keep it in the fridge until I make soup. There are no grisly bits of chicken in the broth, because we haven't cut into it yet.

When the meal is over and we've eaten our fill, I put plastic wrap over the plate of chicken carcass and stick it in the fridge if I don't have time to part it out right away. Otherwise, I do the following:

1. Pick off the meat for use in other meals. All cooked and ready to go!

2. Pick off the skin and fat to save for rendering fat. I use this free fat to grease my egg pan in the morning, instead of buying butter. You can save the fatty pieces in a bag in the freezer until you're ready to render. There will also be some fat that rises to the top of the above-mentioned broth. You can render this as well.

3. The rest of the bones and carcass, which usually includes the neck and wings, are thrown in a freezer bag. When I have enough bones saved up, I make bone broth in the pressure canner. For those who butcher their own chickens, you can also save and use chicken feet for making excellent bone broth.

Before I discovered this method, I dreaded parting out a chicken to salvage meat and bones. I'd spend an hour it seemed, fishing around in a greasy, oily crock pot trying to find some meat. It hardly seemed worth it! Now I find it quicker and easier to be thrifty with my chicken.

What do you do with your leftover chicken carcass?
0 Comments

How to Make Maple Syrup

3/11/2015

0 Comments

 
Picture
It's that time of year again! The days are getting warm, the nights are still cold and maple sap is running! This year I don't have any trees of my own to tap, but I've been fortunate to be able to do it in years past. You don't need a whole forest of black or sugar maples to get started. You can start with the one our two trees in your front yard.

Tapping is super easy. Here's what you'll need:

Taps- pretty cheap on Ebay, or they might be available used if you look around.
Line- I got some plastic tubing at the hardware store. The tubing should fit snugly over your taps.
Drill & bit to fit the taps- if you don't own one, contact your nearest handyman. ;)
Hammer- probably have one around the house.
Buckets- A clean 5-gallon bucket will do. I had to buy a lid from the hardware store, but to get started you probably don't need a lid. It just keeps the bugs and bark out.

The first time I decided to tap trees, the season was almost over and I didn't have time to make an elaborate set-up. For taps I cut up some pieces of old brake line, and hung some milk jugs off the taps. However, one of the three jugs kept falling off. I wouldn't recommend this setup, but it proves that you don't need a lot of fancy equipment.
Picture
My first attempt.
Instructions:

1. Drill a slightly upward-slanting hole 2" - 2.5" deep in each tree. Pick healthy trees that are at least 12" in diameter. For bigger trees, you can insert more taps; a 12-27" diameter tree can have two taps, and trees larger than 27" in diameter can have three taps.

2. Use the hammer to gently pound the taps into each hole.

3. Attach your line to each tap. Put the end of the line into your bucket. You only need one 5-gallon bucket for each tree. Therefore multiple taps can drain into one bucket.
Picture
The trickiest part of making maple syrup is boiling down the sap. The best idea is to find or make an outdoor burner so the steam can evaporate outside. Believe me, you don't want your kitchen ceiling dripping with condensation. When the syrup is concentrated a bit, you can bring it indoors to watch it more carefully.

There are many ways to make a maple sap boiler. My in-laws gutted out an old dryer and burned wood inside, while boiling the sap down in a canner on top of the dryer. They put it near the woodburner (and thus near the wood). Some people use propane, which is easy but not as cheap as free wood.
Picture
The dryer boiler.
When ready to boil, put a large/wide pot over your heat source and fill 3/4 of the way full. When it has boiled down to quarter- or half-full, add more sap. Try to keep it boiling even as you add more sap. When the sap has mostly boiled down and is a golden color but still liquid (not syrup-y), transfer to another smaller pan to finish off indoors.

In the kitchen, watch the sap closely. As it boils, it will take on a syrup consistency. The syrup will begin to "stick" to a spoon when it reaches this stage. Finish boiling when the temperature reaches 219 degrees F, or 7 degrees above boiling point.

And that's it! You can also filter the syrup through a coffee filter if you want. 

This is a great project to celebrate Spring with. Though it is time consuming, real maple syrup fetches a high price, so it might be worth it to make your own. As with any other hobby/project, the key to keeping it frugal is DON'T "invest" too much money too fast into supplies and a heat source. I would advise keeping it cheap the first season, at least, until you know that it is something you want to do every year.

Happy tapping! ...and pancake eating, and waffle eating, and french toast eating.... ;)

-Bethany
0 Comments

How to Make Vanilla Extract

3/6/2015

1 Comment

 
Picture
Here's an easy weekend project. Begin your career as maker of fine vanilla extract today!

Ingredients:
Bottle of bourbon or vodka
2 vanilla beans

Instructions: Cut the beans in half and drop into bottle of vodka/bourbon. Leave to set indefinitely.

As time passes the color of the bean soaks into the liquid, giving it a pretty golden brown color. The more surface area on your beans, the better. I scraped out my seeds for use in another project... perhaps ice cream or custard. I love custard. 

My cost for this extract was around $0.33 / oz. Compared to real (not imitation!) vanilla extract, it is a great deal. Plus I have heard that you can keep filling the bottle up without replacing the beans, which are the costly part of this project.

And when I open the bottle, it smells like vanilla ice cream!

Happy extracting! (vanilla, not teeth...)
-Bethany
1 Comment

How to Make Mozzarella

2/6/2015

0 Comments

 
Picture
Homemade mozzarella is a fantastic cheese for beginners. It only requires milk, salt, citric acid and rennet. No special starter cultures or bacteria or equipment required. I've been making mozzarella with my fresh, creamy goat milk and Hubs can't get enough.

Ingredients:
1 gal. milk
1 1/4 tsp. Citric Acid Powder
1/4 tsp. liquid rennet or 1/8 rennet tablet
1/2 cup cool water, divided in half

Instructions:
1. Dissolve the citric acid powder into 1/2 cup cool water.
2. Dissolve the rennet tablet/liquid in 1/4 cup cool water.
3. Pour milk into a big pot and add citric acid mixture.
4. Heat to 88 degrees F.
5. Add rennet, slowly stirring for 30 seconds. The milk will start to coagulate, or form curds.
6. Let it sit for 15 minutes to form a big massive curd. It helps to use a timer. When you dip your finger into the curds they will break cleanly over your finger. Whey will fill the depression where your finger has been.
7. Cut the curd into 1-inch cubes. This allows more whey to be released. Allow curds to rest for 10 minutes.
Picture
8. Drain off the excess whey by putting the curd in a cheesecloth-lined colander.
9. Place the post of curds into a sink of very hot tap water and slowly bring the temperature up to 108 degrees. Curds will shrink during this process. Drain curds in a colander for 15 minutes. 

The curds must now be worked and stretched in a brine solution (2-3 oz. salt + 1 quart water).

There are many methods and variations of stretching the curd. Some recipes call for using the whey (with added salt) as a brine. Some call for a water-and-salt brine, and some utilize the microwave. If you're in a time pinch, these methods will work. The basic idea is to heat the curd and stretch it until it is shiny.

10. Heat liquid to 150 degrees, more or less. Place curds into heated brine. Work quickly so the cheese doesn't melt into the brine. Using salad tongs, cooking utensils or rubber-gloved hands, bring the curds out of the brine, pulling and stretching like you would taffy until the cheese is shiny.
Picture
11. Put the stretched in a mold to harden. This can be a casserole dish, tupperware container or even a bowl, but remember the cheese will take on its shape. 

Refrigerate for up to 2 weeks. 

Happy curd-pulling!
-Bethany
Picture
Yum-ness!!!
0 Comments
<<Previous
Forward>>
    Picture

    Bethany

    Housewife, happy wife, and mama to one. :)

    Picture

    Picture
    The Housewife's Guide to Frugal Food
    How to Eat for $10.00
    ​per Week

    Picture
    The Housewife's Guide to Menu Planning
    A Weekly Menu to Save
    Time & Money
    Picture
    The Housewife's Guide to
    Frugal Fruits and Vegetables

    No Garden? No Problem!

    Watch Meals From the Bunker:

    Picture

    Check out my Youtube Channel!

    RSS Feed


    Picture
    Baby Girl's Birth Story
    Picture
    8 Cheap Ways to Eat Healthy
    Picture

    Categories

    All
    Animals
    Book Reviews
    Books
    Christmas
    Cleaning
    Clothing
    Cooking
    Couponing
    Education
    Ego
    Electricity
    Farmers Market
    Finance
    Foraging
    Frugal
    Frugal Accomplishments
    Frugality
    Garage Sales
    Gardening
    Gifts
    Grocery Budget
    Grocery Shopping
    Herbs
    History
    Hobby Farm
    Home Based Business
    Home-based Business
    Home Decorating
    Housekeeping
    Industry
    Languages
    Laundry
    Marriage
    Meal Planning
    Medicine
    Minimalist
    Network Marketing
    Organization
    Plants
    Product Reviews
    Quotes
    Recipes
    ROI
    Rv
    Sewing
    Simplicity
    Spanish
    Spending Report
    Travel

    Archives

    May 2021
    April 2021
    March 2021
    February 2021
    January 2021
    August 2020
    May 2020
    April 2020
    March 2020
    February 2020
    January 2020
    December 2019
    November 2019
    October 2019
    September 2019
    August 2019
    July 2019
    June 2019
    May 2019
    April 2019
    March 2019
    February 2019
    January 2019
    December 2018
    November 2018
    October 2018
    September 2018
    August 2018
    July 2018
    June 2018
    May 2018
    April 2018
    March 2018
    February 2018
    January 2018
    December 2017
    November 2017
    October 2017
    September 2017
    August 2017
    July 2017
    June 2017
    May 2017
    April 2017
    March 2017
    February 2017
    January 2017
    December 2016
    November 2016
    October 2016
    September 2016
    August 2016
    July 2016
    June 2016
    May 2016
    April 2016
    March 2016
    February 2016
    January 2016
    December 2015
    November 2015
    October 2015
    September 2015
    August 2015
    July 2015
    June 2015
    May 2015
    April 2015
    March 2015
    February 2015
    January 2015
    December 2014
    November 2014
    October 2014
    September 2014

    Full Disclosure & Disclaimer

    Picture
    Picture
    I get cash back for many online purchases including wedding gifts and Ebay stuff!

Powered by Create your own unique website with customizable templates.
Photos used under Creative Commons from dasWebweib, amanessinger, thewritingreader, diakosmein